A hand painted accent wall can instantly transform a room, adding personality and artistic flair that no wallpaper or store-bought decor can match. The appeal of hand painted walls lies in their unique, personalized touch—each stroke showcases craftsmanship and creativity, making your space truly one-of-a-kind.
In this article, you’ll explore a variety of inspiring ideas to create stunning accent walls with your own hands. From bold geometric patterns to delicate florals and abstract art, these ideas cater to every style and skill level, empowering you to elevate your home environment with a touch of your own artistry.
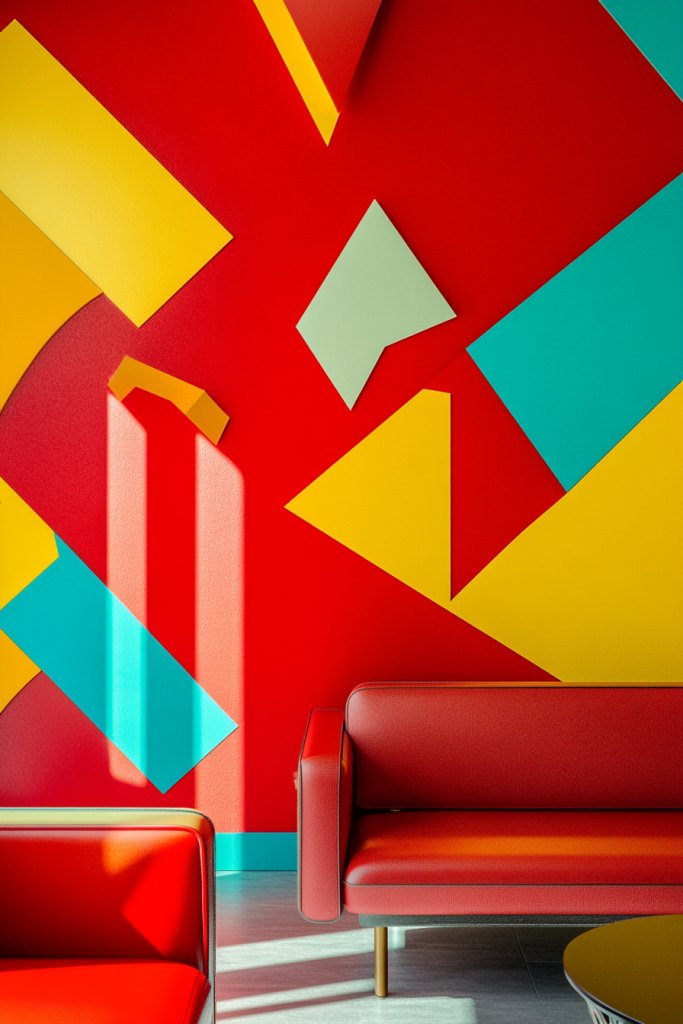
1. Bold Geometric Shapes in Bright Colors
Ever look at your plain walls and think they need a serious upgrade? Maybe you crave a bold statement that instantly energizes your space. Bright colors and sharp shapes can turn an ordinary wall into a captivating focal point. It’s perfect if you want your home to feel fresh, lively, and modern without remodeling.
Imagine a wall covered in geometric triangles, squares, and diamonds painted in vibrant shades like electric blue, fiery orange, and lime green. The clean lines catch your eye from across the room, creating a sense of movement and dynamism. The textures are smooth, with crisp edges that pop against neutral backgrounds. When light hits these shapes, they seem to leap off the wall, making your space feel energetic and fun.
You can opt for large, oversized shapes for a bold look or tiny, intricate patterns for a subtle effect. Seasonal changes might include swapping bright colors for softer pastels during spring or deeper jewel tones in fall. This idea works equally well in small accent walls or entire feature walls in open-concept spaces. For a more subdued vibe, stick to monochrome patterns with bold outlines.
Begin with painter’s tape to outline your shapes, then choose vibrant, high-quality paints for sharp coverage. Use a level and a ruler to ensure symmetry and straight lines. For crisp edges, a steady hand or painter’s shield helps prevent bleeding. You might want to sketch your design lightly with pencil first. Multiple coats may be necessary for vivid colors, and sealing with a clear topcoat helps preserve sharpness. If you’re nervous about freehand painting, stencil kits are a great alternative.
Add metallic accents or glitter to some shapes for a touch of glamour. Incorporate your favorite colors or match the palette to your furniture for a harmonious look. For an even more personalized touch, combine geometric shapes with layered textures like textured wallpaper or fabric panels. You could also add small LED strips behind shapes for subtle backlighting at night. The key is to keep the design aligned with your personality and style.
Bold geometric shapes are a surefire way to make your walls stand out and inject energy into your home. They’re versatile enough to fit any decor style, from ultra-modern to eclectic. Plus, tackling a geometric paint project is easier than it looks and offers a satisfying sense of accomplishment. Ready to turn your walls into a masterpiece? Go ahead—your bold, colorful space awaits.
2. Subtle Ombre Gradient Effect

Tired of walls that feel flat and uninspired? Maybe you want a subtle way to add depth and sophistication without overwhelming the room. An ombre gradient provides a soft transition of colors that can make your space feel more expansive and elegant. It’s perfect if you prefer understated beauty with a touch of artistic flair.
Picture a wall where the paint gradually shifts from a light pastel at the ceiling to a deeper hue at the base. The gentle blending creates a calming visual flow that invites the eye to move effortlessly across the surface. The colors meld seamlessly, resembling a watercolor painting or a sunset sky. The effect is soothing, almost like a natural gradient found in nature, adding a tranquil vibe to any room.
Choose a monochromatic palette for a subtle, chic look or blend complementary shades for a more dynamic effect. During different seasons, swap out soft pastels for richer jewel tones or warm earth colors. This technique works well in bedrooms, living rooms, or even bathrooms, especially when paired with minimalist furniture. You can also experiment with horizontal or vertical gradients for varied visual impact.
Start by selecting two or three shades that blend well together. Use painter’s tape to mark off sections or freehand for a more organic look. Mix paints with a blending medium for smoother transitions, or use a sponge or soft brush to feather the edges. Apply the lightest color first, then layer darker shades, blending as you go. Keep your tools clean and damp to achieve a seamless gradient. For best results, work in sections and step back frequently to assess the flow.
Incorporate metallic or shimmer paints selectively to add a touch of sparkle. Layer textured elements like faux plaster or stucco for added dimension. Pair the ombre wall with neutral furnishings and soft textiles to enhance the gentle gradient. Seasonal accents, like cozy throws or vibrant cushions, can complement the color shift and keep your decor feeling fresh.
Subtle ombre effects bring a refined, artistic touch to any space, elevating your decor effortlessly. They work especially well in creating a relaxing environment or making a small room feel larger. Plus, mastering the blending technique boosts your painting confidence. Ready to add a sophisticated splash of color that’s both trendy and timeless? Your tranquil wall awaits.
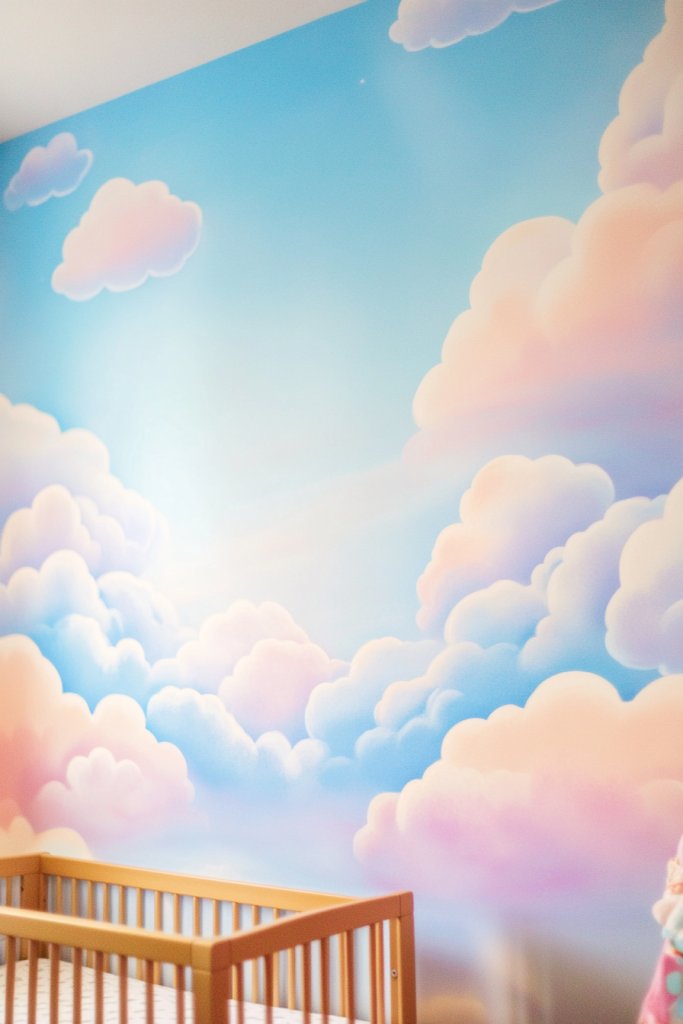
3. Whimsical Cloud and Sky Mural
Ever wanted to bring a little magic into your home? Maybe your kid’s room or your own sanctuary needs a dreamy, playful touch. A cloud and sky mural transforms a plain wall into a whimsical scene that sparks imagination and calm. It’s a perfect way to make any space feel light, airy, and full of wonder.
Imagine fluffy white clouds drifting across a soft blue sky, with subtle hints of pink or orange at the horizon during sunset. The scene feels endless and free, evoking a peaceful outdoor landscape. The clouds are textured with gentle shading, giving them volume and softness. The background can be a gradient or a solid color to enhance the dreamy effect, making your wall look like a piece of the sky itself.
For children’s rooms, add playful elements like rainbows, stars, or even cartoonish animals. In adult spaces, keep the sky serene with minimal clouds and a muted palette, or add a sunset glow for a romantic vibe. During different seasons, incorporate seasonal colors or weather elements, like thunderstorms or sunrise scenes. You can also extend the sky onto ceiling or adjacent walls for a wraparound effect.
Start by sketching your cloud shapes lightly with pencil or chalk. Use a soft sponge or dry brush to apply base colors, blending edges for a soft look. Layer shading and highlights to add depth and fluffiness to clouds. For the sky, use gradient blending techniques with sponges or airbrush tools for smooth transitions. Consider stenciling or freehand painting for clouds and sun elements, and seal with a matte finish for a soft, natural look. Acrylic paints are ideal for durability and ease of blending.
Add glow-in-the-dark paint to stars or moon elements for nighttime magic. Incorporate metallic or iridescent paints to mimic shimmering light. Personalize your mural with favorite colors or include a quote or phrase in elegant script. Embellish with textured elements like faux feathers or glitter for extra whimsy. This mural becomes a personalized, calming retreat that reflects your imagination.
A cloud and sky mural instantly transforms any room into a dreamy escape. It’s a creative project that unleashes your artistic side, even if you’re a beginner. Plus, it creates a soothing atmosphere that helps you or your kids unwind. Ready to turn your wall into a piece of open sky? Dream big—you’ve got this!
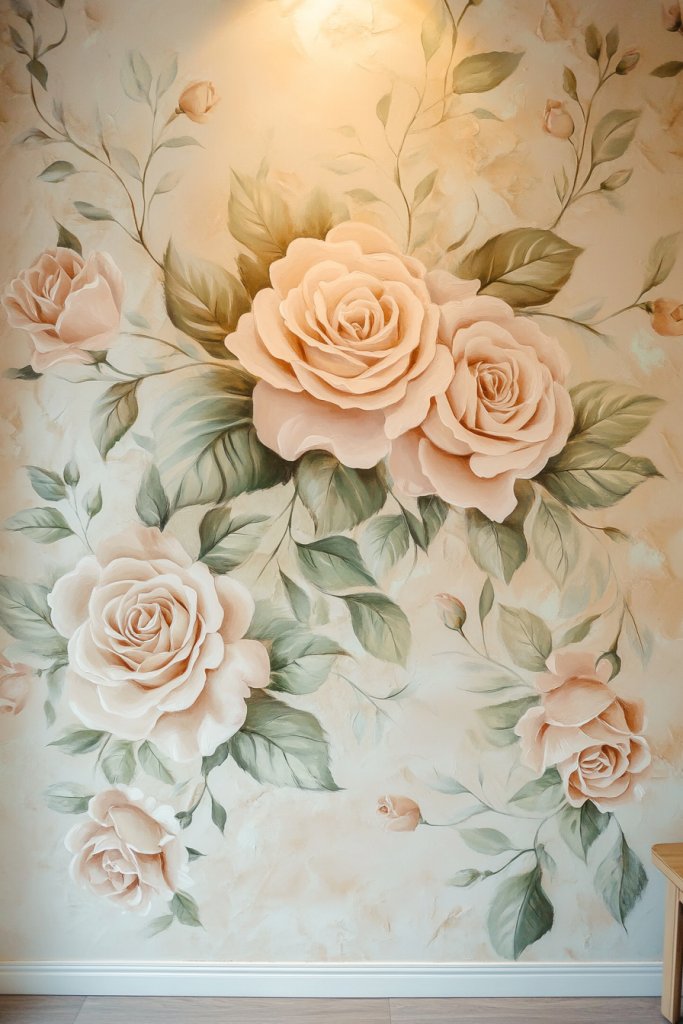
4. Intricate Floral Designs with Freehand Painting
Feeling like your walls lack personality and elegance? Maybe you want a decor element that’s timeless yet personal. Floral designs can add a touch of femininity, grace, and natural beauty to any space. Freehand painting allows for a unique, artistic flourish that no stencil or print can match. It’s a way to showcase your creativity and bring life to dull walls.
Visualize a wall adorned with delicate roses, peonies, or wildflowers, painted in soft pastels or bold hues. The flowers bloom across the surface, with petals curling and leaves swirling in intricate detail. Light shading and fine lines create depth, making the flowers feel almost three-dimensional. The overall effect is a lush garden that invites you to admire its beauty and craftsmanship. The textured strokes evoke a sense of movement and vitality.
Opt for large, statement blooms or tiny, intricate floral clusters for a more subtle look. Seasonal variations could involve changing color palettes—bright and cheerful for summer, warm and muted for fall. For minimalist interiors, focus on single large blooms or delicate line art. In boho or eclectic spaces, combine flowers with abstract elements or geometric patterns for contrast. You can extend the floral motif onto furniture or textiles for cohesive styling.
Begin by sketching your floral designs lightly with pencil or chalk. Use fine brushes and high-quality acrylic or oil paints to achieve detailed petals and leaves. Layer colors gradually, starting with background greens and base flower colors, then add shading and highlights for realism. Practice on paper first to perfect your strokes. Take your time to build up intricate details, and don’t be afraid to make mistakes—painting over them is part of the process. Seal with a matte or satin varnish for longevity.
Incorporate your favorite flowers or colors to customize the design. Add metallic or iridescent accents to pollen or petal edges for shimmer. Combine floral motifs with other decorative elements like vines or butterflies for a garden-inspired theme. Personal touches like initials or a special date can be painted into the design. These details make your wall a meaningful work of art that reflects your personality.
Hand-painted floral murals exude elegance and craftsmanship, instantly elevating your decor. They’re a wonderful way to practice freehand skills and develop your artistic confidence. Plus, they create a calming environment that celebrates natural beauty. Ready to turn your wall into a blooming masterpiece? Grab your brushes and let your imagination blossom!
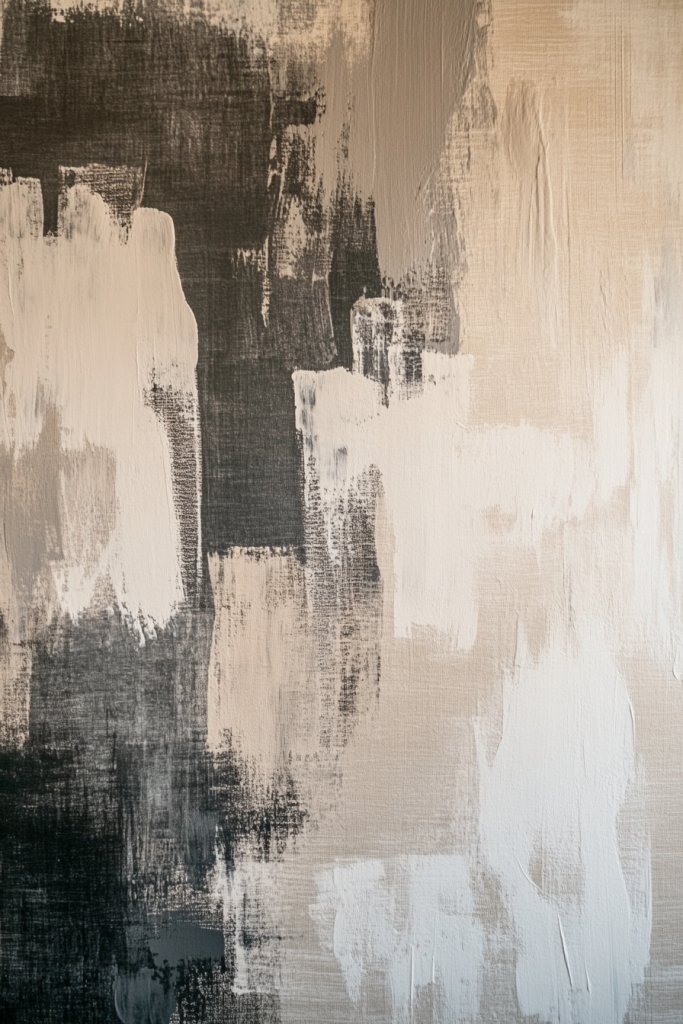
5. Abstract Brushstroke Art in Neutral Tones
Is your space feeling a bit too sterile or dull? Maybe you want an artistic centerpiece that adds depth without shouting for attention. Abstract brushstroke art in neutral tones offers a sophisticated way to introduce texture and visual interest. It’s perfect if you prefer a minimalist aesthetic but still crave that artistic touch that makes a statement.
Envision a wall covered in sweeping, layered strokes of beige, taupe, and soft gray. The broad, expressive brushstrokes appear almost like an artist’s spontaneous creation, full of movement and emotion. The overlapping layers add depth, while the muted palette ensures the wall remains calming and versatile. The textured surface invites touch and adds a tactile dimension to your decor.
You can opt for bold, large strokes for a dramatic effect or subtle, thin lines for a more understated look. During different seasons, adjust the palette to include warmer browns and creams or cooler grays and silvers. This style pairs well with modern, industrial, and contemporary interiors. For a more dynamic look, add gold or metallic accents sparingly within the strokes.
Start by selecting a neutral color palette that complements your room’s decor. Use large, flat brushes or palette knives to apply broad strokes across the wall. Layer different shades and textures for added complexity. Practice your strokes on paper or canvas beforehand to get a feel for the movement. To create variation, tilt your brushes at different angles or use different tools like sponges or scrapers. Finish with a matte or satin clear coat to protect and unify the surface.
Introduce subtle metallic or pearl accents into some strokes for a touch of elegance. Combine the artwork with textured textiles like wool or boucle for contrast. Personalize by incorporating your favorite abstract shapes or symbols subtly into the design. Keep the overall look balanced and harmonious, allowing your personality to shine through in the details.
Abstract brushstroke art is a chic way to add personality without overwhelming the space. It’s forgiving for beginners and encourages experimentation with textures and techniques. The neutral tones make it easy to incorporate into any decor style. Ready to create a sophisticated, artistic wall that feels both modern and timeless? Grab your brushes and start moving!
6. Striped Pattern with Contrasting Colors
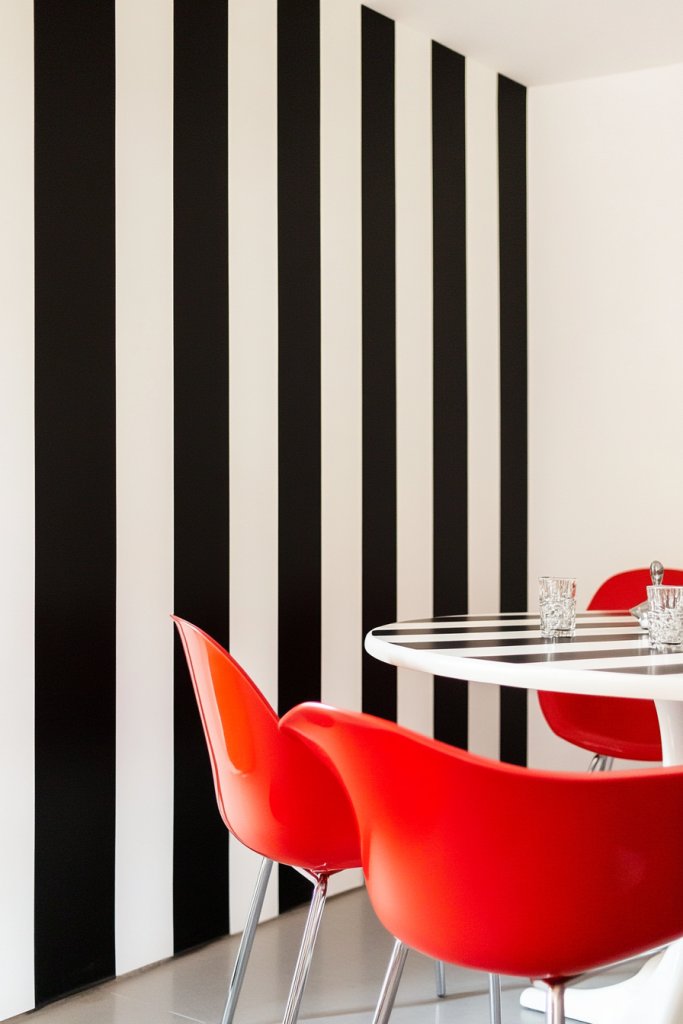
Does your room feel visually flat and in need of some zing? Maybe you want a simple yet impactful way to add dimension. Stripes in contrasting colors create an instant visual punch that can make any wall pop. It’s a classic pattern with a modern twist, perfect for adding depth and energy without overwhelming your space.
Imagine bold, wide stripes alternating in black and white or vibrant reds and blues. The clean, sharp lines stretch from ceiling to floor, creating a rhythmic flow that guides your eyes through the room. The contrast makes the pattern stand out, adding a graphic punch that energizes the space. The stripes can be even or varied in width, depending on your style preference. The overall effect is striking and contemporary.
Choose narrow pinstripes for a subtle, sophisticated look, or go wide for maximum impact. During different seasons, swap out bold colors for softer pastels or earthy tones. For a more playful vibe, create irregular or wavy stripes instead of straight lines. This pattern works well in bedrooms, living rooms, or even kitchens, especially when combined with minimalist furniture. You can also experiment with vertical or diagonal stripes for different perspectives.
Use painter’s tape to mark your stripes carefully, measuring and marking with a level for straight lines. Apply high-quality, matte or semi-gloss paint for sharp, clean edges. For crispness, paint in thin layers, letting each dry thoroughly before removing tape. Use a small brush for touch-ups along tape edges. For wider stripes, a roller provides even coverage, while a fine brush is better for detailed lines. Seal with a clear coat for durability.
Introduce metallic or neon accents within some stripes for added flair. Pair with patterned textiles or contrasting furniture for a cohesive look. Personalize by including a central motif or a bold accent stripe that acts as a visual anchor. Customize color combinations to match your mood or seasonal decor. This pattern allows for endless variations tailored to your taste.
Striped walls are a timeless way to make your space feel modern yet classic. They’re easy to execute and instantly transform a room’s character. Plus, mastering clean lines boosts your confidence in painting and decorating. Ready to add a bold, graphic element? Stripes might just be your new best friend.
7. Rustic Faux Wood Paneling
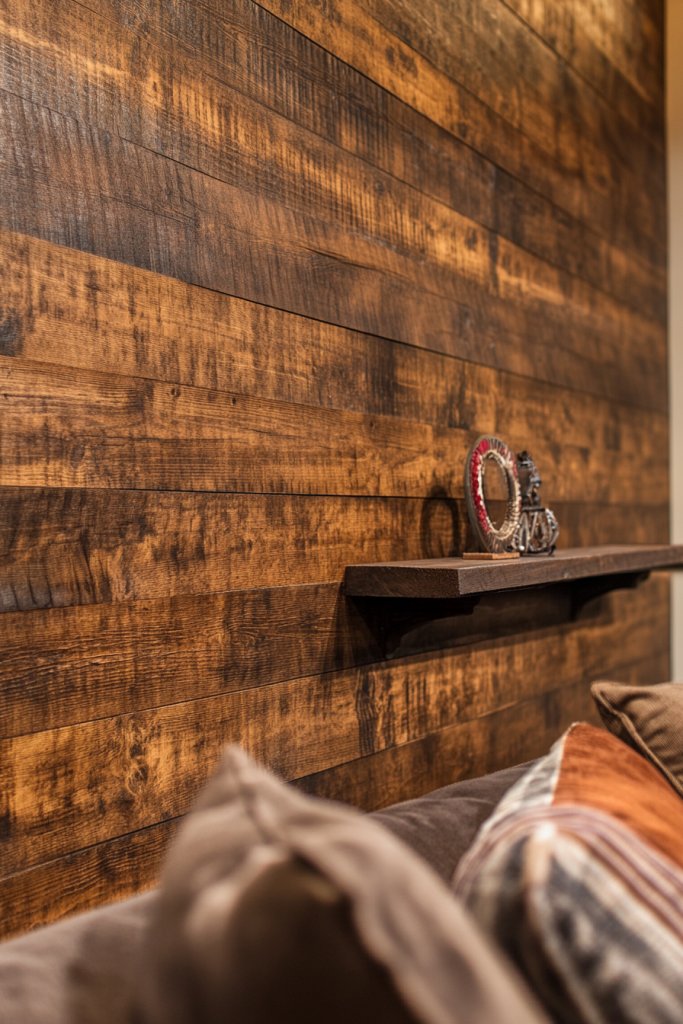
Looking to add warmth and texture to your walls without the hassle of real wood? Faux wood paneling gives you the rustic charm of reclaimed timber with a fraction of the effort. It’s perfect for creating cozy, inviting spaces that feel both vintage and modern. Plus, it’s a great way to cover up imperfections or outdated wall surfaces.
Picture a wall lined with textured planks that mimic weathered barn wood or aged shiplap. The surface has a tactile, rough-hewn appearance, with knots and grain details that add authenticity. The warm, earthy tones create a sense of comfort and nostalgia. When lit softly, the textured surface casts subtle shadows, emphasizing the rustic charm. It transforms your space into a countryside retreat or farmhouse-inspired haven.
Choose lighter or darker wood tones depending on your room’s aesthetic—bright whites for a shabby chic look or deep browns for a more traditional feel. Combine with modern minimalist furniture for contrast, or keep the rustic theme consistent with vintage decor. Seasonal tweaks include adding cozy textiles or metallic accents for a touch of glam. Apply panels vertically or horizontally, or mix orientations for visual interest.
Start by measuring your wall and selecting faux wood panels made from PVC, MDF, or real reclaimed wood. Mark your layout and plan your installation, whether adhesive or interlocking panels. Clean the wall thoroughly before applying adhesive or nails. Use a level to ensure straight lines and a saw to cut panels to size. Finish with a clear sealant or paint wash for added protection or color variation. This DIY project is straightforward and rewarding.
Add decorative metal accents or vintage hardware to enhance the rustic feel. Incorporate wall-mounted shelves or hooks for functional decor. Personalize by staining or painting the panels in different shades or distressing them further. Complement the look with cozy textiles like plaid blankets or vintage rugs. This textured wall provides a warm backdrop for your everyday life.
Faux wood paneling offers a quick transformation that’s both stylish and functional. It’s a DIY-friendly project that can dramatically change your space’s vibe. Plus, it adds a layer of texture that elevates your decor to a new level. Ready to bring rustic charm into your home without a sawmill? Go for it—you’ve got this!
8. Modern Scandinavian-inspired Lines and Shapes
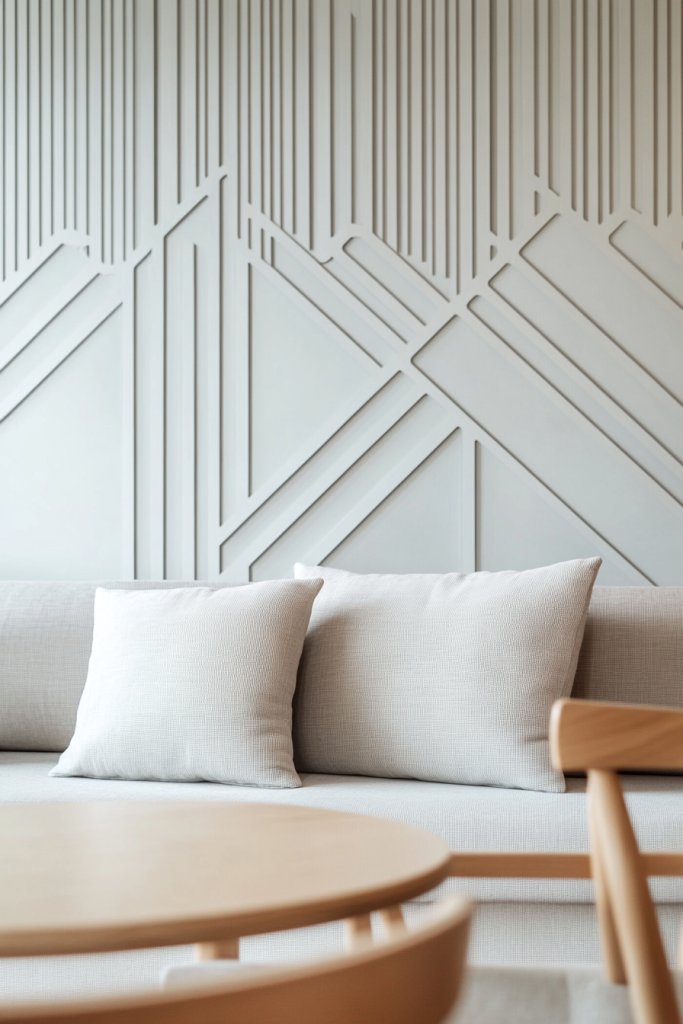
Craving a sleek, minimalist look that’s both stylish and calming? Scandinavian design emphasizes clean lines, functional beauty, and simplicity. Incorporating subtle shapes and linear patterns on your walls can create a serene atmosphere that’s perfect for modern living. It’s an effortless way to refresh your space without clutter or fuss.
Visualize a wall painted in soft, neutral tones with delicate, linear shapes—thin stripes, arcs, or geometric cutouts—painted in muted shades like charcoal or pastel hues. The lines are crisp, with precise edges that bring order and harmony to the room. The shapes are often asymmetrical, adding visual interest without overwhelming the senses. Light plays softly on the smooth surface, highlighting the simplicity and elegance.
Stick to monochrome or dual-tone palettes for a classic Scandinavian feel, or introduce pastel accents for a more playful mood. This concept suits small apartments or large open spaces alike. During different seasons, add textured textiles and layered throws to keep the space cozy. You can also extend the linear patterns onto furniture or ceilings for a more cohesive look.
Use painter’s tape and stencils for precise shapes, or freehand for a more organic feel. Pick a neutral paint base, then add shapes with a contrasting color, keeping lines thin and sharp. A steady hand and a level are your best friends here. For textured elements, consider matte or satin finishes to enhance visual depth. Practice on paper first to perfect your lines. Seal with a protective coat for longevity.
Incorporate subtle metallic elements or textured paints for added sophistication. Use minimalist wall-mounted shelves or sleek hooks that complement the shapes. Personalize by adding your favorite abstract motifs or subtle symbols within the patterns. Keep the overall design harmonious and balanced, reflecting your personal taste and style.
Scandinavian-inspired lines create a peaceful, uncluttered vibe that can make your home feel more spacious and organized. They’re simple to execute and can be adapted to any room size or shape. Mastering clean lines and shapes boosts your confidence in wall art. Ready to embrace sleek, modern minimalism? Your serene space awaits.
9. Bohemian Mandala and Pattern Art
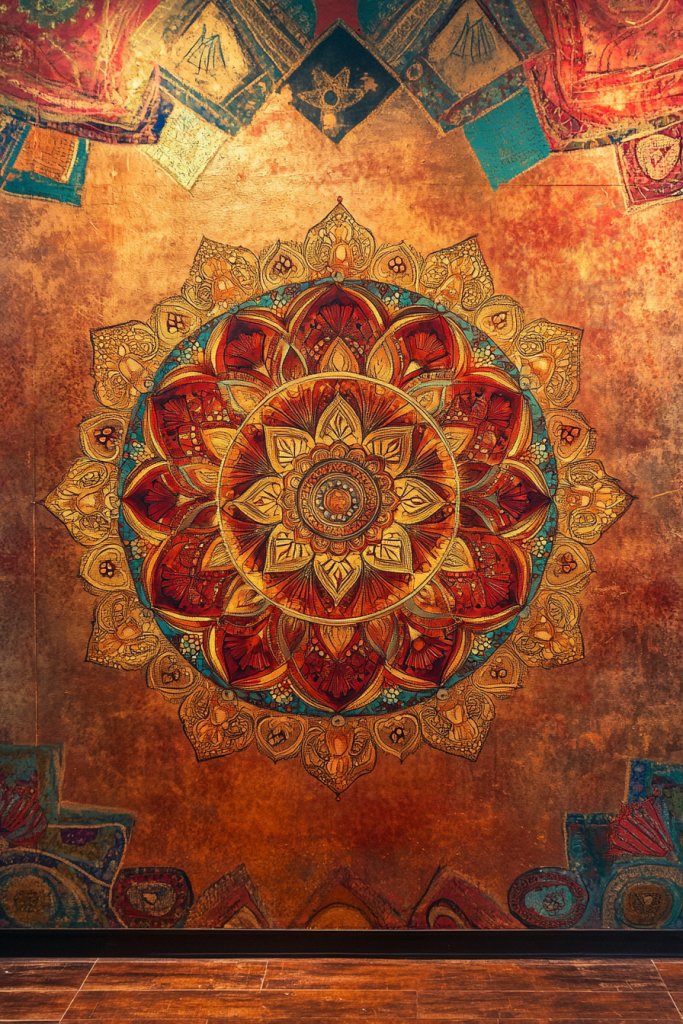
Looking to add a touch of free-spirited artistry to your home? Maybe you want a wall that feels personal, vibrant, and calming all at once. Mandalas and eclectic patterns evoke a bohemian vibe that’s both relaxing and visually captivating. It’s a perfect project for those who love a bit of freehand creativity and cultural flair.
Imagine a large, intricate mandala painted in earthy tones—terracotta, deep reds, and golds—centered on your wall. The symmetrical design radiates outward with detailed patterns, swirls, and geometric shapes. Surrounding it, smaller motifs like feathers, paisleys, or abstract swirls enhance the boho aesthetic. The layered patterns create depth and movement, drawing your eyes into a peaceful, artistic world.
Opt for bold, large mandalas for a statement piece or smaller, repeated patterns for a subtle effect. Use bright, vibrant colors for a lively look or earthy neutrals for a more subdued, cozy vibe. During different seasons, incorporate metallic accents or textured paints to add richness. This style pairs beautifully with layered textiles, woven baskets, and vintage furniture for a full boho vibe.
Start with a detailed sketch or use stencils to outline your mandala or pattern. Use fine brushes and high-quality acrylic paints for precision. Layer your colors gradually, starting with the background and building up details. Practice the symmetrical design on paper first to avoid mistakes. For added depth, consider using metallic or shimmer paints for highlights. Seal with a matte or satin finish for durability.
Add personal touches like initials, meaningful symbols, or favorite colors into the designs. Incorporate textured elements like metallic leaf or glitter for extra sparkle. Combine with eclectic furnishings and textiles to enhance the boho aesthetic. Personalize the pattern size and complexity based on your skill level for a truly one-of-a-kind wall.
Mandala art is both meditative and decorative, perfect for creating a calming focal point. It encourages artistic exploration and confidence in freehand design. Plus, it instantly adds personality and warmth to any room. Ready to channel your inner bohemian artist? Your vibrant wall awaits.
10. Tropical Leaf and Jungle Motifs
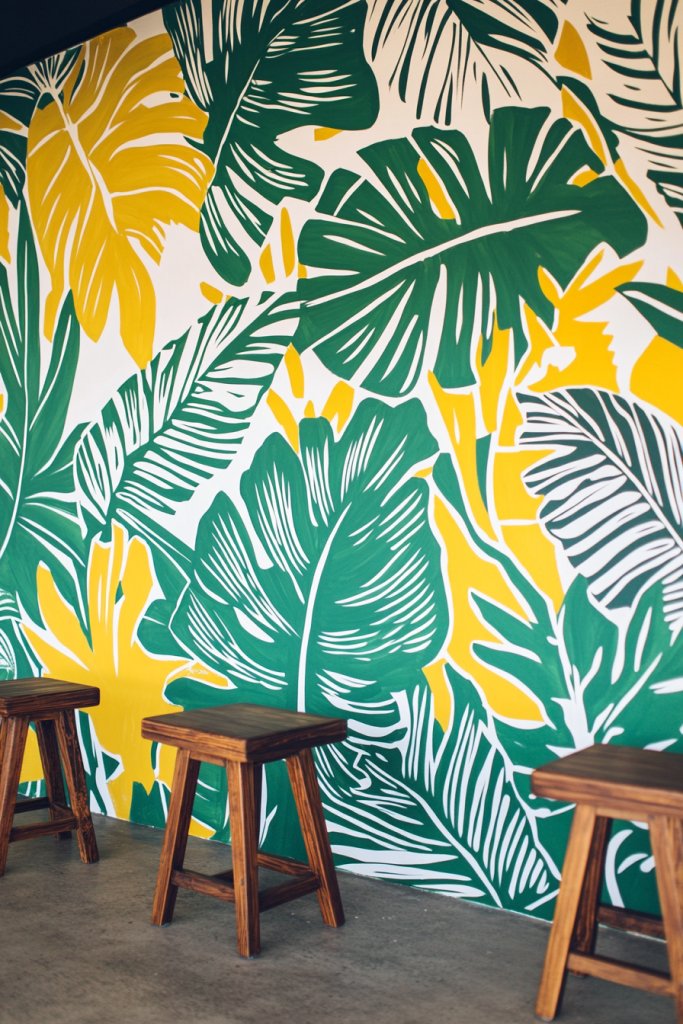
Craving a lush, vibrant vibe that transports you to a tropical paradise? Maybe your space needs a burst of greenery and exotic charm without actual plants. Hand-painted jungle motifs and large tropical leaves can create a bold, immersive atmosphere. It’s an easy way to add life and color, making your home feel like a vacation destination.
Picture a wall filled with oversized monstera, palm, and banana leaves painted in rich greens and vibrant accents. The leaves overlap and swirl in a natural, flowing pattern, creating depth and movement. The textured brushstrokes mimic the natural veins and edges of real foliage, adding realism and vibrancy. The background can be a subtle gradient or a contrasting color to make the foliage pop. The overall effect is energetic, lively, and inviting.
Use a monochromatic green palette for a calming jungle feel or incorporate bright pops of pink, yellow, or turquoise for a festival of color. During different seasons, you can adjust the intensity of the colors or add metallic highlights for a glossy, high-end look. Pair this motif with rattan furniture, woven textiles, or tropical-inspired decor for a cohesive theme. Extend the foliage onto ceiling or adjacent walls for an immersive experience.
Begin with a rough sketch of your leaves, referencing photos for accuracy. Use large brushes and layered acrylic or latex paints to capture the lush textures. Focus on shading and highlights to give the leaves a sense of depth and dimension. Mix your greens with different shades to add variety. For a more dynamic look, incorporate some darker tones for shadows and lighter ones for highlights. Finish with a protective sealer to preserve the vibrancy.
Add metallic or iridescent paints to mimic sunlight glinting on leaves. Incorporate small details like birds, insects, or floral accents for extra personality. Use textured brushes or sponges for a more natural, organic feel. Personalize by including favorite tropical animals or symbols meaningful to you. This mural becomes a lively, tropical retreat that energizes your space.
Tropical leaf murals evoke vacation vibes and bring a fresh, lively energy. They’re a creative way to explore bold painting techniques and textures. Plus, they transform your home into a personal paradise. Ready to create your own jungle oasis? Grab your brushes and dive in!
11. Nautical Stripes and Anchors in Navy and White
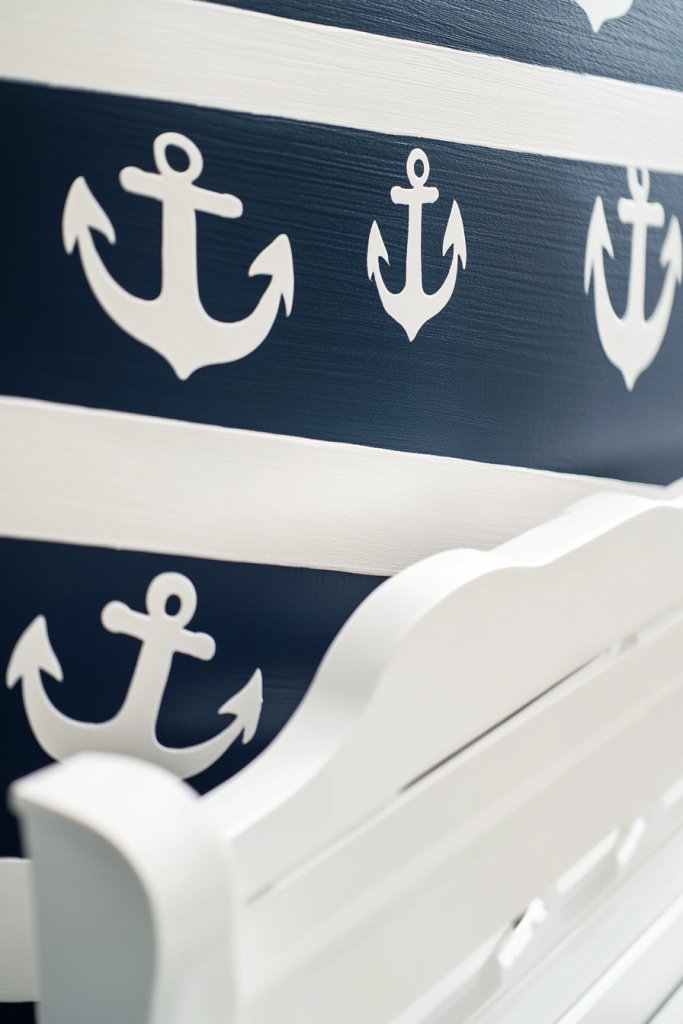
Want to give your home a crisp, coastal charm? Nautical themes are timeless, and stripes combined with maritime symbols instantly evoke a seaside vibe. Whether you live near the water or just wish you did, this look adds freshness and a sense of adventure. It’s a simple way to make your space feel breezy, light, and inviting.
Visualize a wall painted with navy blue and white stripes, evenly spaced and perfectly aligned. Small painted anchors, ships, or lighthouses add playful accents, enhancing the maritime feel. The stripes create a rhythmic pattern that guides your eyes across the space, giving it structure and energy. The contrast between navy and white keeps the look clean and classic, reminiscent of a sailor’s uniform or boat sails. When complemented with weathered wood or rope accents, the theme becomes complete.
Opt for wide or narrow stripes depending on your style preference. During summer, brighten the palette with aqua, coral, or sandy beige. For a more vintage nautical vibe, incorporate weathered effects or distressed finishes. This pattern adapts well to bedrooms, bathrooms, or even outdoor patios. Extend the nautical theme onto furniture or textiles for a cohesive look.
Use painter’s tape and a level to ensure straight, even stripes. Start with a neutral base, then carefully tape off your stripe sections. Use high-quality, durable paint in navy and white, applying multiple coats for opacity. For crisp lines, remove the tape while paint is still slightly tacky. Add small details like painted ropes or ships with fine brushes for extra charm. Seal with a protective coating suitable for the room’s use.
Incorporate personal touches like your favorite coastal quotes or symbols. Use textured or weathered finishes to mimic driftwood or barnacles. Add nautical-inspired decor such as rope shelves or lanterns to complement the wall. Customize the anchor or ship designs with initials or meaningful dates. This creates a fun, personalized maritime retreat.
Nautical stripes and symbols evoke a carefree, beachy vibe that transforms any space. They’re easy to execute and always stylish, making your home feel like a seaside escape. Plus, mastering clean lines and consistent patterns boosts your painting confidence. Ready to set sail on your decorating adventure? The coast is calling!
12. Artistic Dotted Pointillism Technique
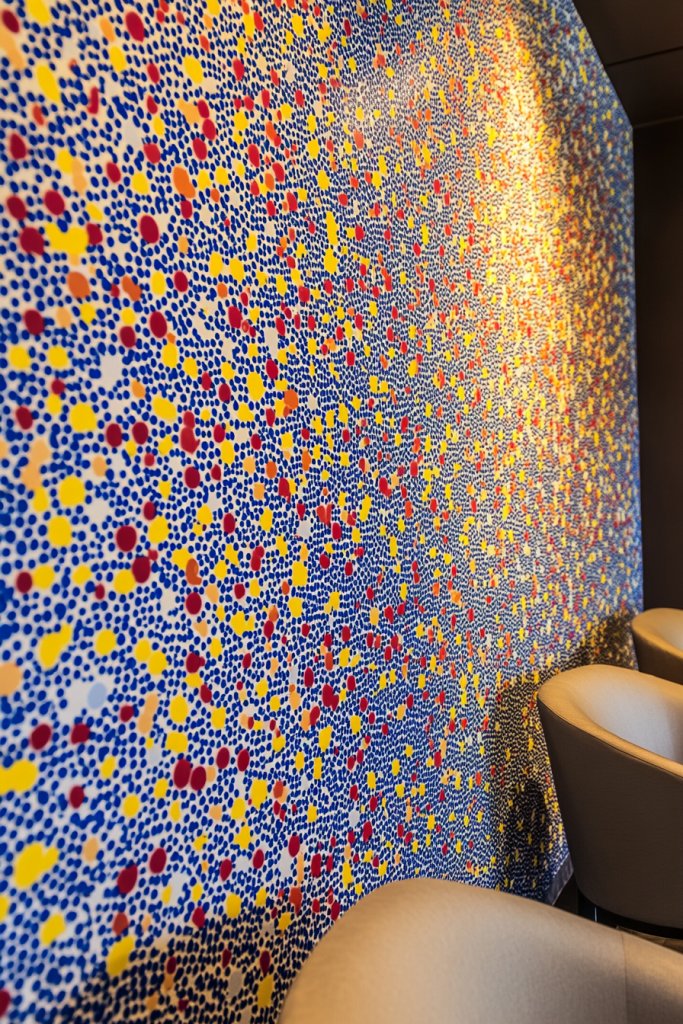
Looking for a way to add texture and color without overwhelming your space? Maybe you want something artistic that’s both subtle and intriguing. The dotted pointillism technique creates mesmerizing patterns with tiny, deliberate dots that form images or abstract designs. It’s a creative method that invites close inspection and appreciation. Plus, it’s surprisingly easy to learn!
Envision a wall filled with countless small dots in various colors, blending together from a distance to create a vibrant mosaic. The technique produces a textured, almost tactile surface that catches light differently depending on the angle. From afar, the dots form a cohesive image or pattern, but up close, you see the intricate detail and patience involved. This textured mosaic feels alive, constantly changing with your perspective.
Use a limited color palette for a more refined look or a wide spectrum for maximum vibrancy. Abstract compositions work well, or you can create stylized landscapes or portraits. During different seasons, incorporate metallic or pearlescent dots for shimmer. This technique pairs beautifully with minimalist furnishings or eclectic, artsy decor. You can also extend the dot pattern onto furniture or textiles for harmony.
Start by sketching your design lightly, then load a small brush or a toothpick with paint. Carefully place dots, varying the density and spacing for desired effects. Work in layers, letting each layer dry before adding more dots. Use contrasting colors for depth and vibrancy. Practice on paper or canvas first to develop a steady hand and understanding of dot placement. Seal with a matte varnish for protection.
Add metallic or iridescent dots to mimic shimmer or light reflections. Incorporate personal symbols or favorite motifs within your design. Combine with textured or patterned textiles to amplify the artistic vibe. Personal touches like initials or meaningful shapes make your wall uniquely yours. This technique offers endless possibilities for creative expression.
Pointillism transforms simple dots into a captivating work of art. It’s accessible for beginners and encourages patience and precision. The textured surface adds depth and interest, elevating your decor. Ready to create a mesmerizing, artistic wall? Your dotted masterpiece awaits.
13. Vintage-inspired Chalkboard Wall with Painted Designs
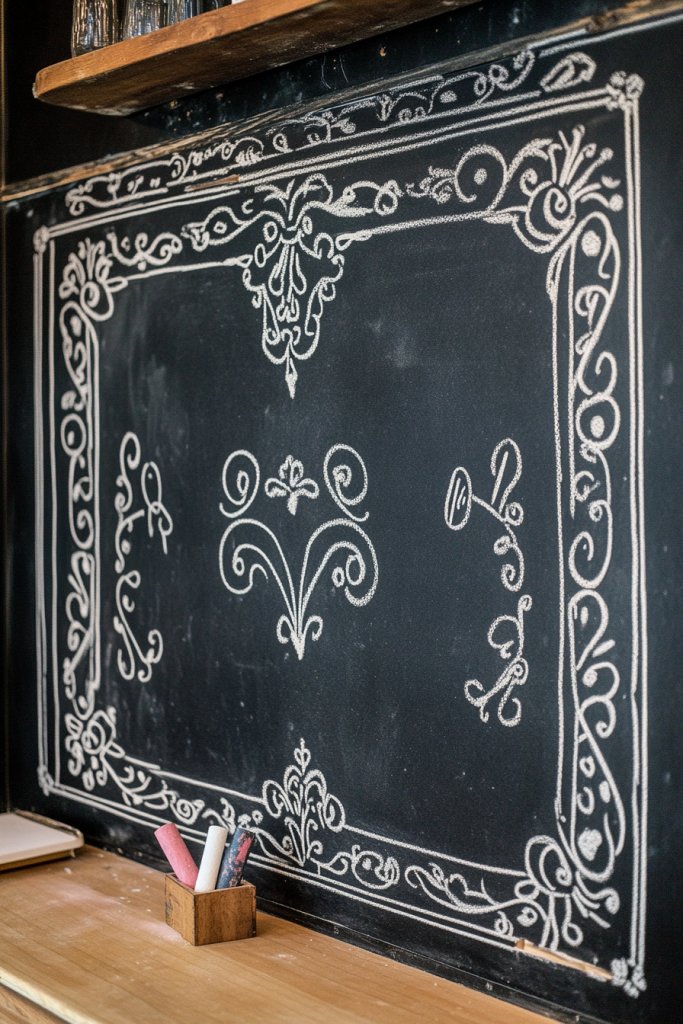
Ever wish your walls could be both functional and stylish? A chalkboard wall combines practicality with creative freedom, perfect for notes, doodles, or seasonal messages. Vintage-inspired designs make it charming and nostalgic, adding personality to kitchens, offices, or kids’ rooms. It’s a versatile idea that invites interaction while looking adorable.
Picture a matte black wall filled with handwritten quotes, doodles, or menu plans in white chalk. Decorative borders, floral accents, or vintage scrolls are painted directly with chalk-style paint or hand-drawn for authenticity. The surface feels smooth yet inviting, encouraging spontaneous creativity. When not in use, the designs add a charming, old-world vibe that complements shabby chic or rustic decor.
Switch between playful doodles for kids’ rooms and elegant scrolls or floral motifs for kitchens or cafes. During different seasons, change the messages or designs—pumpkins and leaves for fall, snowflakes for winter. You can add decorative frames or borders painted in metallic or pastel shades to enhance the vintage feel. Extend the chalkboard onto a small section of furniture or a countertop for extra fun.
Apply a high-quality chalkboard or matte black paint directly onto your wall after cleaning and priming the surface. Use painter’s tape to create borders or sections. Once dry, draw your designs with chalk or chalk-style paint, then go over with fine brushes for detail. For a vintage look, add decorative motifs with a stencil or freehand. Keep chalk or chalk markers handy for updates and personal touches.
Frame your chalkboard with decorative trim or paint a border in metallic or pastel shades. Personalize messages with your handwriting style or add small decorative elements like vintage keys or floral accents. Switch out seasonal designs regularly to keep the wall fresh and engaging. Incorporate small shelves or hooks nearby for functional accessories or seasonal decor.
A chalkboard wall is a creative, interactive feature that invites personalization. It encourages artistic expression and makes everyday routines more fun. Plus, it’s a project that can be as simple or intricate as you like, boosting your confidence in DIY decor. Ready to turn a blank wall into a canvas of your imagination? Start sketching your ideas today!
14. Whimsical Fairy Tale Castles and Stars
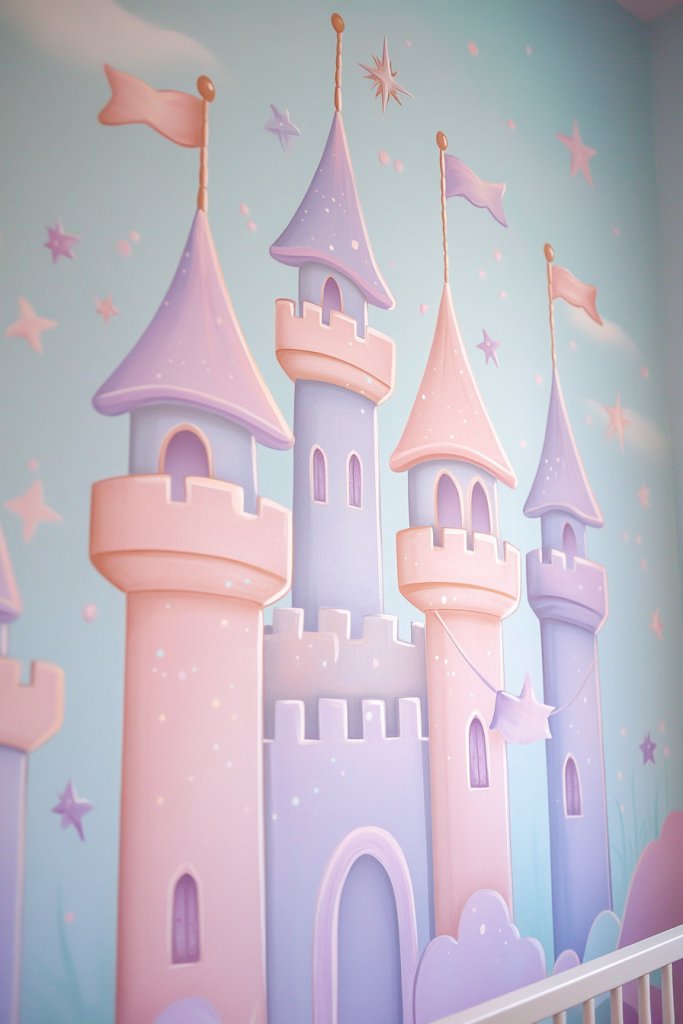
Want to create a magical space for your little dreamer? A fairy tale castle and star mural transforms a plain wall into an enchanting scene straight out of a storybook. It’s perfect for nurseries or kids’ rooms, sparking imagination and wonder. Plus, it adds a whimsical charm that makes bedtime and playtime extra special.
Imagine delicate castles with turrets, flowing banners, and tiny windows painted in soft pastel shades. Surrounding them are twinkling stars, moons, and clouds, all shimmering with metallic or glitter accents. The scene feels dreamy and fantastical, inviting children into a world of their own. The background can be a gentle gradient or solid color, enhancing the magical atmosphere. When lit with soft LED lights, it feels even more enchanting.
Use bright, vibrant colors for a lively fairy tale or pastel tones for a more gentle, dreamy effect. Incorporate elements like flying dragons, fairy wings, or enchanted forests for extra detail. During different seasons, add thematic touches like snowflakes or blooming flowers. Extend the scene onto ceiling or adjacent walls to create a wraparound storybook world. Personalize by adding your child’s name or favorite characters for a special touch.
Sketch your castle and star designs lightly with pencil or chalk. Use fine brushes and metallic or shimmer paints for details and highlights. Layer colors gradually for depth and dimension. For castles, focus on shading to create a 3D effect; for stars, add glitter or metallic paint for shimmer. Practice on paper if needed. Seal with a clear varnish to protect your artwork and keep it looking magical over time.
Incorporate glow-in-the-dark paints for stars or moons that shine at night. Add personalized elements like your child’s initials or favorite motifs. Use textured paints or glitter to make certain features stand out. Pair the mural with fairy tale-themed textiles or accessories to complete the fantasy environment. Regular updates with new characters or scenes can keep the magic alive.
A fairy tale mural sparks imagination and creates a cozy, magical retreat. It’s a rewarding project that encourages artistic exploration, even for beginners. Plus, it adds a whimsical touch that makes your child’s space truly unique. Ready to turn your wall into a storybook adventure? Your magical journey starts now!
15. Colorful Rainbow Stripes or Arc Patterns
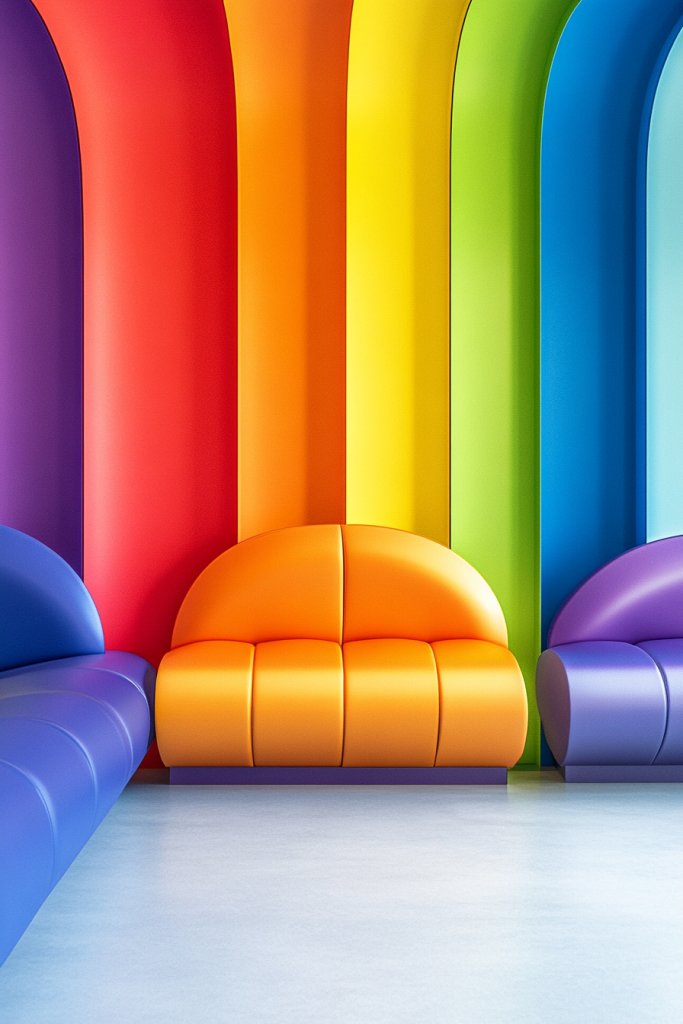
Feeling like your space needs a splash of happiness? Maybe you want a vibrant, cheerful feature wall that instantly uplifts the mood. Rainbow stripes or arcs are a playful, colorful way to brighten any room. They’re perfect for nurseries, playrooms, or even a lively accent in a living area. Who doesn’t love a burst of color to make everything feel more joyful?
Picture a wall painted with bold, layered rainbow arches spanning from corner to corner. The colors are bright and saturated—red, orange, yellow, green, blue, indigo, and violet—blending seamlessly in a joyful cascade. The arcs create a sense of movement and fun, energizing the space. Light reflects off the glossy finish, making the colors pop even more. It’s like capturing a rainbow’s magic in your own home.
Use softer pastel shades for a more subdued, calming effect or go full vibrancy for maximum impact. During different seasons, change the color palette—warm tones for fall or cool shades for winter. You can also experiment with irregular arc shapes or layer multiple patterns for a more dynamic look. Pair with colorful textiles, cushions, or playful decor to enhance the cheerful vibe.
Start by sketching the arcs with a pencil or use a flexible stencil. Use painter’s tape to define each color band sharply. Apply high-quality, glossy or semi-gloss paints in layers, allowing each to dry thoroughly. For clean edges, remove the tape while the paint is still slightly tacky. Use a large brush or roller for even coverage, and consider a clear protective topcoat to preserve the brightness. Be patient and precise for best results.
Add metallic or iridescent paints to some arcs for extra sparkle. Incorporate personalized motifs, such as initials or favorite symbols, within or around the rainbow. Use textured or patterned textiles to complement the vibrant colors. Seasonal decorations or themed accessories can be swapped in to keep the space lively and fresh. This wall is a celebration of joy and color.
Bright rainbow walls instantly lift spirits and create a playful, energetic environment. They’re a fun project that’s easy to customize and adapt over time. Plus, mastering the layering and masking techniques boosts your confidence in wall art. Ready to bring a rainbow of happiness into your home? Let the colors flow!
16. Modern Minimalist Line Art Scenes
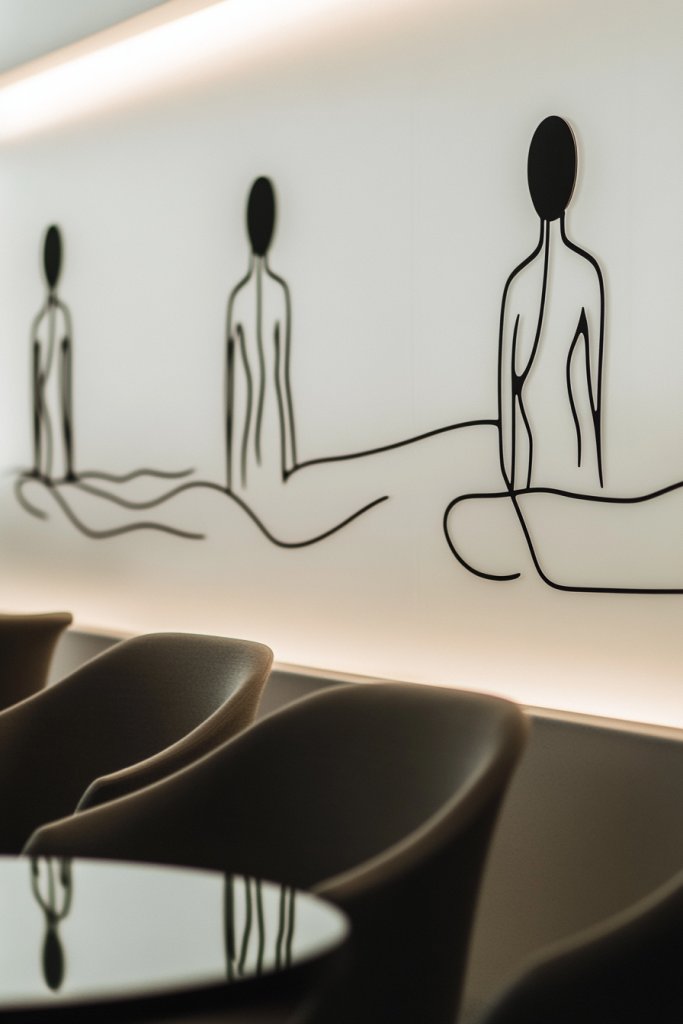
Craving sleek, contemporary decor that’s both artistic and unobtrusive? Minimalist line art offers a stylish way to add visual interest without clutter. Simple black or metallic lines depict abstract scenes, figures, or landscapes that evoke emotion and sophistication. It’s perfect for modern homes that value clean design and subtle elegance.
Visualize a wall with continuous, flowing black lines forming an abstract face, a mountain range, or a cityscape. The lines are smooth, unbroken, and deliberate, creating a sense of movement and harmony. Negative space plays a crucial role, making the artwork feel open and balanced. When illuminated with soft lighting, the lines cast gentle shadows, enhancing the minimalist aesthetic. It’s a subtle statement that sparks curiosity.
Opt for monochrome or metallic tones—gold, silver, or copper—for a luxurious touch. During different seasons, pair the art with textured textiles or sleek furniture to maintain the modern vibe. You can extend the line art onto furniture or accessories for a cohesive look. For a more playful approach, incorporate colorful accents within the lines or background elements.
Use painter’s tape and stencils or freehand the designs for organic lines. High-quality matte or metallic paints work best for clean, sharp edges. Practice your sketches on paper or a canvas first to perfect your technique. Start from the center or focal point, then extend lines outward for balance. For more complex scenes, break the design into sections and assemble in layers. Seal with a clear protective coating for longevity.
Add a touch of metallic or glow-in-the-dark paint to certain lines for a subtle shimmer or night-time glow. Incorporate personal symbols or motifs that hold meaning for you. Keep the overall composition minimal to maintain sophistication, but feel free to add small bursts of color for contrast. Pair with minimalist furniture and decor for a seamless look.
Line art is a modern, timeless form of expression that elevates any space. It’s accessible for beginners and encourages creative exploration with simple tools. The sleek lines create a calming, organized environment that’s easy to update or expand over time. Ready to transform your wall into a work of art with just a few strokes? Embrace the simplicity!
17. Artistic Swirls and Curves in Metallic Hues
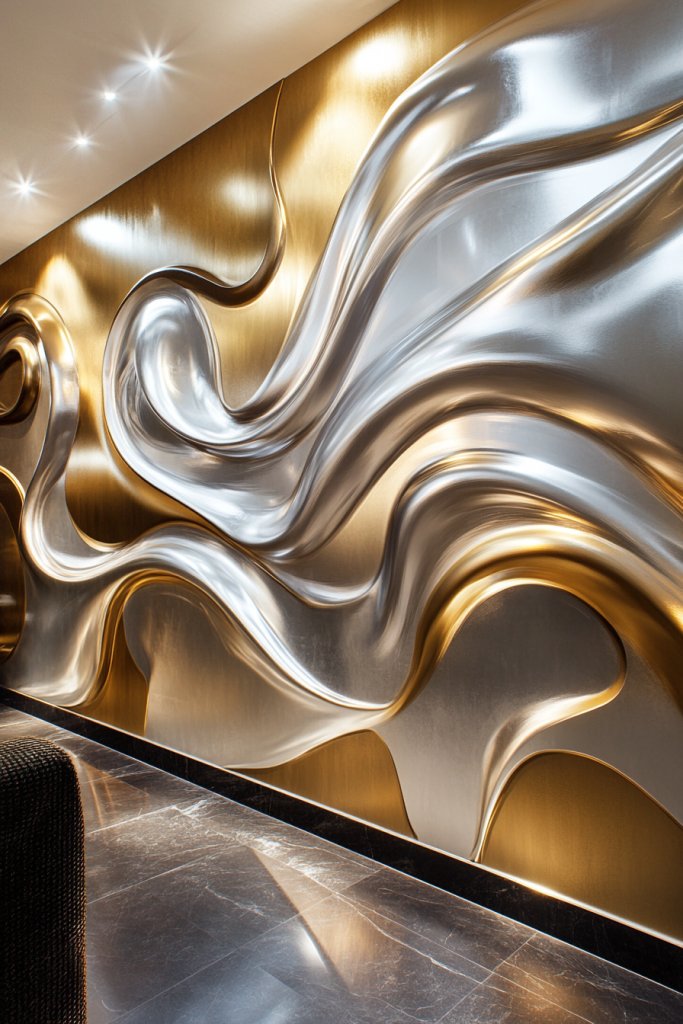
Looking to add a touch of luxury and movement to your walls? Swirls and curves in metallic hues bring a dynamic, elegant vibe that catches light and creates visual interest. Perfect for accent walls in living rooms, bedrooms, or entryways, this style oozes sophistication and artistic flair. It’s a simple way to make your space feel more opulent and lively.
Imagine flowing, sweeping lines in gold, silver, or bronze that dance across your wall in organic, rhythmic patterns. The curves intertwine and extend, forming abstract shapes or delicate scrolls that evoke a sense of motion. The metallic finish reflects light from different angles, adding shimmer and depth. The overall effect is both energetic and refined, transforming your wall into a piece of moving art.
Use a monochrome metallic palette for a sleek, cohesive look or combine different metallic shades for contrast. During different seasons, pair with warm or cool tones in your decor—rich jewel tones or neutral shades. You can also incorporate subtle textures within the swirls using raised paints or metallic leaf for extra dimension. Extend the design onto ceilings or furniture for a unified aesthetic.
Sketch your swirl and curve designs lightly with pencil or chalk. Use metallic or shimmer paints and a steady hand with fine brushes for precision. Layer the paint gradually for a polished look, building up highlights and shadows for depth. Practice on paper before committing to the wall. For larger, more complex patterns, consider using stencils or templates. Finish with a clear topcoat to prevent tarnishing and enhance shine.
Incorporate personalized motifs or initials within the swirls for a bespoke touch. Use metallic accents to highlight specific areas or create focal points. Pair with plush textiles or textured wall coverings to complement the metallic sheen. Add small decorative elements like faux gemstones or beads within the design for added luxury. The result is a stunning, elegant statement wall.
Swirls and curves in metallic hues elevate your decor and introduce movement and shine. They’re easy to execute with patience and practice, turning your wall into a captivating centerpiece. Plus, mastering metallic finishes boosts your confidence in more advanced painting techniques. Ready to add a luxurious, artistic touch? Your metallic masterpiece awaits.
18. Hand-Painted Tile-Inspired Patterns
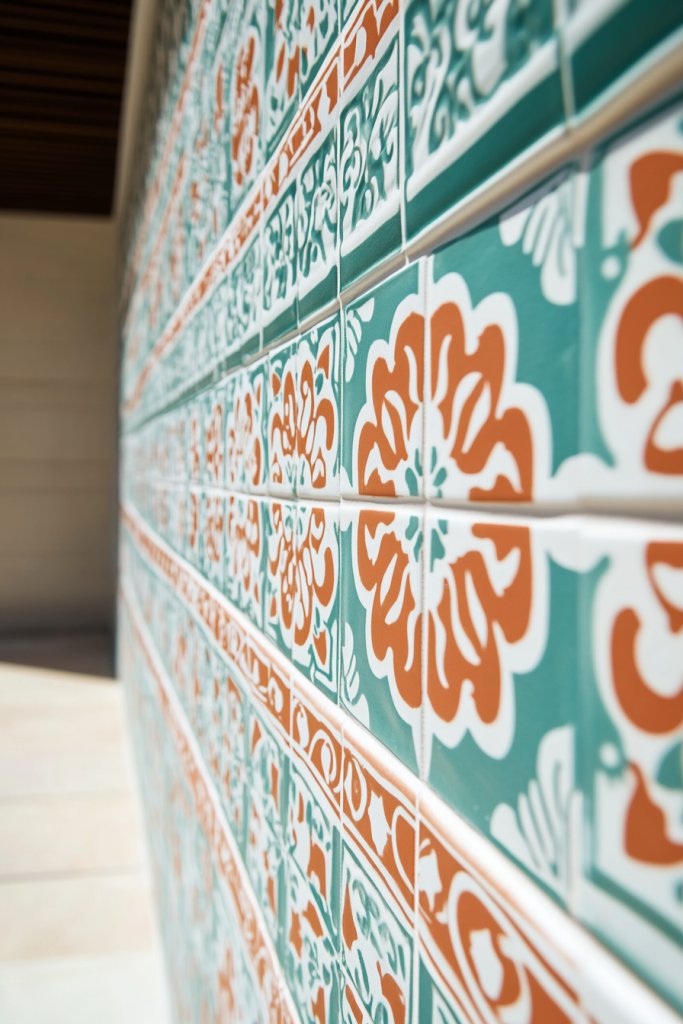
Want a beautiful, timeless look without the cost or difficulty of installing actual tiles? Hand-painted patterns inspired by classic Mediterranean or Moroccan tiles offer an artistic solution. They add intricate detail, color, and character, transforming your wall into a decorative focal point. It’s a creative DIY project that combines craftsmanship with personality.
Visualize a wall covered in repeating, symmetrical motifs—geometric shapes, floral patterns, or intricate borders—in vibrant blues, whites, and earthy tones. The hand-painted tiles appear seamless, with detailed lines and shading that mimic real ceramic tiles. The textured surface adds depth, making the design feel authentic and lively. When illuminated, the detailed patterns glow with a rich, handcrafted charm.
Choose traditional motifs for a classic look or create modern, abstract interpretations for a contemporary vibe. During different seasons, adjust the color palette—bright and lively for summer, muted and warm for fall. Incorporate borders or medallions for variety, or extend the pattern onto floors or furniture for a cohesive design. Keep the background neutral to make the patterns pop.
Sketch your tile patterns with light pencil marks, referencing traditional tile designs for accuracy. Use a variety of brushes for fine lines and details, and high-quality, vivid paints for bold colors. Mask off sections carefully to maintain symmetry. Layer colors gradually, allowing drying time between coats. For authenticity, add shading and highlights to mimic glazed ceramic effects. Seal with a clear, durable varnish.
Personalize your tiles with initials, symbols, or unique motifs. Incorporate metallic or glitter accents for a decorative touch. Use contrasting colors for borders or central medallions to add focus. Combine with Moroccan or Mediterranean textiles and accessories for a complete look. Updating the pattern seasonally keeps your decor fresh and inspiring.
Tile-inspired murals showcase craftsmanship and attention to detail, adding elegance and charm. They’re a rewarding project that enhances your artistic skills and confidence. Plus, they create a timeless, decorative feature that elevates your entire space. Ready to craft your own tile masterpiece? Grab your brushes and start designing!
Conclusion
The hand painted accent wall ideas shared here demonstrate how you can infuse your home with creativity and originality. Whether you prefer bold designs or subtle details, these projects are perfect for adding character and charm to any room. Don’t hesitate to pick up your paintbrush and bring your vision to life—your beautifully personalized space awaits!
Leave a Reply