Ever wondered if you can save time and effort on your DIY projects? Home Depot’s wood cutting service has become a game-changer for many handy homeowners and crafters alike. It’s no surprise that this convenient service is so popular—who wouldn’t want professional precision without the hassle?
In this article, you’ll discover a variety of creative ideas and practical tips on how to make the most of Home Depot’s wood cutting service. From simple shelving to intricate furniture projects, these ideas will inspire you to tackle your next home improvement adventure with confidence and convenience.
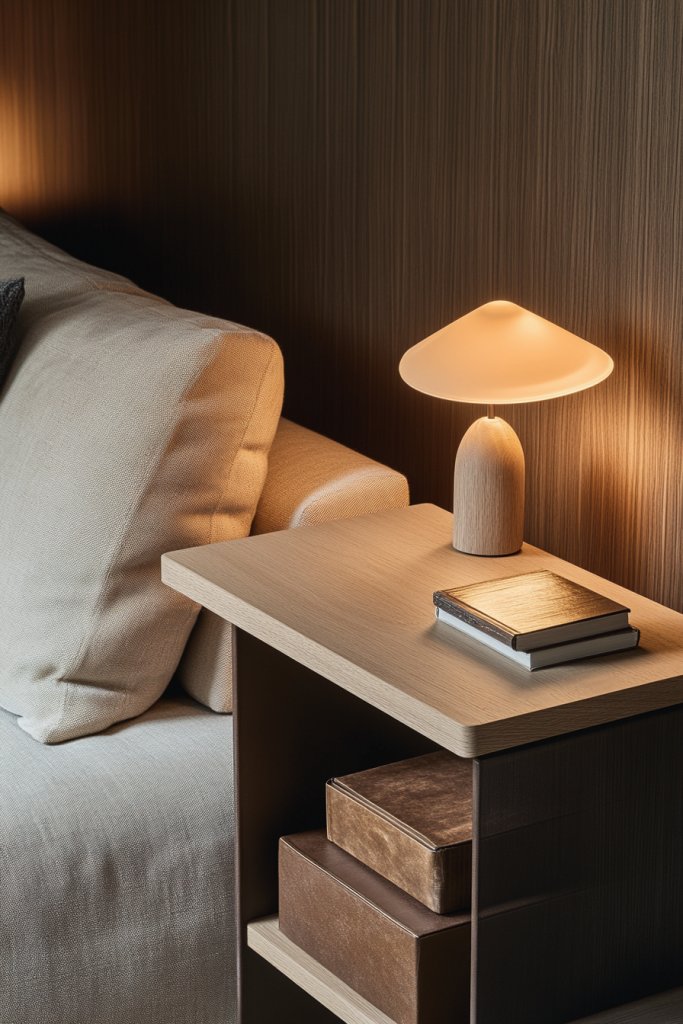
1. Custom Floating Nightstands for Modern Bedrooms
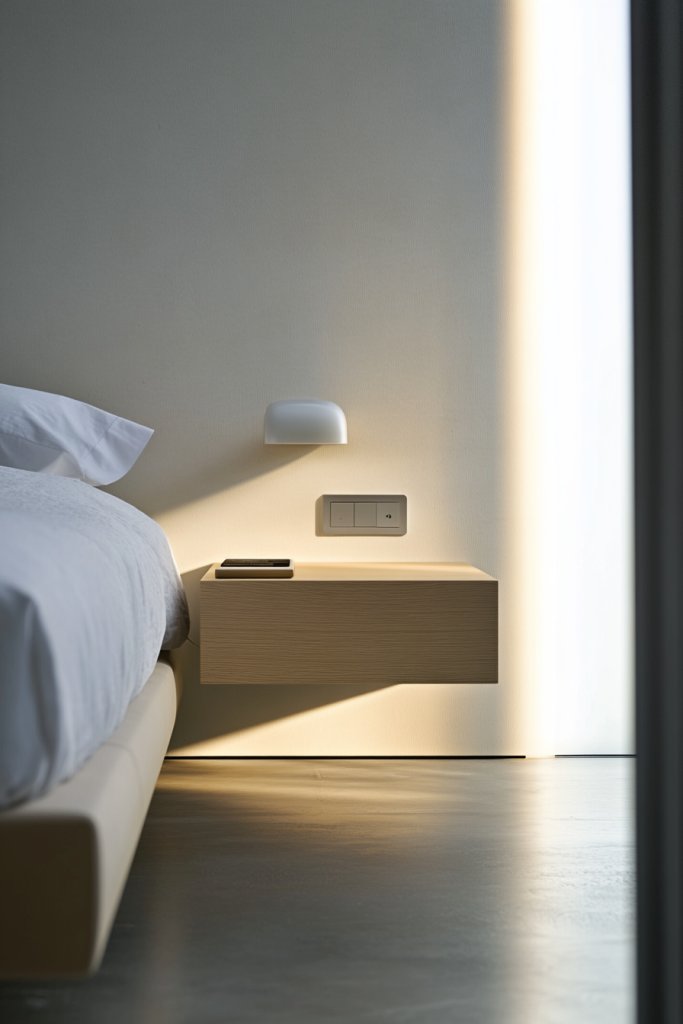
Ever tried squeezing a cluttered bedside table into your sleek modern bedroom? It’s like trying to fit a square peg in a round hole—frustrating and unappealing. You want a clean, minimalist look without sacrificing storage or convenience. The idea of floating nightstands with clean lines and smart design seems like a dream come true for anyone craving simplicity.
Imagine a wall with two slim, floating wooden panels, each perfectly aligned with your mattress. The smooth, matte finish of the wood complements your bedding, creating a seamless, modern aesthetic. Small LED strip lights subtly illuminate the space beneath, highlighting the floating effect. A soft glow from the sconces on either side adds ambiance, while a minimalist clock and a favorite book sit neatly on the surface, free of clutter. It’s a calming, organized space that feels both functional and stylish.
You can customize these nightstands to match any decor style—go rustic with reclaimed wood, or ultra-modern with sleek laminate finishes. For smaller rooms, opt for narrow, wall-mounted designs that don’t encroach on walking space. During different seasons, swap out the hardware or add decorative textiles like a cozy throw or textured cushions nearby. If you prefer a more dramatic look, paint the wood in bold colors or use contrasting finishes to make the floating units pop.
Start by measuring the space beside your bed to determine the ideal size. Choose durable, lightweight plywood or hardwood depending on your budget, and cut to your desired dimensions—usually about 12-18 inches wide and 4-6 inches deep. Attach sturdy mounting brackets to your wall, ensuring they can support the weight of your chosen wood and any items you’ll place on top. Sand and seal the wood for a smooth finish, then mount the panels securely. Finish with optional decorative elements like edge banding or paint, and add soft lighting if desired.
Personalize your floating nightstands by adding engraved initials or decorative accents like small sculptural pieces. Incorporate different textures—think a glossy lacquer top or a natural, matte finish—to suit your vibe. You might also add small magnetic or adhesive storage pouches for essentials like chargers or glasses, keeping everything tidy. Layering textiles like a plush rug or a textured throw nearby enhances the overall cozy, modern feel. The key is making the space uniquely yours.
Creating custom floating nightstands elevates your bedroom’s style and declutters your space effortlessly. It’s a project that’s both functional and deeply satisfying—plus, it’s budget-friendly! Once installed, you’ll wonder how you ever managed without them. Ready to turn your bedroom into a sleek retreat? Just grab some wood, a few tools, and get floating!
2. Rustic Wooden Wall Shelves for Cozy Living Rooms
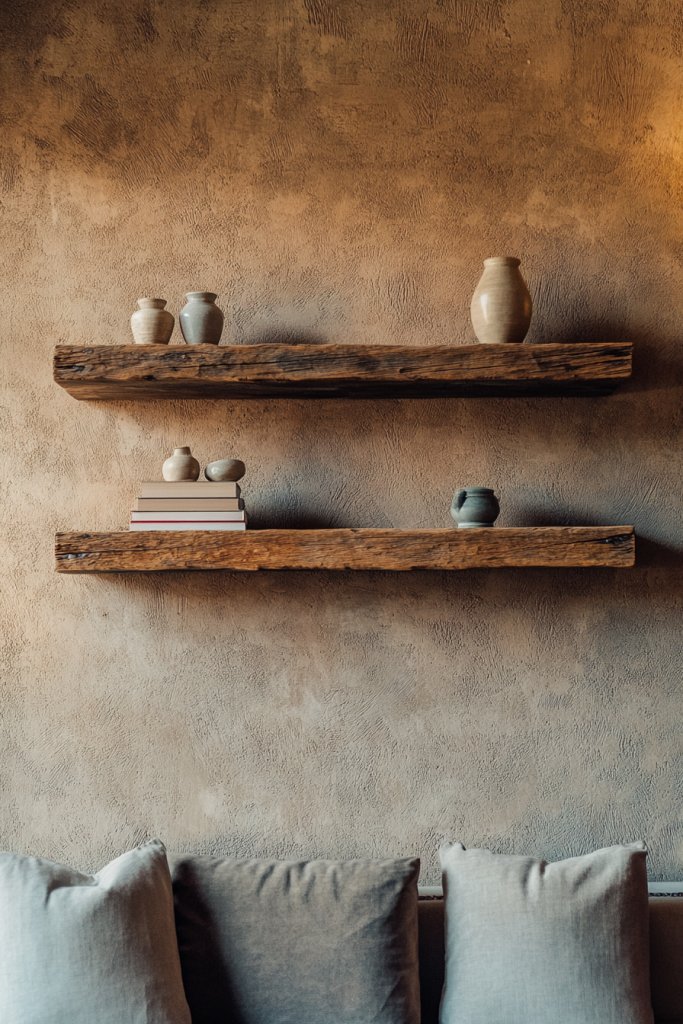
Tired of cluttered surfaces and boring walls? You want to add charm and functionality without sacrificing your cozy vibe. Rustic wooden wall shelves are the perfect solution to display your favorite decor, books, or even a few plants—without making the space feel cluttered. Plus, they instantly add warmth and character to any living room.
Picture a set of reclaimed wood planks mounted evenly apart on your wall, their rough-hewn edges contrasting beautifully with smooth, painted walls. The shelves hold a mix of vintage books, small ceramic sculptures, and woven baskets, creating a layered, inviting look. Soft lighting highlights the textured wood and curated display, casting gentle shadows that add depth. The overall effect? A welcoming space that feels handcrafted and personal.
Choose different finishes—weathered gray, honey oak, or deep walnut—to match your decor style. For a more rustic appeal, opt for raw, unfinished wood, or go polished with a clear sealant for a modern touch. In small spaces, install shelves high on the wall to maximize vertical storage, while larger rooms can support multiple levels for a gallery-like display. Seasonal swaps, like adding holiday-themed decor or fresh flowers in summer, keep the look fresh and engaging.
Select sturdy, reclaimed wood or plywood with a rustic veneer. Cut the wood to your desired length—commonly 24 to 36 inches—and sand the edges for safety. Use heavy-duty wall anchors and screws to secure the brackets, making sure to locate wall studs for maximum support. Mount the brackets level, then place the shelves on top, securing them with screws if needed for extra stability. Finish by sealing or staining the wood to protect it from humidity and wear, and arrange your decor thoughtfully.
Add personal touches like engraved quotes or painted designs on the wood for a bespoke look. Incorporate textured textiles like burlap or jute runners on the shelves to enhance the rustic vibe. Mix in vintage finds, such as old cameras or antique jars, for a curated feel. For a seasonal update, swap out decor or add fairy lights behind the shelves for a cozy glow. The goal is to make your shelves both functional and a true reflection of your style.
Rustic wood shelves transform blank walls into storytelling spaces that showcase your personality. They’re easy to customize and install, making them perfect for DIY enthusiasts. With just a few tools and some reclaimed wood, you can craft a space that feels warm, inviting, and uniquely yours. Ready to enhance your living room with rustic charm? Let’s get building!
3. Minimalist Plant Stands for Indoor Greenery
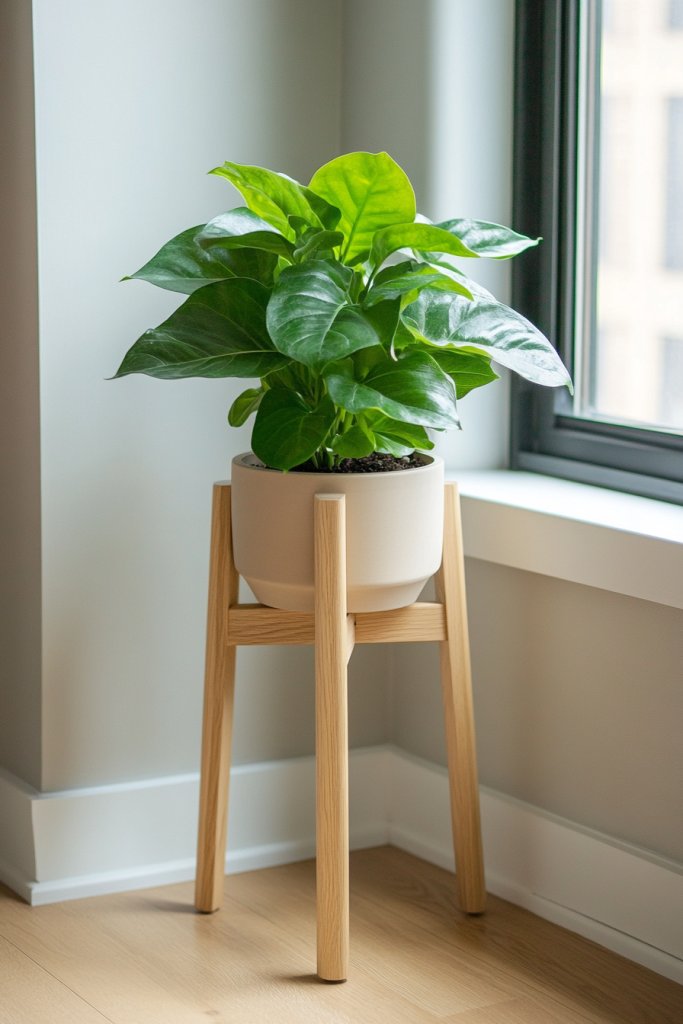
Ever felt like your indoor plants are taking over your space, turning your chic apartment into a jungle? Or maybe you just want a cleaner look that highlights your greenery without clutter? Minimalist plant stands are the answer—elevating your plants while keeping your decor sleek and simple. They’re perfect for adding a touch of nature without sacrificing style.
Visualize a set of slender, powder-coated metal or light-colored wooden stands with clean lines and gentle curves. Your favorite leafy plant rests atop, its pot nestled in a geometric holder that complements the stand’s minimalist design. The stand’s height varies, creating visual interest and making your plants pop against the wall or corner. Soft sunlight filters through nearby windows, casting playful shadows on the stand’s sleek silhouette, emphasizing its modern simplicity.
Choose materials like natural bamboo, light oak, or painted MDF depending on your decor theme. For a more industrial look, opt for black metal with a matte finish. Adjustable or stackable stands work well in small spaces, allowing you to customize height and arrangement. During different seasons, swap out plants or change the stand’s position to refresh the look. Layering with textiles or decorative stones can add texture without overwhelming the minimalist aesthetic.
Start by selecting lightweight, durable materials—wood, metal, or a combination. Cut or purchase pre-made stands in your desired height and design. Assemble using simple tools like a drill, screwdriver, or even glue for DIY options. Position your plants in lightweight pots to avoid strain on the stand. Place the stands in strategic spots—near windows, in corners, or along walls—to maximize visual impact. Regularly check stability, especially if you move or rearrange your plants.
Personalize your stands with painted patterns, carved initials, or decorative accents like small stones or textured fabrics around the base. Mix different heights and shapes for a curated layered look. Use plant tags or small labels for a botanical touch. During seasonal changes, add fairy lights or seasonal decor around the stands to keep your space lively and fresh. The key is maintaining that clean, uncluttered vibe while showcasing your plants.
Minimalist plant stands turn your indoor greenery into art pieces that elevate your space. They are easy to build, customize, and move around—perfect for DIY lovers. With simple materials and a little creativity, you can craft a lush yet modern oasis that feels both calming and stylish. Ready to give your plants the stage they deserve? Let’s elevate your indoor garden!
4. Versatile Storage Crates for Organization
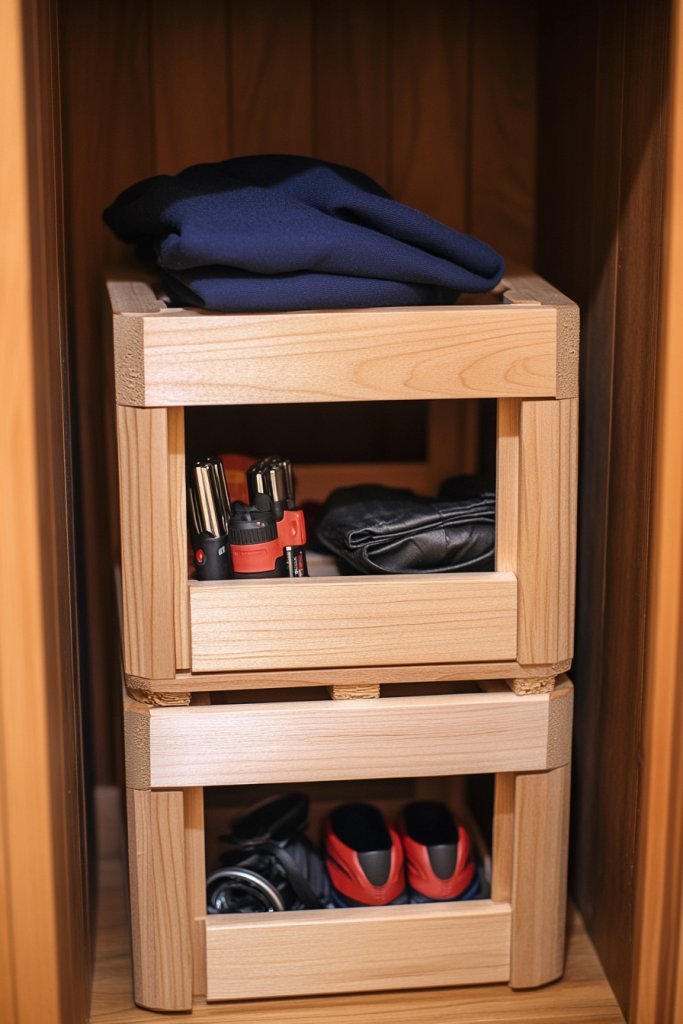
Clutter piling up in your closet, garage, or kid’s playroom? You need a simple, effective way to organize everything without sacrificing style. Versatile wooden crates are the perfect DIY hack—customizable, durable, and easy to stack or move around. They turn chaos into order, making your space functional and tidy.
Imagine a set of rustic wooden crates painted in pastel hues or stained to highlight their natural grain. They’re stacked neatly on a shelf, each labeled with handwritten tags or chalkboard paint for easy identification. Inside, you store everything from sports gear and craft supplies to seasonal decorations. The warm tones of the wood contrast beautifully with modern decor, creating a cozy, organized nook that invites you to declutter.
Choose between natural, stained, or painted finishes to match your style. For a more industrial look, opt for metal reinforcements or wire handles. In small spaces, use crates as mobile storage by adding casters or handles. Stack or arrange them to fit different room layouts, and change their configuration seasonally or as your needs evolve. You can also add fabric liners or cushioned inserts for delicate items.
Start with high-quality plywood or reclaimed wood, cut to your desired dimensions—typically 12×12 inches or larger for bigger storage needs. Sand all edges thoroughly, then assemble using nails or screws, reinforcing corners for durability. Finish with paint, stain, or sealant, depending on your aesthetic. Use a drill or screwdriver for assembly, and ensure each crate is sturdy enough to hold the intended weight. Label each crate clearly for quick access.
Personalize your crates with stenciled designs, custom labels, or decorative hardware. Mix and match colors or finishes to create visual interest. Incorporate interior dividers or smaller containers for organizing tiny items. Attach hooks or handles for easy transport, especially for larger crates. Seasonal decorations like ribbons or stickers can give your storage a fresh look throughout the year.
DIY storage crates provide a practical yet charming solution to everyday clutter. They’re simple to make and adapt to any space or style, giving you full control over the organization process. Once finished, your home will look more spacious and inviting. Ready to turn simple wood into your new organizational hero? Let’s get stacking!
5. Personalized Coat Racks with Hooks
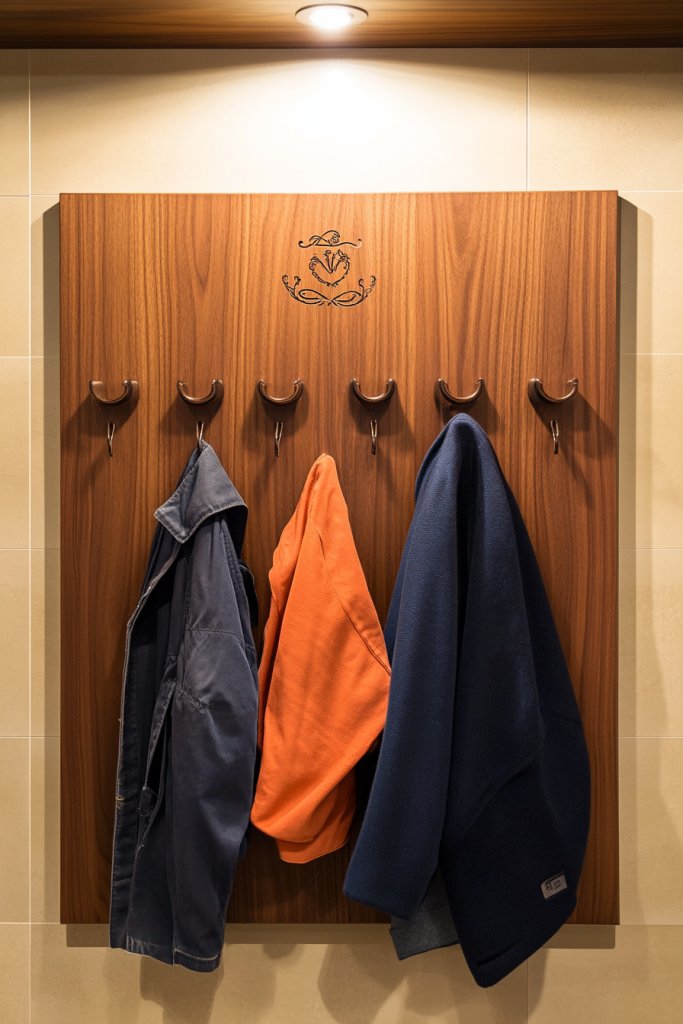
Ever walk into your entryway and feel like it’s a chaotic mess? Jackets, hats, and bags scatter everywhere, making the space feel cluttered and unwelcoming. A personalized coat rack with hooks can solve this problem, transforming your hallway into a stylish, functional zone. Plus, it’s a great way to showcase your personality right at the door.
Picture a sleek wooden back panel, stained in rich walnut or painted in a bold color, mounted securely on the wall. Multiple hooks—metal or wood—are evenly spaced, each holding a coat, hat, or bag with ease. Small decorative accents, like engraved initials or carved motifs, add a custom touch. The overall look is polished yet inviting, making guests feel at home immediately. Soft lighting above highlights the craftsmanship and adds warmth.
You can style your rack in rustic, modern, or vintage themes by choosing different wood finishes and hook styles. For small entryways, opt for a compact, wall-mounted version with fewer hooks. In larger spaces, add a shelf above for extra storage of shoes or decorative items. Seasonal updates like adding small wreaths or decorative ribbons can enhance the look during holidays or special occasions.
Start by selecting a sturdy piece of wood—pine, oak, or reclaimed barn wood—cut to your desired size. Sand all edges thoroughly, then drill evenly spaced holes for hooks. Mount the back panel securely into wall anchors or directly into studs for maximum support. Attach hooks using screws, ensuring they’re level and stable. Finish with a protective coat of sealant or paint to match your decor. Add optional shelf brackets if you want extra storage space.
Engrave your family’s initials or a welcoming message on the wood back panel for a custom touch. Paint or stain the wood in your favorite color palette to match your decor. Attach decorative hooks with unique shapes—like vintage cast iron or sleek modern designs. Incorporate a small tray or basket underneath for keys or sunglasses. Seasonal accessories like small holiday ornaments can make your rack festive.
A DIY coat rack personalized to your style turns a simple wall into a statement piece. It’s a practical project that offers instant organization and curb appeal. With a few tools and some creative flair, you can craft a functional and stylish entryway that impresses guests and makes everyday life easier. Ready to hang your new masterpiece? Let’s get started!
6. Contemporary Coffee Table with Geometric Design
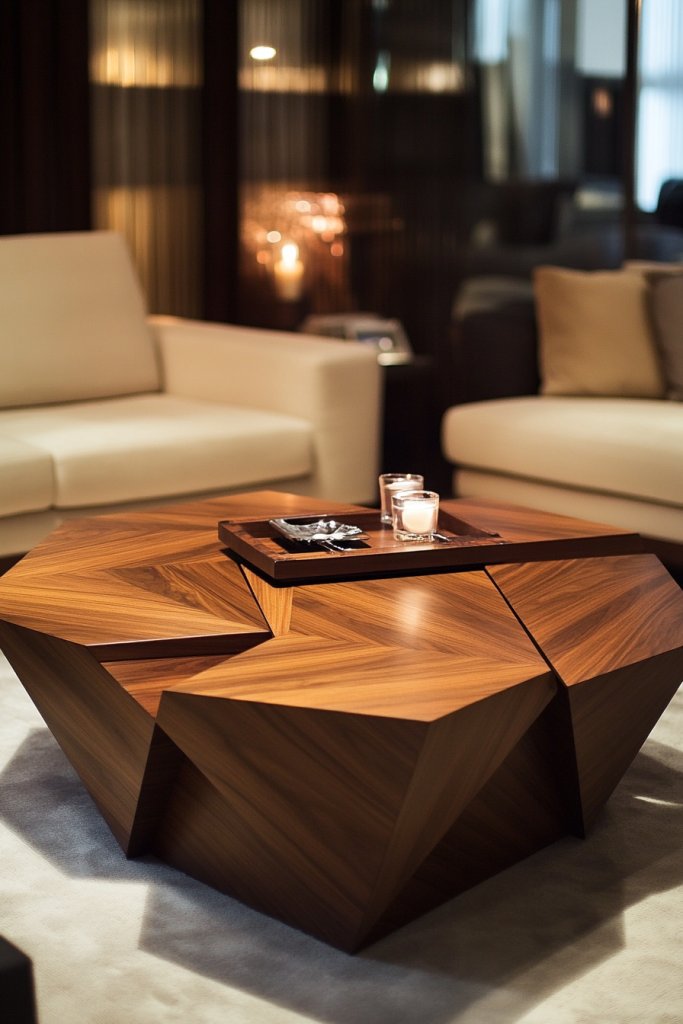
Looking for a coffee table that’s more than just a surface for drinks? You want a centerpiece that sparks conversation and adds a modern touch to your living room. A geometric, handcrafted wooden coffee table offers clean lines, bold shapes, and a fresh aesthetic. It’s the kind of piece that elevates your space instantly.
Visualize a table made from interlocking wooden panels in hexagonal or trapezoidal shapes, creating a striking geometric pattern. The natural grain of the wood contrasts beautifully with sleek metal legs or a minimalist base. The surface is smooth, with sharp angles that catch the light, emphasizing the artistic design. It’s a functional art piece, inviting you to relax and admire its craftsmanship, whether your friends are over or you’re enjoying a quiet night.
Experiment with different wood finishes—from light maple to dark walnut—to match your decor. Incorporate inlays or painted accents for a personalized touch. For smaller rooms, opt for a compact design with storage underneath, while larger spaces can handle bigger, multi-layered tables. Seasonal styling might include adding textured throws or decorative books to complement the geometric form. The key is balancing bold shapes with subtle finishes.
Begin by sketching your geometric design and selecting quality plywood or solid wood panels. Cut the shapes precisely using a jigsaw or CNC machine, then sand all edges smoothly. Assemble the pieces with wood glue and clamps, reinforcing with screws if needed. Finish with stain or paint, and seal for durability. Attach the legs or base structure securely, ensuring the table remains stable on uneven flooring. Consider adding felt pads underneath to prevent scratching.
Add a personal touch with painted patterns or embedded metallic elements. Use contrasting finishes—matte versus gloss—to create visual interest. Incorporate small built-in compartments or hidden drawers for remote controls or magazines. Seasonal decor like a soft cream throw blanket with chunky knit texture can soften the look. The idea is to make it a statement piece that also serves your daily needs.
A geometric wooden coffee table combines artistry with function, transforming your living room into a modern sanctuary. It’s a project that’s doable with basic tools and yields a high-impact result. Once completed, it will become a focal point that impresses guests and reflects your creative style. Ready to craft your own modern masterpiece? Let’s go!
7. Space-Saving Foldable Laptop Desks

Do you find yourself working on your couch or bed because your bulky desk takes up too much space? Or maybe your tiny apartment doesn’t allow for dedicated work areas? Foldable, space-saving wooden laptop desks are the perfect solution. They offer a portable workspace that folds away when not in use, freeing up precious square footage.
Imagine a sleek, lightweight wooden desk with foldable legs, finished in a natural or painted tone to match your decor. It rests neatly against the wall or slides under your bed, ready to be pulled out when needed. When unfolded, it provides a sturdy surface with enough room for your laptop, a notepad, and a cup of coffee. Its simple, minimalist design blends seamlessly into your living space, ready to support your work or hobbies.
Choose different wood types—pine for budget-friendly, hardwoods for durability. The surface can be finished with varnish or painted for a pop of color. For small spaces, opt for compact designs with a single foldable surface, while larger setups can include built-in storage or multiple tiers. Seasonal changes can be accommodated by adding decorative elements like a soft cloth or colorful mouse pad. When not in use, simply fold it flat against the wall or slide it into a closet.
Start by measuring your available space and deciding on the size of your desk. Cut plywood or hardwood to your desired dimensions—typically around 24 inches wide and 16 inches deep. Attach foldable legs using strong hinges and screws, ensuring they lock securely when unfolded. Sand and finish the surface with varnish, paint, or sealant for easy cleaning. Mount or store the desk in a convenient spot, and test stability and comfort before regular use. Consider adding a handle or carrying strap for portability.
Personalize your desk with painted patterns, stenciled designs, or custom decals. Add small accessories like a foldable stand for your tablet or a pen holder made from scrap wood. Change the finish seasonally—like a bright color in summer or a deep hue for cozy winter vibes. You can also add felt pads underneath to protect floors or a built-in charging station for devices. The goal is functional, fun, and perfectly suited to your lifestyle.
Foldable wooden desks are practical, stylish, and customizable—perfect for small spaces or flexible work routines. They’re easy to build with basic tools and can be a rewarding DIY project. Once set up, they give you a dedicated workspace that disappears when you need more room. Ready to create your portable workstation? Let’s do it!
8. Chic Wooden Headboard for Bedroom Upgrade
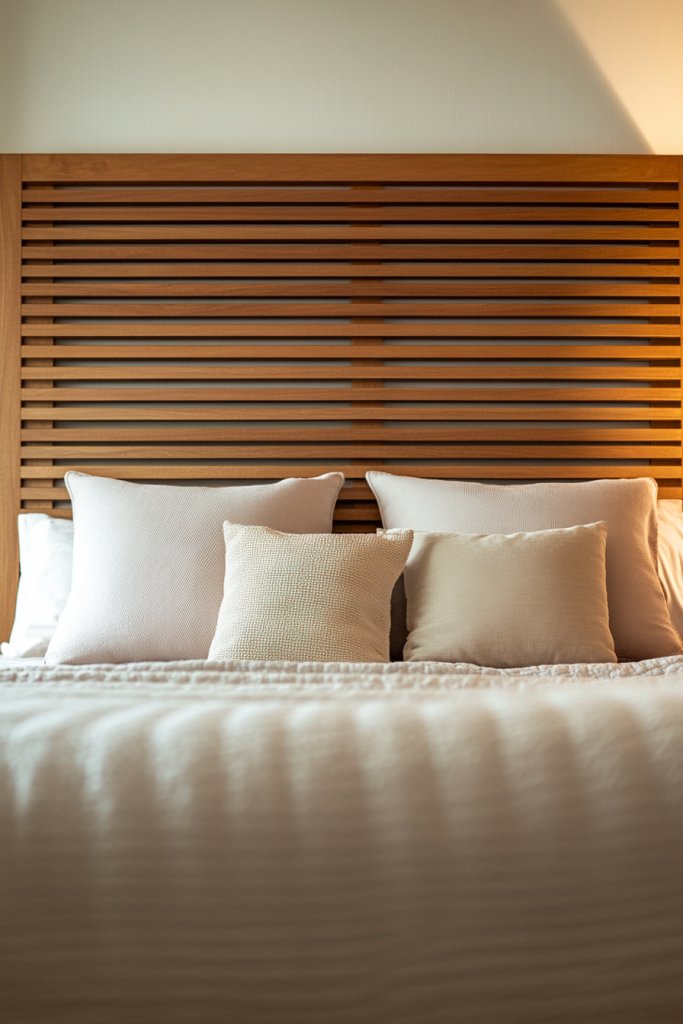
Is your bedroom feeling a little lackluster or outdated? A stylish headboard can instantly elevate the entire space, making your bed the focal point. Instead of buying an expensive upholstered piece, you can craft a chic, modern wooden headboard that reflects your personality. It’s a simple upgrade with a big visual impact.
Visualize a tall, textured wooden panel with a geometric or slatted design, finished in a rich stain or sleek paint. The headboard extends slightly beyond the width of the mattress, creating a dramatic backdrop. Soft ambient lighting behind or along the edges enhances the texture and adds a cozy glow. The natural grain and craftsmanship of the wood bring warmth and style, transforming your sleeping area into a relaxing retreat.
Choose from various wood finishes—light oak, dark walnut, or painted white—to match your decor. For a rustic vibe, use reclaimed or weathered wood; for a modern look, opt for smooth, stained plywood or MDF. Adjust the height to suit your ceiling and aesthetic preferences. During different seasons, add decorative pillows or textiles in complementary colors to change the mood. For a minimalist design, keep it simple with clean lines and subtle finishes.
Begin by measuring your bed and wall space to determine the appropriate size and height. Cut your wood panels to size, then sand all edges thoroughly. Assemble the headboard using wood glue and brackets, attaching the pieces securely. Finish with stain, paint, or sealant, and install on the wall using sturdy anchors or brackets. Consider attaching LED strip lighting or wall sconces for added ambiance. Finish by arranging bedding and accessories to complement your new focal point.
Add engraved patterns, carved initials, or decorative inlays for a custom look. You can also incorporate textured finishes like a matte lacquer or a distressed look. Use different wood tones or paints to create contrast or harmony. Seasonal decor, such as fairy lights or textile accents, can refresh the look throughout the year. Making it uniquely yours ensures the headboard becomes a signature piece in your bedroom.
A custom wooden headboard is a simple yet impactful DIY project that transforms your bedroom instantly. It’s a chance to showcase your craftsmanship while creating a cozy, stylish retreat. With a little planning and some basic tools, you’ll have a beautiful focal point that’s both functional and personal. Ready to upgrade your bedroom? Let’s build!
9. DIY Wooden Pegboard for Tool and Craft Storage
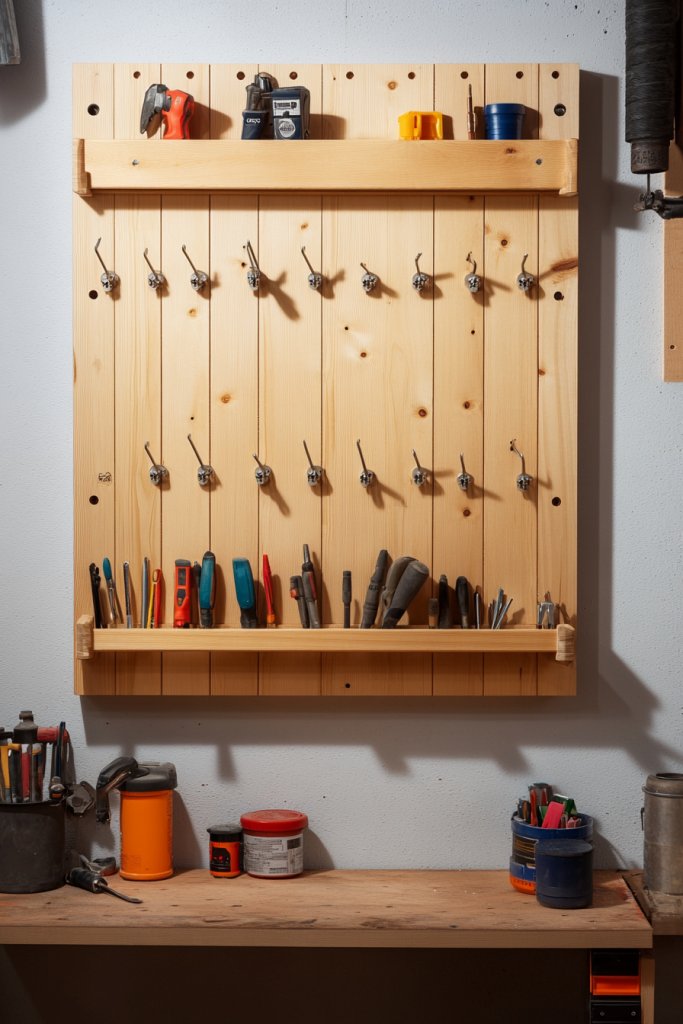
Messy toolboxes and cluttered craft corners drive you crazy, right? You need a smarter way to organize your supplies and keep everything within easy reach. A DIY wooden pegboard offers a customizable, stylish solution that frees up space and adds a functional design element. It’s perfect for DIY enthusiasts, crafters, or anyone tired of digging through clutter.
Imagine a large, framed wooden panel mounted on your wall, featuring evenly spaced holes or pegs. Hooks and small shelves hang from this grid, holding everything from screwdrivers to paintbrushes. The natural wood finish adds warmth to your workspace, contrasting with the metal tools and colorful supplies. Behind the pegboard, a peg or rail system allows for easy rearrangement, creating a dynamic, organized display that’s both practical and attractive.
Use different types of wood—pine, oak, or reclaimed wood—for various looks and budgets. For a sleek, modern style, stain or paint the wood in neutral or bold colors. Customize the grid pattern to fit your tools or craft supplies—larger holes for power tools, smaller for jewelry or art supplies. In small workshops, incorporate storage bins or small drawers for tiny items. Seasonal or project-based updates keep the organization fresh and functional.
Start by measuring your available wall space and deciding on the size of the pegboard. Cut the wood panel accordingly, then drill evenly spaced holes or attach pre-made pegboard inserts. Sand all edges and finish with stain or paint. Mount the panel securely into wall studs using screws and anchors. Attach hooks, shelves, or bins, arranging them in a way that suits your workflow. Regularly update and maintain to keep your tools and supplies accessible.
Personalize your pegboard with engraved labels or decorative accents. Mix in different peg types—metal hooks, wooden pegs, or magnetic strips—for variety. Add small framed photos or inspirational quotes around the border for motivation. Incorporate lighting—like LED strips—to highlight your tools. Seasonal decorations or themed accessories can make your workspace feel fresh and inviting.
A DIY wooden pegboard transforms your cluttered chaos into a sleek, organized space that sparks creativity. It’s a project that’s easy to customize and expand over time. Once installed, it becomes a visual reminder of how functional and stylish organization can be. Ready to create your ultimate workshop or craft corner? Let’s get pegboarding!
10. Elegant Picture Frame Wall Gallery
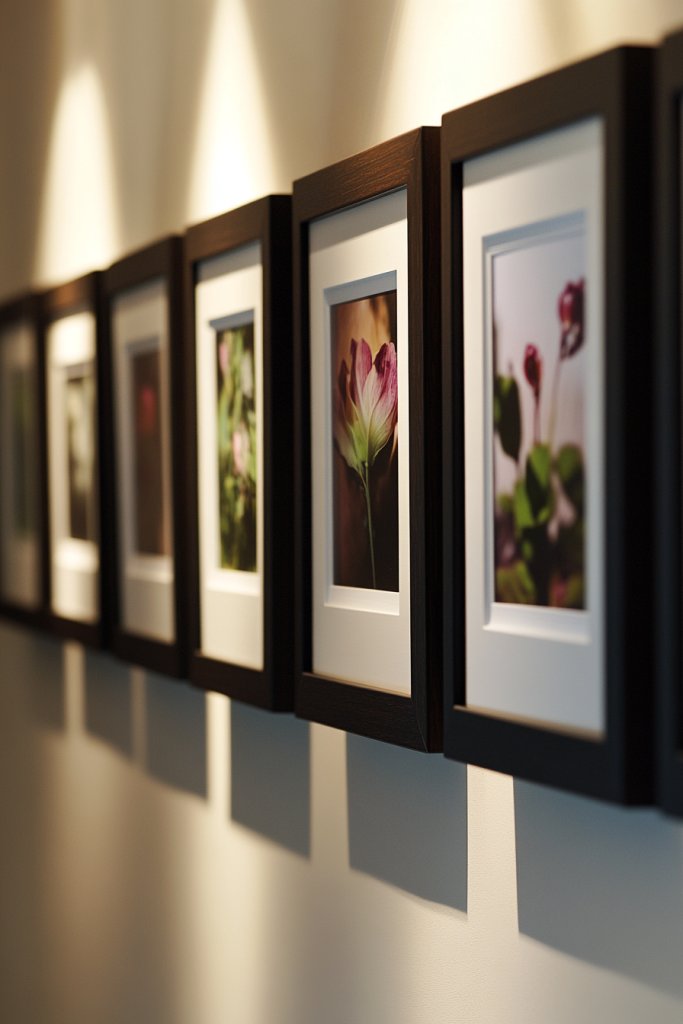
Ever struggle to create a cohesive gallery wall that looks polished instead of chaotic? You want something elegant, uniform, and easy to assemble. An DIY picture frame wall gallery made from wood offers a customizable way to display photos, art, or prints with style. It’s a simple upgrade that turns blank walls into a personal masterpiece.
Picture a series of identical wooden frames, finished in matte black, white, or natural wood, arranged symmetrically or in a curated asymmetrical layout. Inside each frame, you have your favorite photos, botanical prints, or abstract art—each carefully chosen to tell your story. The frames are mounted flush against the wall, creating a clean, cohesive look. Soft lighting accentuates the gallery, making it a focal point in your room. The overall effect is sophisticated and inviting.
Mix different frame sizes and finishes for a more eclectic feel, or keep everything uniform for a sleek, modern look. For seasonal updates, swap out artwork or photos without changing the frames. Use complementary mats or backing colors to add depth and contrast. Arrange the gallery around architectural features like windows or doorways for a dynamic appearance. You can also add small decorative elements like wooden initials or textured accents.
Select high-quality wood or MDF boards, cut to the sizes of your desired frames. Sand and finish with stain, paint, or sealant to match your decor. Attach hanging hardware—D-rings or sawtooth hangers—on the back of each frame. Layout your design on the floor first, then transfer to the wall using a level and measuring tape. Hang your frames securely into wall studs or anchors, ensuring even spacing. Adjust for balance and symmetry as needed.
Add personal touches with engraved wood plaques or decorative corner accents. Use different textures—like burlap mats or metallic finishes—to add visual interest. Incorporate small wooden embellishments or quotes for a personalized vibe. Seasonal themes like holiday ornaments or travel souvenirs can be added temporarily. Keep updating the gallery periodically to reflect your evolving style and memories.
A custom picture frame wall gallery elevates your decor with minimal effort and cost. It’s a project that’s both functional and deeply personal, showcasing your favorite memories with style. Once finished, it creates a warm, inviting atmosphere that’s perfect for entertaining or relaxing. Ready to turn your wall into a storybook? Let’s hang it!
11. Stylish Wall-Mounted Wine Rack
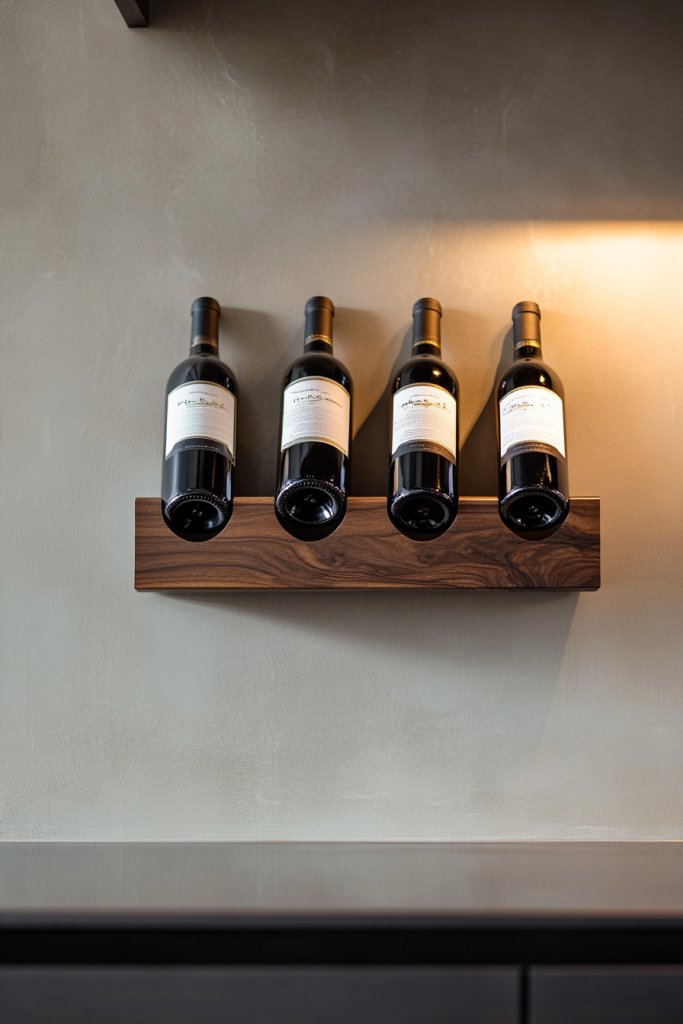
Tired of cluttered wine bottles taking up space on your countertops or in cabinets? You want a sleek, space-efficient way to store and display your collection. A DIY wall-mounted wooden wine rack combines practicality with style, turning your wine storage into a conversation piece. It’s a perfect project for any wine lover wanting to add a touch of sophistication.
Visualize a slim, horizontal wooden shelf with evenly spaced slots or cubbies for bottles. The wood’s rich grain and warm finish contrast beautifully with the cool glass bottles and metallic labels. The rack is mounted at eye level on your wall, creating a focal point in your kitchen or bar area. Soft lighting above or nearby highlights the bottles, making your collection look curated and inviting. It’s both functional for pouring and artistic for display.
Use different woods—cherry, oak, or painted MDF—to match your decor. For a modern look, opt for sleek, minimalist designs with clean lines. For rustic appeal, use reclaimed wood with rough edges and a weathered finish. Adjust the size and number of slots to fit your collection, or incorporate additional shelves for glasses and accessories. Seasonal or themed decorations, like fairy lights or vintage labels, can personalize the display.
Start by measuring your wall space and deciding on the size of your rack. Cut the wood to length, then drill evenly spaced holes or slots for bottles using a jigsaw or router. Sand all edges smooth, then finish with stain or paint. Mount the rack securely into wall studs with appropriate anchors to support the weight of the bottles. Attach additional decorative elements like hooks for glasses or small shelves for accessories. Regularly update and organize your collection for a stunning display.
Personalize your rack with engraved monograms, labels, or decorative accents. Incorporate LED strip lighting behind the rack to showcase your bottles at night. Use contrasting finishes or paint to create a bold statement piece. Add decorative cork or wood tags to label different wine types. Seasonal decor, like mini ornaments or themed signs, can make your wine area festive and inviting.
A wooden wall-mounted wine rack elevates your home bar while saving space and adding style. It’s a project that combines craftsmanship with personal flair, making your collection a centerpiece. With simple tools and some creative planning, you’ll have a functional art piece that impresses guests and enhances your lifestyle. Cheers to your new wine display—ready to build?
12. Compact Bookshelves for Nooks and Corners
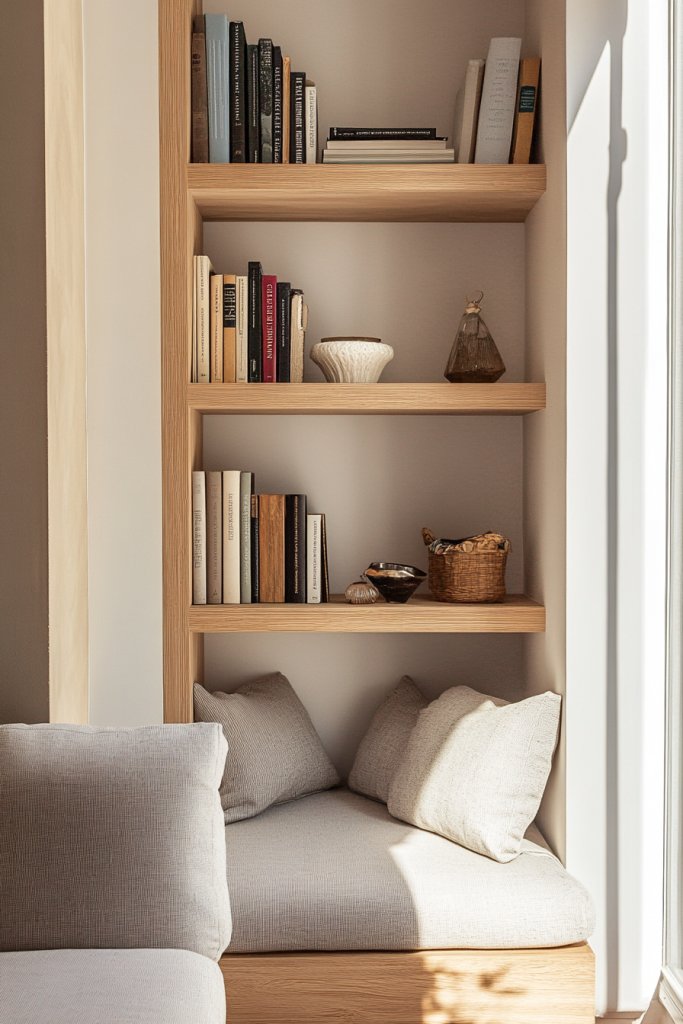
Struggling to fit books and decorative items into tight spaces? Small nooks and corners often get overlooked but are perfect spots for compact shelving. A DIY wooden bookshelf tailored to your space can turn awkward corners into cozy reading retreats. It’s a smart, affordable way to add storage and charm without overwhelming the room.
Picture a narrow, angled bookshelf with multiple tiers, made from light stained or painted wood. The shelves fit snugly into a corner, supporting a curated collection of books, plants, or decorative objects. Natural light highlights the wood’s grain, while the angled design creates visual interest and easy access. The overall look is functional yet stylish—a perfect blend for small spaces craving personality.
Choose different finishes—white, natural, or bold colors—to match your decor. For a minimalist look, keep the design simple with clean lines and no visible hardware. For more visual impact, add decorative brackets or contrasting finishes. Adjustable or modular designs allow you to customize shelf heights based on your needs. Seasonal decor, like small plants or themed accents, can refresh the look throughout the year.
Start by measuring the space and designing your shelf with angled sides and multiple levels. Cut the wood to size—plywood or solid wood works well—and sand all edges. Assemble using wood glue and screws, reinforcing the corners for stability. Finish with stain, paint, or sealant. Mount securely into wall studs using brackets or anchors, ensuring stability for weight. Organize your books and accessories thoughtfully for maximum impact.
Personalize with painted patterns, stenciled designs, or engraved labels. Incorporate decorative elements like small sculptures or vintage bookends. Use contrasting colors or textures to add visual interest. Seasonal updates like fairy lights or themed decorations can make your nook inviting. The goal is a functional, charming space that feels tailored to your personality.
A custom nook bookshelf maximizes small spaces and showcases your style. It’s easy to build, adaptable, and highly functional. Once finished, it transforms an unused corner into a cozy, organized spot. Ready to turn that awkward nook into your favorite reading corner? Let’s build!
13. Modern Wooden Side Tables for Living Rooms
Your living room needs a quick style upgrade, but bulky furniture is just too much. You want a sleek, modern side table that complements your decor without overwhelming the space. DIY wooden side tables are perfect—they’re stylish, customizable, and fit perfectly into any aesthetic. Plus, they’re surprisingly easy to make.
Picture a minimalist table with a rectangular top and slender legs, finished in a matte or glossy stain. The smooth surface holds a lamp, a cup of coffee, or a small book, while the open space underneath adds visual lightness. The wood grain pops against neutral or bold-colored walls, adding warmth and texture. Soft lighting from nearby lamps or sconces enhances the natural beauty of the wood, creating a cozy yet modern vibe.
Experiment with different wood types—light maple, dark walnut, or painted MDF—to match your decor. For small spaces, choose narrow, single-leg designs or stacking options. Larger living rooms can support multi-tiered or multi-functional tables with drawers or shelves. Seasonal decor like textured throws or small decorative objects can change the feel throughout the year. Keep the finishes simple and elegant for a timeless look.
Start by measuring your space and designing your table—rectangular tops with four legs are classic. Cut the wood to size, then sand all edges thoroughly. Assemble using wood glue and screws, ensuring the legs are aligned and sturdy. Finish with stain, paint, or sealant, and attach the legs securely. Place the table in your desired spot and arrange decor items to suit your style. Regularly check stability and finish for lasting beauty.
Add engraved patterns, painted accents, or decorative hardware for a personalized touch. Incorporate contrasting finishes on the tabletop and legs to create visual interest. Use textured or patterned cloths on the surface for added flair. Seasonal decorations like small lanterns or floral arrangements can refresh the look. The goal is a versatile, stylish piece that enhances your living room’s vibe.
Modern wooden side tables are a simple way to elevate your decor and showcase your craftsmanship. They’re easy to customize and adapt to your style, making your space more inviting. Once complete, they serve as functional art pieces that impress guests and add warmth. Ready to craft your perfect living room accent? Let’s do it!
14. Durable Outdoor Planter Boxes
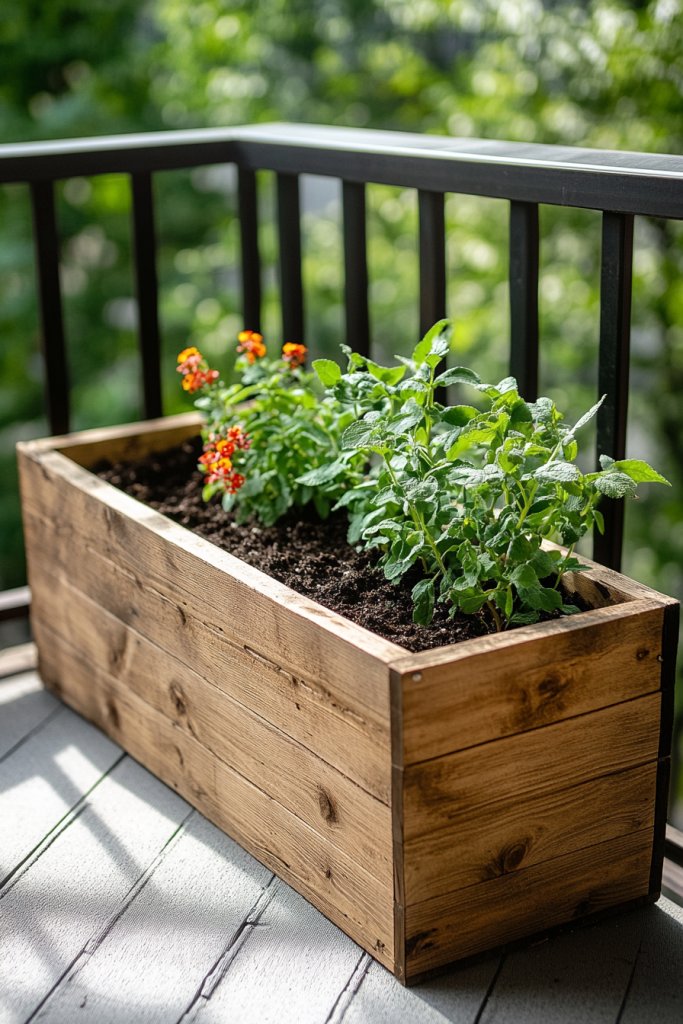
Dreaming of a lush garden or balcony oasis but worried about weather damage? DIY outdoor wooden planter boxes are the perfect way to grow your favorite flowers, herbs, or vegetables while ensuring durability. They’re customizable to fit your space and style, and built to withstand the elements. It’s gardening made easy and stylish.
Picture a rectangular wooden box with clean, simple lines and a weatherproof finish. Filled with vibrant blooms or fresh herbs, it sits on your patio or balcony, adding color and life. The wood’s natural texture complements outdoor decor, while drainage holes ensure healthy roots. A cozy outdoor nook is complete with these planters, especially when paired with outdoor lighting or seating nearby. It’s a welcoming retreat that’s both functional and beautiful.
Choose rot-resistant woods like cedar, redwood, or pressure-treated pine for longevity. Finish with weatherproof stains or sealants to protect against rain and sun. Sizes range from small window boxes to large, multi-tiered structures—adapt based on your space and plant needs. Seasonal planting allows you to swap out flowers or herbs, keeping your outdoor space fresh. Decorative gravel or small stones around the base add a polished look.
Start by measuring your available outdoor space and deciding on the size and shape of your planter. Cut your wood accordingly, then drill drainage holes in the bottom panels. Sand all edges for safety and apply weatherproof finishes. Assemble the box using outdoor-grade screws and brackets, making sure it’s sturdy and level. Fill with quality soil, and plant your chosen greenery. Position in a sunny spot and water regularly.
Add decorative touches like engraved patterns, painted borders, or personalized signs. Incorporate reclaimed wood accents or decorative hardware for a custom look. Use different heights or arrangements to create visual interest. Seasonal decor like fairy lights or small outdoor sculptures can enhance the space. Regular maintenance and refreshing plants keep your outdoor oasis lively and inviting.
Weather-resistant planter boxes combine practicality with style, turning any outdoor space into a lush retreat. They’re a rewarding DIY project that enhances your gardening skills and your home’s curb appeal. Once finished, you’ll enjoy watching your plants thrive in your handcrafted containers. Ready to grow your outdoor haven? Let’s build!
15. Functional DIY Shoe Storage Bench
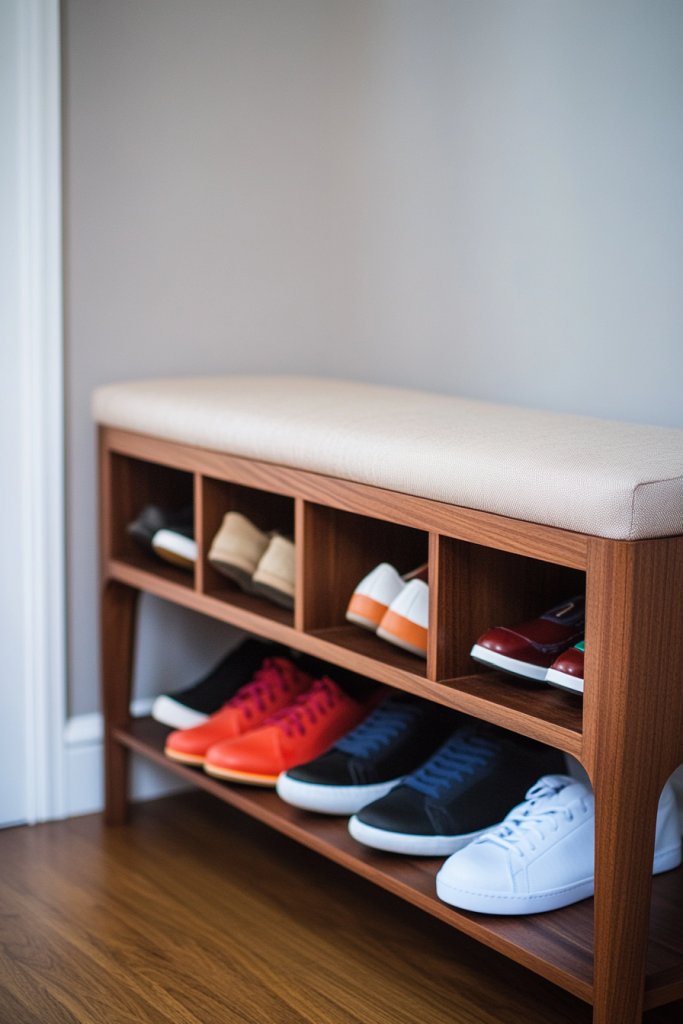
Ever tripped over shoes or struggled to find that perfect pair right when you need them most? A cluttered entryway makes the morning rush even more chaotic. DIY shoe storage benches are the perfect fix, combining practicality with a touch of style. They turn an everyday annoyance into a stylish, organized solution. Who knew that a simple bench could transform your mornings?
Imagine a sturdy wooden bench with a smooth finish, topped with a soft cushion for sitting. Beneath, open cubbies hold shoes of all sizes, neatly arranged and easy to access. The bench fits snugly into your entryway, with hooks on the wall above for coats and bags. The warm tones of the wood contrast with colorful sneakers and boots, creating a lively yet organized space. It’s as if your shoes finally got the VIP treatment.
You can customize the bench with different finishes, from rustic distressed to sleek modern, depending on your decor. Add a waterproof top for outdoor use or a padded cushion for comfort. For small spaces, opt for a narrow design, while larger entries can accommodate wider, multi-tiered benches. Seasonal accents like a cozy throw or decorative baskets can give it a fresh look all year round. The key is tailoring it to your needs and style.
Start by measuring your space and deciding on the number of cubbies needed. Choose durable wood like cedar or pine, and cut panels for the seat, sides, and compartments. Assemble with screws and add a cushion on top for comfort. Sand all edges for safety, and finish with paint or stain to match your decor. Attach hooks or baskets for extra storage and organization. This project can be completed in a weekend, even for DIY novices.
Add personalized touches like engraved initials or decorative hardware to make it uniquely yours. Incorporate a small tray on top for keys or sunglasses. Use colorful fabric bins inside the cubbies for a pop of color and easier organization. You could also paint or stain it in bold colors to match your entryway’s vibe. It’s all about making the piece reflect your personality and needs.
A DIY shoe storage bench isn’t just functional; it boosts your home’s style and organization. Plus, it’s a rewarding project that builds confidence and skills. Imagine greeting guests with an inviting, clutter-free space that shows off your handiwork. Ready to turn your entryway into a tidy, welcoming zone? Let this project inspire you to get creative and take control of your space!
16. Custom Kitchen or Bathroom Shelving Units
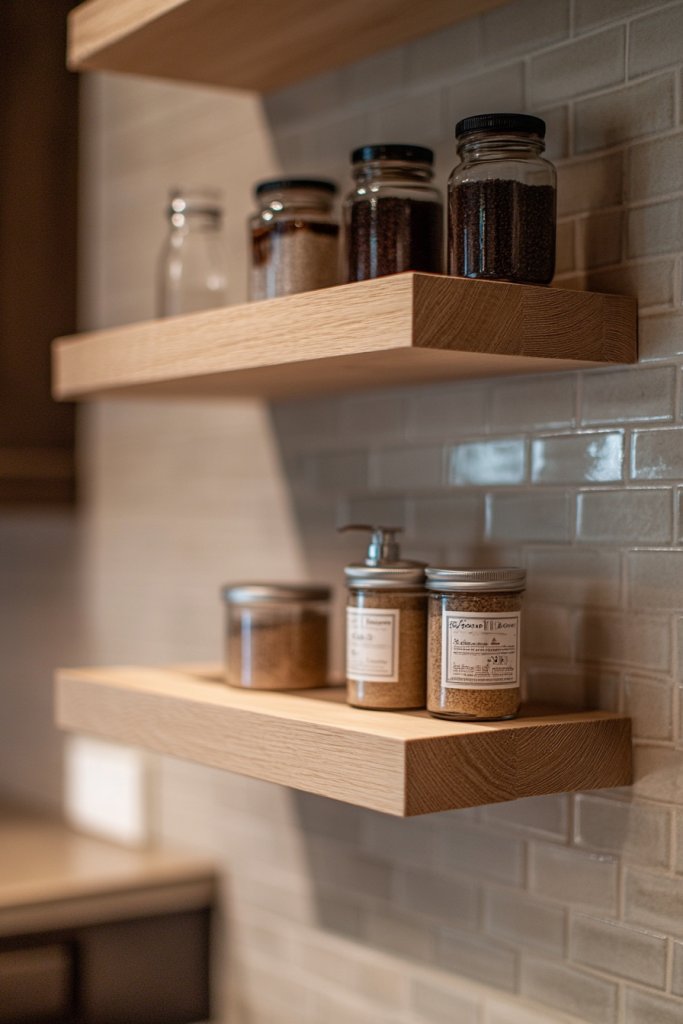
Ever feel like your kitchen or bathroom is bursting at the seams with clutter? Standard shelves often look bland and don’t quite fit your space or style. Custom shelving units are the answer, offering tailored storage that combines function with flair. They make your space more organized and visually appealing. Who doesn’t want a tidy, stylish home without breaking the bank?
Picture a set of sleek, open shelves made from light-colored wood, mounted securely on the wall. They hold neatly arranged jars, towels, or decorative containers, all within easy reach. The shelves are minimalist but sturdy, with smooth edges and a natural finish that highlights the wood grain. Soft lighting underneath adds warmth and ambiance. It’s a perfect blend of practicality and aesthetic appeal, transforming your space into a magazine-worthy room.
Opt for floating shelves for a modern look, or add decorative brackets for a vintage vibe. Adjust the height and number of shelves based on what you need to store—more for kitchen cookware, fewer for bathroom essentials. Use different wood stains or paints to match your decor, from rustic farmhouse to sleek contemporary. Consider adding glass or metal accents for contrast. Seasonal accessories like greenery or candles can be swapped out for a fresh look.
Begin by measuring the wall space and planning the layout. Select quality wood like birch or oak, and cut shelves to size. Sand all surfaces thoroughly to prevent splinters. Drill holes for wall anchors and use a level to ensure even installation. Mount the brackets or floating supports first, then place the shelves securely. Finish with a protective sealant or stain for durability. This project is straightforward and perfect for DIYers comfortable with basic tools.
Personalize your shelves with decorative edge detailing or painted accents. Add small hooks underneath for hanging utensils or towels. Use labeled storage containers for ingredients or toiletries. Incorporate a contrasting color or textured backing to add visual interest. Seasonal decor like mini pumpkins or pinecones can make the shelves feel festive and fresh throughout the year.
Custom shelves elevate your home from cluttered to curated with minimal effort. They give you control over your space and style, boosting confidence in your DIY skills. Imagine the satisfaction of designing a storage solution that’s both functional and beautiful. Your friends will ask for tips—be ready to share your success story. It’s time to make your kitchen or bathroom work harder and look better.
17. Unique Wooden Coat Hooks with Artistic Flair
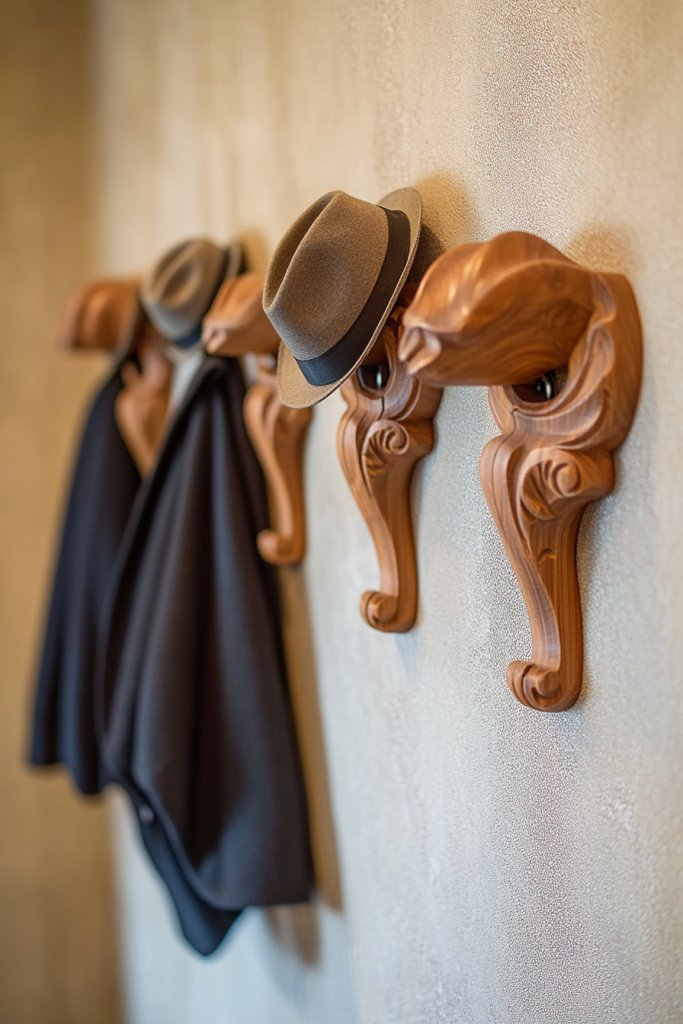
Tired of boring, generic hooks that do nothing for your decor? A plain hook just doesn’t cut it when you want your entryway or mudroom to stand out. Unique wooden coat hooks with artistic flair add personality and function all in one shot. They turn a simple necessity into a design statement. Who says functional can’t be fabulous?
Imagine a sculptural wooden hook carved into an abstract shape or a whimsical animal figure. It’s mounted on a feature wall, instantly catching the eye. Coats, hats, or bags hang from these artistic pieces, adding a playful or sophisticated vibe depending on your style. The natural wood textures contrast beautifully with painted walls, creating a focal point that’s both practical and eye-catching. It’s a small detail with a big impact.
Choose from minimalist geometric designs for a modern look, or go for ornate carvings for a vintage feel. Paint or stain the wood in bold or muted shades to match your decor palette. Mount multiple hooks in a row for a cohesive look or scatter different shapes for an eclectic vibe. These hooks can also be used in bedrooms or kitchens for towels or jewelry, adding versatility to their charm.
Start by sketching your design or browsing inspiration online. Select hardwoods like walnut or cherry for durability and beauty. Cut the shapes using a scroll saw or band saw, then sand edges smooth. Attach hooks securely with strong wood screws, making sure they can handle weight. Mount the hooks on a backing board or directly on the wall with anchors. Finish with a protective oil or varnish to enhance the wood grain and longevity.
Personalize with engraved initials or custom symbols that reflect your personality. Experiment with layered or multi-tone finishes for a unique look. Combine different shapes and sizes to create a gallery wall of hooks—functional art, basically. You could also add small LED lights or decorative elements like metal accents for extra flair. Your hooks will be both a conversation starter and a storage hero.
Creative hooks showcase your style and add a personal touch to any space. They prove that even small details can make a big difference. Plus, crafting your own guarantees a one-of-a-kind piece that no one else has. Ready to elevate your decor with a bit of artistry? It’s easier than you think, and the results will wow everyone.
18. Multi-Purpose Folding Workbench
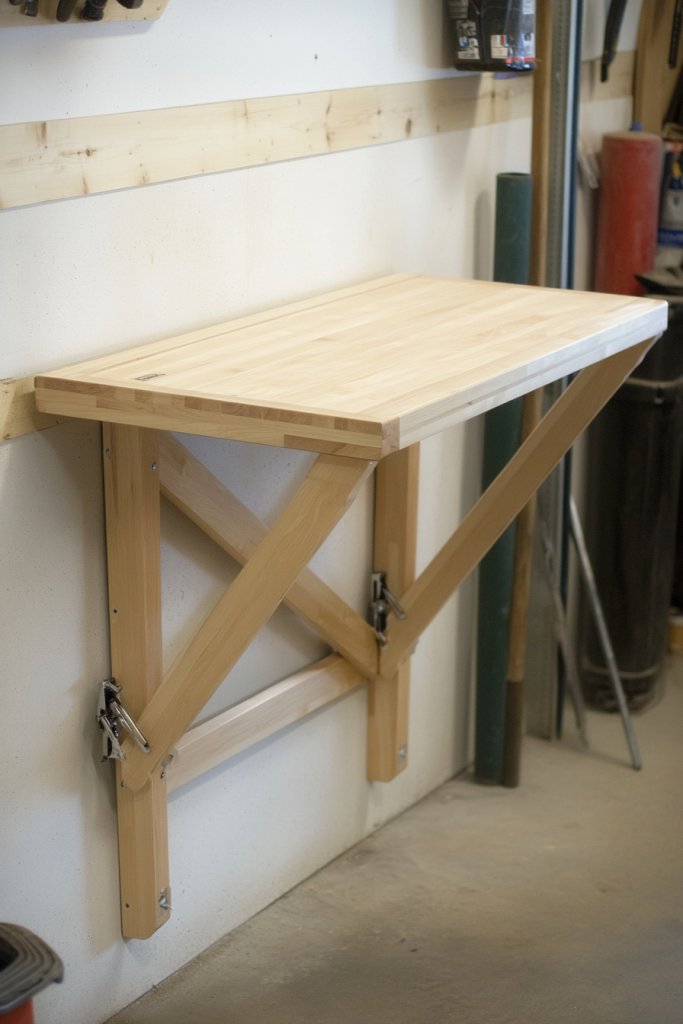
Ever wish you had a sturdy work surface that could hide away when not in use? A dedicated workshop space can eat up your entire garage or basement. A multi-purpose folding workbench solves this dilemma by offering a strong, reliable surface that folds flat when you need space for cars or kids’ toys. It’s the ultimate space-saver for DIY lovers and homeowners alike. Ready to get your workshop organized without sacrificing your garage?
Picture a robust wooden workbench with a thick, smooth top that folds down against the wall. When upright, it provides a stable surface for projects, with built-in storage underneath for tools and supplies. The frame is reinforced with metal brackets for strength, and the fold mechanism is smooth and easy to operate. When folded up, the entire unit becomes a sleek wall panel, reclaiming your space. This clever design blends practicality with a clean aesthetic.
Choose different wood finishes, from natural oak to painted MDF, to match your workshop or garage decor. Customize the size of the work surface based on your projects—small for minor repairs, larger for woodworking. Add pegboards or magnetic strips nearby for tool organization. For portability, incorporate locking casters or wall-mount brackets that suit your space. Seasonal or project-based adjustments keep it functional year-round.
Begin by measuring available wall space and deciding on the workbench dimensions. Cut the top and frame components, then assemble using heavy-duty screws and brackets. Attach the folding hinges securely to ensure stability when in use. Reinforce the frame with cross braces for extra support. Mount the entire unit high enough to fold flat against the wall, making sure all hardware is tight. Test the folding mechanism and adjust if necessary. It’s an efficient project that pays off in space.
Add custom features like a built-in clamp rack or tool holders to suit your projects. Use weather-resistant paint or stain if you plan to use it outdoors. Personalize the surface with measurements or markings for specific tasks. Incorporate LED lighting or a power strip for added functionality. This adaptable workspace can grow with your skills and projects.
A folding workbench makes DIY projects more accessible and less messy. It shows that smart design can turn small spaces into productive zones. Building your own puts you in control of your tools and workspace. Plus, it’s a great way to boost your confidence in tackling bigger projects. Get ready to craft, build, and organize—all in one versatile setup.
19. Charming Wooden Candle Holders or Lanterns
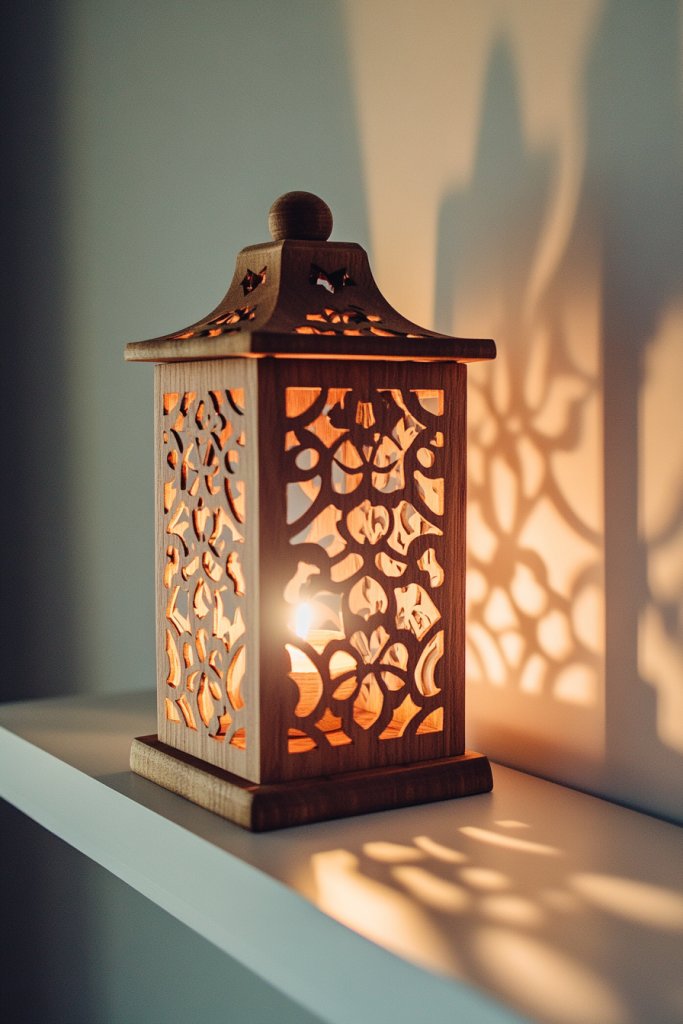
Looking to add a warm, inviting glow to your home without relying on generic store-bought decor? Wooden candle holders or lanterns bring cozy ambiance and a personal touch that no mass-produced item can match. They’re perfect for relaxing evenings or special occasions like dinners or parties. Ready to create your own charming lighting pieces that stand out?
Imagine a handcrafted wooden lantern with intricate cut-out patterns, casting flickering shadows across your walls. The warm hue of natural wood complements candles of all shapes and sizes, from tall pillar candles to small tea lights. When lit, the lantern’s design creates a dance of light and shadow, transforming your space into a cozy retreat. These pieces look charming on mantels, tables, or shelves, adding rustic elegance to any room.
Choose different woods like cedar, walnut, or pine for varied textures and colors. Decorate the lanterns with metal handles, painted accents, or carved motifs to enhance their character. Use them seasonally, swapping out candles for festive or scented options. Create a collection of different sizes and shapes for a layered, curated look. They work equally well indoors or outdoors, making them versatile decor pieces.
Start by sketching your design or browsing online for inspiration. Cut the wood into panels, then assemble using wood glue and nails or screws. Drill holes for handles or decorative cut-outs, then sand all surfaces thoroughly. Finish with a protective oil or stain to highlight the grain. Insert candles carefully, ensuring stability and safety. For outdoor use, consider weatherproofing with a sealant.
Add engraved messages or initials for a personalized gift or keepsake. Incorporate decorative elements like beads or leather straps for extra charm. Paint or stain the wood in colors that match your decor or mood. Use different candle types—LED, scented, or flameless—for variety. You can also add small mirrors or reflective elements inside for enhanced light effects.
Creating your own candle holders adds warmth and personality to your space while boosting your crafting confidence. They’re a simple yet impactful way to elevate your home decor. Plus, handmade lighting pieces make thoughtful gifts for loved ones. Ready to light up your home with your own charming creations? Just a bit of wood and imagination go a long way.
20. Compact Desk Organizer with Dividers
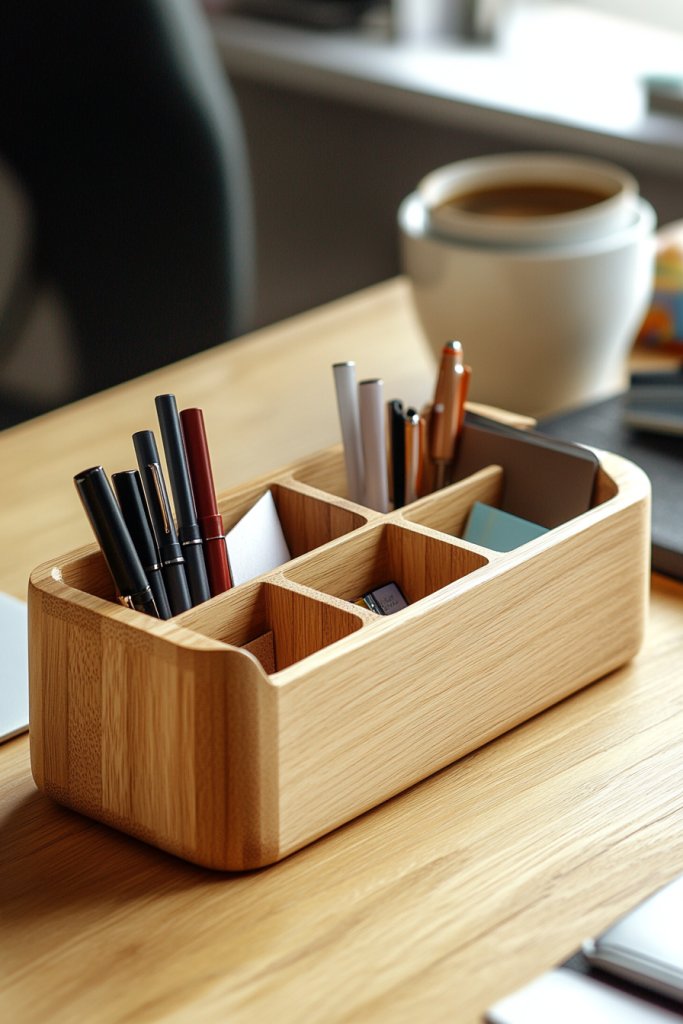
Cluttered desks can kill your productivity and increase stress. A cluttered workspace makes it hard to focus and wastes precious time searching for supplies. A custom desk organizer with dividers offers a simple yet effective way to keep everything in its place. It’s like having a personal assistant that sorts your chaos. Want a cleaner, more efficient workspace? This project is your answer.
Picture a sleek wooden tray with multiple compartments, each designed for pens, paper clips, sticky notes, and other essentials. The dividers are adjustable or removable, allowing customization. The warm wood finish adds a touch of elegance to your desk, while the tidy compartments keep everything accessible. When your supplies are neatly organized, your desk looks inviting and professional, inspiring you to work better and faster.
Use different woods like bamboo or painted MDF for varied aesthetics. Customize the size and number of compartments based on your needs—more for heavy users, fewer for minimalist setups. Add labels or engraved icons for quick identification. Incorporate a charging station or cable management features for tech accessories. Seasonal or thematic colors can refresh your workspace throughout the year.
Measure your desk space and decide which items need organizing. Cut the wood into a base tray and smaller dividers using a saw, then sand all edges smooth. Attach dividers with wood glue or small nails, ensuring they are secure. Finish with a clear sealant or stain to enhance durability and look. Place the organizer on your desk, filling each compartment with your supplies. Maintain by periodically cleaning and adjusting dividers as needed.
Add custom engravings or painted labels to personalize each compartment. Incorporate non-slip pads underneath to keep it stable. Use colorful or patterned liners inside compartments for visual interest. For a tech-friendly touch, embed a small wireless charger or USB hub. This organizer will evolve with your needs and style preferences.
A personalized desk organizer simplifies your workflow and boosts your confidence in managing your space. It’s a small project that delivers big results, making your workspace more inviting and functional. When everything has a dedicated place, creativity and productivity soar. Ready to transform your desk into a clutter-free zone? Your organized future starts today.
21. Minimalist Wooden Lazy Susans for Dining and Decor
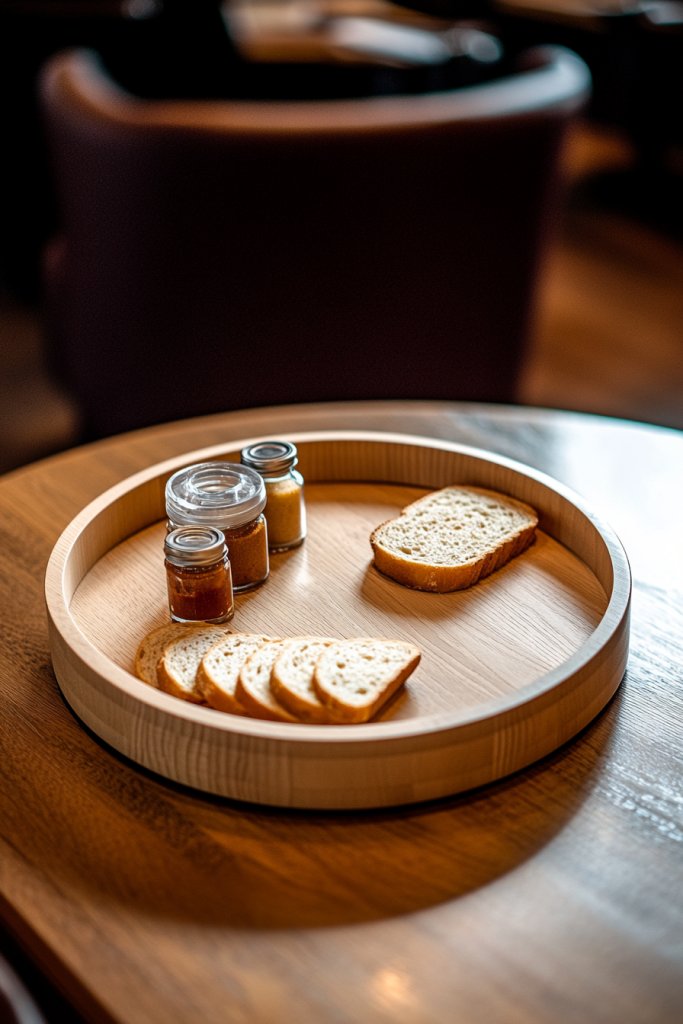
Ever struggle with reaching for that awkwardly placed condiment jar or have guests wrestling over the last slice of bread? Lazy Susans are the unsung heroes of dining tables, but most look plain and uninspired. A minimalist wooden Lazy Susan adds elegance and practicality to any meal or display. Want to impress guests and streamline your serving game? This project is for you.
Imagine a smooth, circular wood piece with a subtle natural grain, rotating effortlessly on a sleek base. It holds an array of cheeses, fruits, or spices, turning your table into a functional art piece. When spun, it reveals everything at a glance, eliminating clutter and awkward reaching. The warm tones of the wood add a cozy, inviting vibe, perfect for both casual dinners and special occasions. Its simplicity enhances any table setting without overpowering it.
Opt for different wood species—maple, cherry, or walnut—for varied shades and textures. Keep the design ultra-simple or add a carved edge or subtle inlay for a touch of detail. Size the Lazy Susan to fit your typical serving needs, from small snack trays to larger family-sized options. You can also customize the base with protective pads or decorative accents to match your decor. Seasonal or themed accessories can be swapped in easily.
Start by drawing your circle or using a template for accuracy. Cut the wood into a perfect circle, then sand all edges smooth. Attach a rotating mechanism or bearing at the center, ensuring it spins freely. Finish with a food-safe oil or sealant to protect the wood and enhance appearance. For the base, cut a slightly larger circle or square to support the top, securing with glue or small nails. Place on your table and load with your favorite snacks.
Add engraved patterns, initials, or decorative inlays for a personal touch. Use contrasting woods or finishes to create visual interest. Incorporate small rubber or felt pads underneath to prevent slipping. For a thematic look, paint or stain in seasonal colors or add decorative accents like metal inlays. Your Lazy Susan will be both functional and a conversation starter.
A handmade Lazy Susan elevates your hosting game and shows off your craftsmanship. It’s a simple project that combines beauty and utility, making every meal feel special. Plus, it’s a fantastic way to learn basic woodworking skills. Ready to spin your way to better gatherings? This project proves that elegance is within your reach.
Conclusion
Exploring the diverse ways to utilize Home Depot’s wood cutting service opens up a world of creative and practical project ideas. Whether you’re building custom furniture, garden planters, or organization solutions, these ideas can help turn your vision into reality. Don’t wait—start experimenting with these concepts today and transform your home into a personalized haven. Take action now and bring your DIY dreams to life!
Leave a Reply