Imagine transforming your backyard into the ultimate outdoor entertainment haven with just a few creative DIY touches! Outdoor TVs have become a popular trend because they seamlessly blend technology with outdoor living, making movie nights and game days more exciting than ever.
In this article, you’ll discover a variety of DIY outdoor TV ideas that are both stylish and functional. From simple mounting hacks to custom-built entertainment centers, there’s something for every skill level and space. Get ready to elevate your outdoor gatherings with ideas that are as impressive as they are easy to DIY!
1. Rustic Pallet Frame for Outdoor TV Mounting
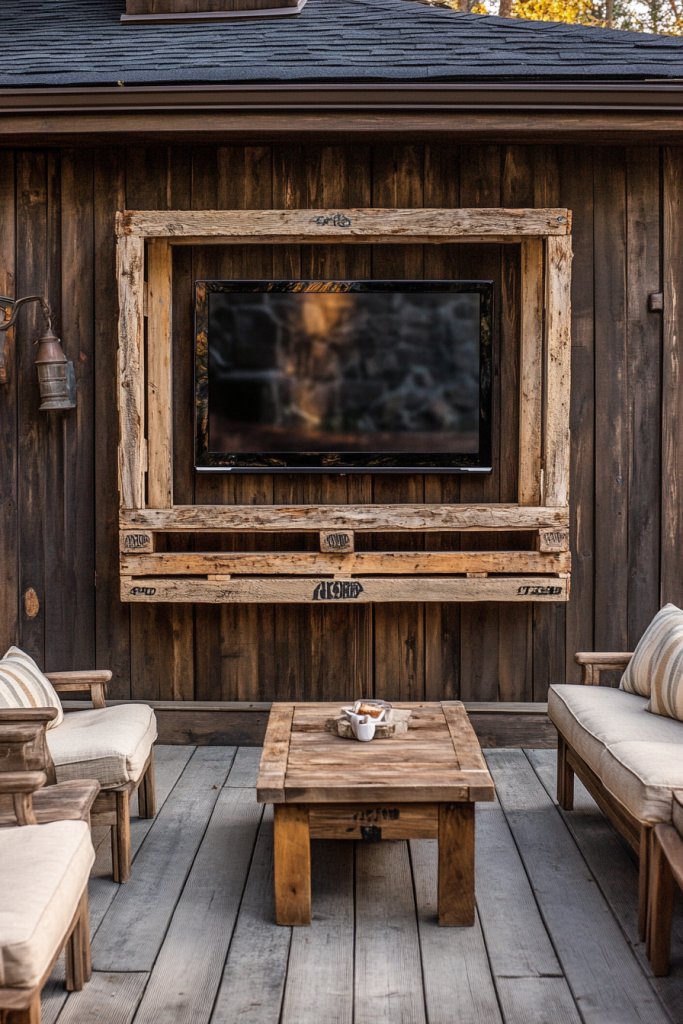
Ever dreamed of turning your outdoor space into a cozy retreat where you can kick back and enjoy movie nights under the stars? A rustic pallet frame for mounting your outdoor TV might just be the perfect DIY solution. It combines charm with functionality, giving your setup a warm, inviting vibe. Plus, it’s a budget-friendly way to add personality to your patio.
Imagine a weathered wooden frame made from reclaimed pallets, its rough edges softened by a light stain or whitewash. The texture of the wood adds rustic character, complemented by outdoor string lights draped around it. Your TV is mounted securely in the center, framed by the natural grain and imperfections of the wood. It creates a focal point that feels both cozy and stylish, perfect for outdoor movie nights.
You can customize the pallet frame with color washes, distressed finishes, or even incorporate decorative hooks and shelves. For a more modern twist, paint the pallets in bold colors or geometric patterns. Seasonal accessories like lanterns or fabric banners can also change the vibe. No matter the style, this DIY project adapts well to small balconies, large patios, or poolside setups.
Start by sourcing weather-resistant pallets or treating regular wood with sealant. Disassemble the pallets and reassemble them into a rectangular frame using outdoor-grade screws. Sand the surfaces lightly for a smoother finish, then stain or paint as desired. Mount your TV using a secure bracket, ensuring the wall area behind can support the weight. Add hooks or small shelves for outdoor essentials like remotes or drinks. Double-check stability before enjoying your outdoor cinema.
Personalize your pallet frame with decorative touches like metal accents, stenciled patterns, or even a built-in shelf for speakers. Incorporate weatherproof cushions or fabric elements to soften the look. You can also add a chalkboard panel for notes or menus, making it more interactive. The key is blending rustic charm with your personal style for a truly unique setup.
This DIY pallet frame proves that you don’t need to be a master carpenter to craft something stylish and functional. It’s a project that’s forgiving for beginners and rewarding once complete. Imagine hosting backyard movie nights with friends, all while showcasing your creative flair. Your outdoor space becomes a conversation piece and a personal oasis, all thanks to a bit of reclaimed wood and some DIY spirit.
2. Modern Metal TV Enclosure with Ventilation
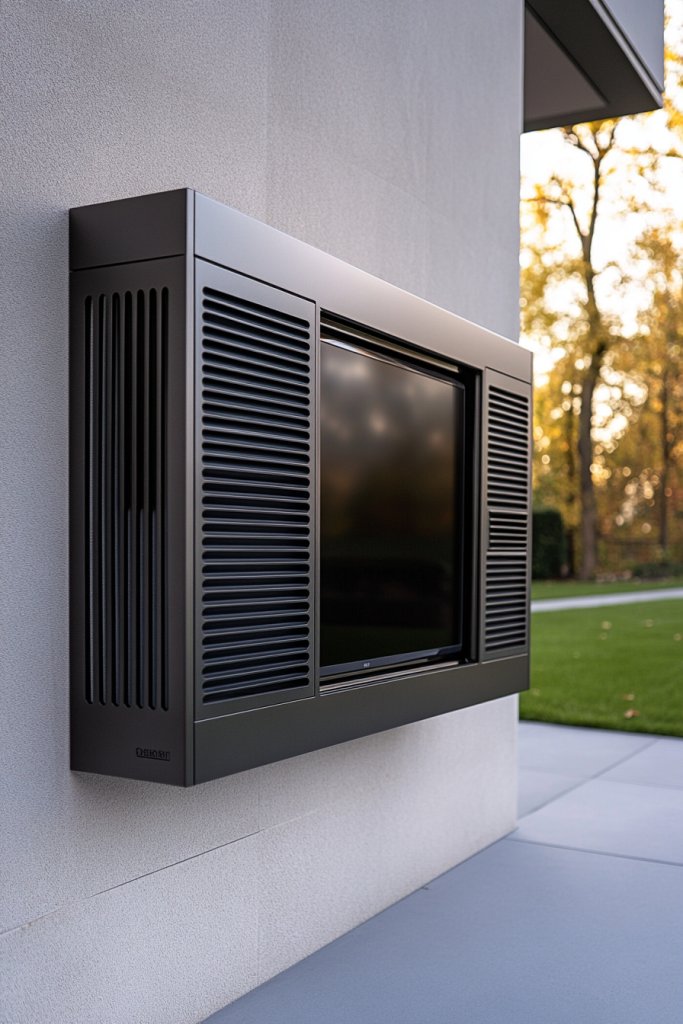
Ever worry about your outdoor TV getting fried by the sun or soaked during unexpected rain? A sleek, modern metal enclosure with proper ventilation could be your answer. It offers a stylish protective shell that keeps your tech safe without sacrificing aesthetics. Plus, it’s a DIY project that adds a contemporary touch to your outdoor setup.
Picture a minimalist metal box, finished in matte black or brushed aluminum, with clean lines and sharp edges. The enclosure surrounds your TV, leaving enough space for airflow and heat dissipation. Ventilation slots or mesh panels are incorporated seamlessly into the design, preventing overheating. The enclosure stands out as a modern architectural element, blending industrial style with outdoor durability.
You can customize the enclosure with colors that match your patio decor or add decorative cutouts for a more artistic look. For a warmer vibe, combine metal with wooden accents or incorporate LED lighting for nighttime ambiance. The enclosure can be built to fit various TV sizes or adapted to include additional storage compartments. It’s versatile enough for small balconies or large backyard patios.
Begin by measuring your TV and designing a frame that allows for airflow and easy access. Use weatherproof metal sheets, cut to size with a metal saw or shears. Weld or fasten the panels together, ensuring the enclosure is sturdy and well-ventilated. Drill ventilation slots or attach mesh panels where necessary. Mount the TV inside with a secure bracket, making sure cables can run through protected channels. Seal all edges to prevent water ingress, and add rubber gaskets if needed.
Enhance the enclosure with custom paint, textured finishes, or even stencil designs. Incorporate magnetic panels for easy access or removable sections for maintenance. For added style, attach outdoor-rated handles or hinges that match your decor theme. You can also add a weatherproof cover or shield to protect the TV during severe weather.
A metal enclosure combines durability with modern design, making it a statement piece as well as a protector. It’s a project that’s achievable with basic metalworking skills and tools. Once installed, it offers peace of mind during storms or scorching heat, letting you enjoy outdoor entertainment worry-free. This DIY upgrade transforms your outdoor TV into a sleek, industrial focal point that impresses everyone.
3. Faux Stone Wall Surround for a Natural Aesthetic
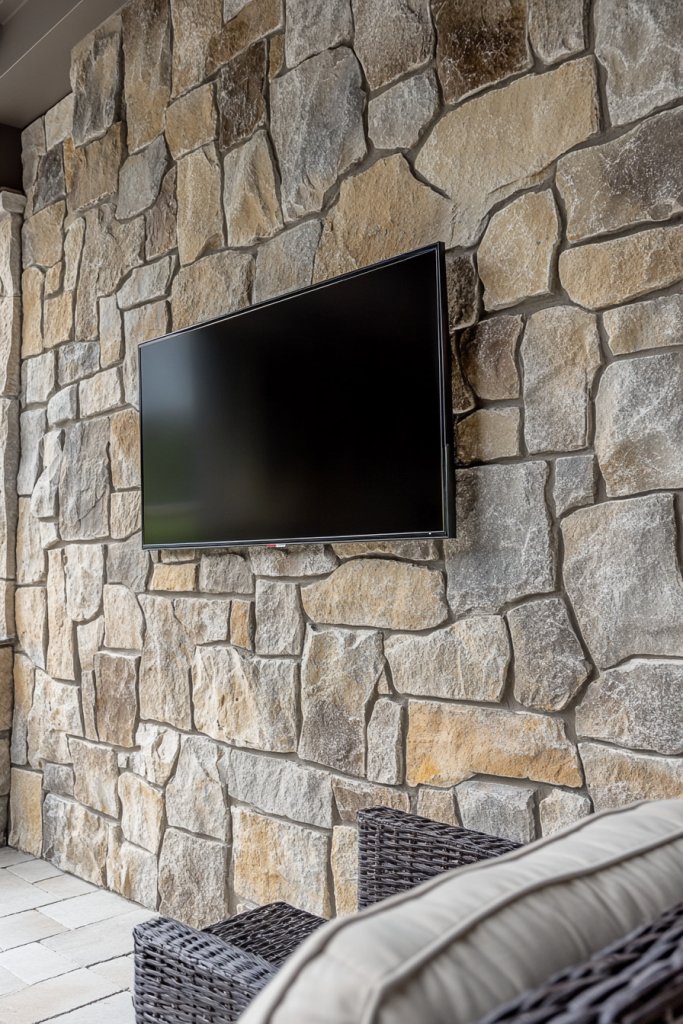
Looking to elevate your outdoor entertainment area with a touch of nature? A faux stone wall surround creates a sophisticated backdrop that mimics the beauty of real stone without the weight or cost. It adds texture and visual interest, making your outdoor TV the centerpiece of a stylish natural oasis.
Visualize a lightweight wall panel made from foam or concrete veneer, textured to resemble natural stone. The panels are arranged in a pattern that mimics irregular stones, with mortar lines carefully painted or sealed. The surface has a rough, tactile feel, inviting touch and adding depth to your outdoor space. Ambient lighting highlights the textured surface, especially at dusk, creating a cozy, upscale atmosphere.
Choose from various stone styles—rough-hewn, stacked slate, or smooth river stones—to match your aesthetic. Apply different paint washes or stains to customize the color palette. The faux stone wall can be built as a standalone feature or as part of a larger outdoor feature wall. It’s adaptable for small alcoves or entire backyard facades, depending on your space and taste.
Start by selecting lightweight panels designed for outdoor use. Attach the panels securely with outdoor-rated adhesive or mechanical fasteners, ensuring they’re aligned properly. Use a level and spacers to maintain even mortar lines or grout effects. Seal all seams with weatherproof caulk to prevent water infiltration. Mount your TV on the center of the wall using a heavy-duty bracket, making sure cables are concealed behind the panels for a clean look. Finish with weatherproof paint or sealant for added protection.
Decorate the faux stone surface with built-in shelves or niches to hold outdoor decor, speakers, or lighting fixtures. Incorporate LED strip lighting along the edges for a dramatic effect. For extra texture, add sculptural elements like carved stones or faux vines (if permitted). Personal touches make the wall uniquely yours, blending natural beauty with functional design.
A faux stone wall offers a high-end look without the weight or expense of real stone, perfect for DIY enthusiasts. It instantly elevates your outdoor space, making it feel like a rustic retreat or a modern lodge. With some patience and attention to detail, you can craft a stunning backdrop that will impress guests and enhance your outdoor movie nights or sports viewing marathons.
4. Reclaimed Wood Pergola with Built-in TV Niche
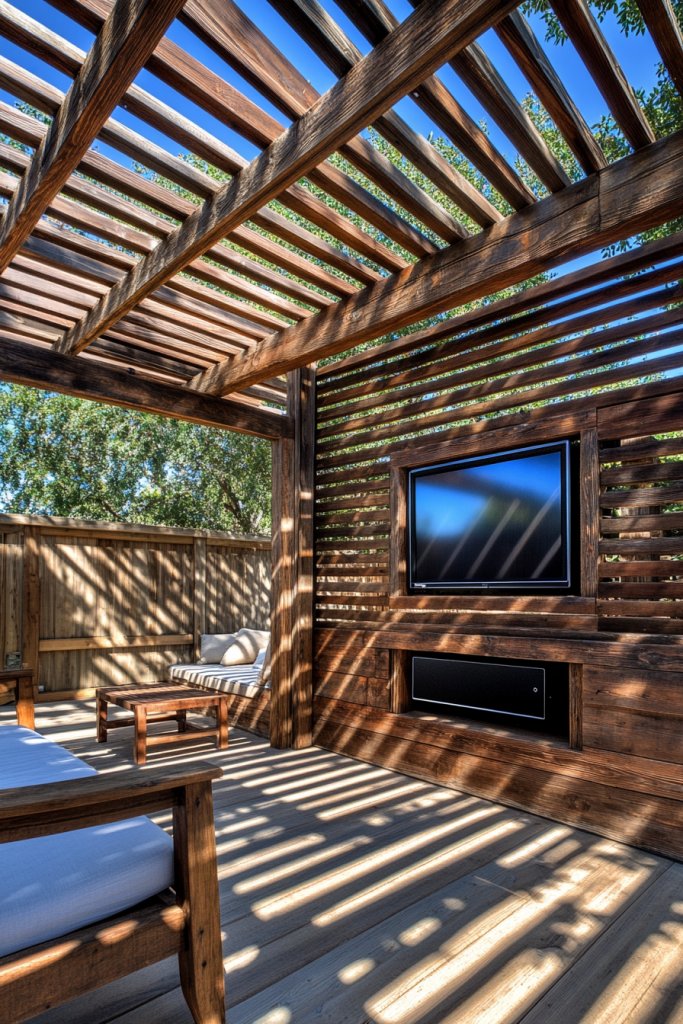
Ever wished for a shaded outdoor space that feels both stylish and functional? A reclaimed wood pergola with a built-in TV niche offers the perfect solution. It combines shelter, privacy, and entertainment in one DIY project, transforming your backyard into an outdoor living room. Plus, using reclaimed wood adds eco-friendly charm.
Picture a sturdy pergola made from weathered, reclaimed beams, with a slatted roof that filters sunlight and creates dappled shade. The structure frames your outdoor TV, nestled in a dedicated niche that’s part of the supporting posts or a decorative side panel. String lights or outdoor lanterns hang from the beams, enhancing the rustic ambiance. The overall effect is a cozy, inviting space where friends gather for films or sports.
Customize the pergola with different finishes—natural, stained, or painted—to match your decor. Add side curtains or outdoor fabric drapes for privacy and style. For colder seasons, incorporate a removable clear plastic or glass roof panel. The size and height of the pergola can be adjusted to fit your yard, and the TV niche can include built-in shelves or sound systems for extra flair.
Begin by sourcing reclaimed wood from local sources or salvaged pallets. Treat the wood with weatherproof sealant, then cut and assemble the beams using outdoor-grade hardware. Build the frame on a level surface, ensuring stability with concrete footings or anchors. Create a niche by framing a recessed section within the supporting posts, reinforced for safety. Mount your outdoor TV using a weatherproof bracket, and run cables through protective conduits. Finish by adding decorative elements like lattice or climbing plants.
Personalize your pergola with hanging planters, decorative stones, or custom signage. Add a weatherproof cushion or seating inside to make it more inviting. Incorporate a retractable shade or canopy to control sunlight, and install outdoor speakers for full audio-visual experience. Experimenting with different stains or paint colors can also make your pergola uniquely yours.
A reclaimed wood pergola with a built-in TV niche blends sustainability with style, creating a focal point in your outdoor space. It’s a project that’s accessible for DIYers with basic carpentry skills and offers long-term value. Imagine hosting weekend movie nights or watching the game in your own backyard theater—your friends will be jealous of your outdoor upgrade!
5. Vinyl Banner Screen for a Budget-Friendly Setup
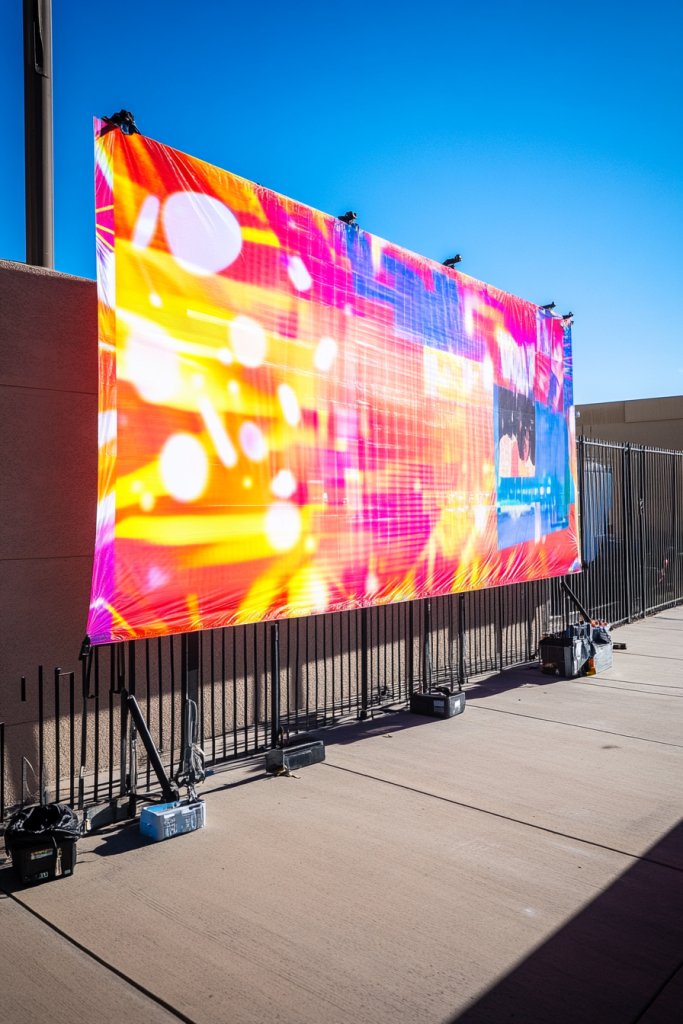
Looking for a quick, affordable way to create a large outdoor screen? Vinyl banners are an easy DIY hack that can turn any wall or fence into a vibrant entertainment zone. They’re perfect for renters or anyone wanting a temporary solution that doesn’t require heavy construction. Plus, they’re super budget-friendly and customizable.
Visualize a bright, weatherproof vinyl banner stretched tightly across a sturdy frame or attached directly to a fence. The banner features bold graphics, colorful designs, or even custom prints that make your outdoor setup pop. It acts as a giant canvas for your movie or sports events, with the wind gently fluttering the edges. The vibrant colors and lightweight material make it easy to swap out for different themes or seasons.
Use multiple banners to create layered or collage effects, or add fabric or string embellishments for a more decorative look. Change the banners for holidays or special occasions, like Halloween or summer parties. Attach the banners with zip ties, bungee cords, or grommets to hooks or poles. For a more permanent feel, secure them with outdoor adhesive or clips, depending on your setup.
Choose a high-quality, weather-resistant vinyl banner with UV protection. Measure the area you want to cover and cut the banner accordingly, adding extra for hems and grommets. Attach grommets along the edges, then secure the banner with heavy-duty hooks, zip ties, or bungee cords. For larger screens, build a simple frame from PVC pipes or scrap wood to hold the banner taut. Ensure the setup is stable and resistant to wind or rain. Finally, connect your outdoor speakers or sound system for an immersive experience.
Personalize your banner with custom logos, photos, or artwork that reflect your style. Add string lights along the top or sides for illumination at night. You can also use fabric paint or markers to draw or write on the banner for a personal touch. Layering multiple banners or combining with other decorative elements can make your outdoor cinema truly unique.
A vinyl banner screen is a game-changer for those who want a flexible, inexpensive entertainment setup. It’s perfect for quick projects or temporary installations, offering instant impact. With a little creativity, you can create a lively outdoor space that rivals commercial setups, all without breaking the bank or needing specialized skills.
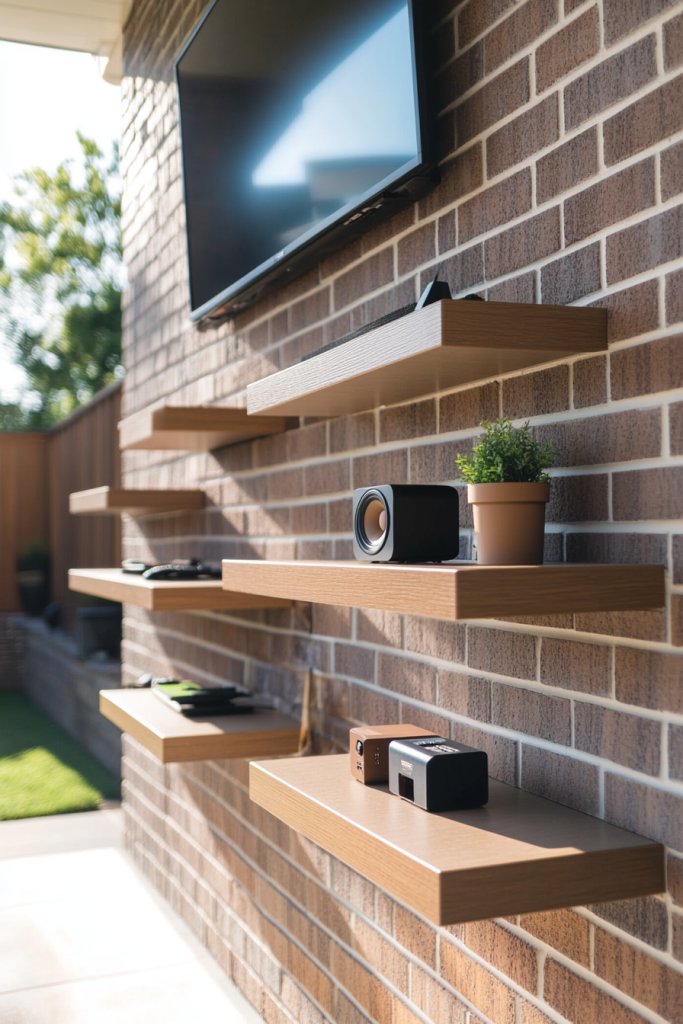
6. Floating Shelf Mount with Decorative Cables
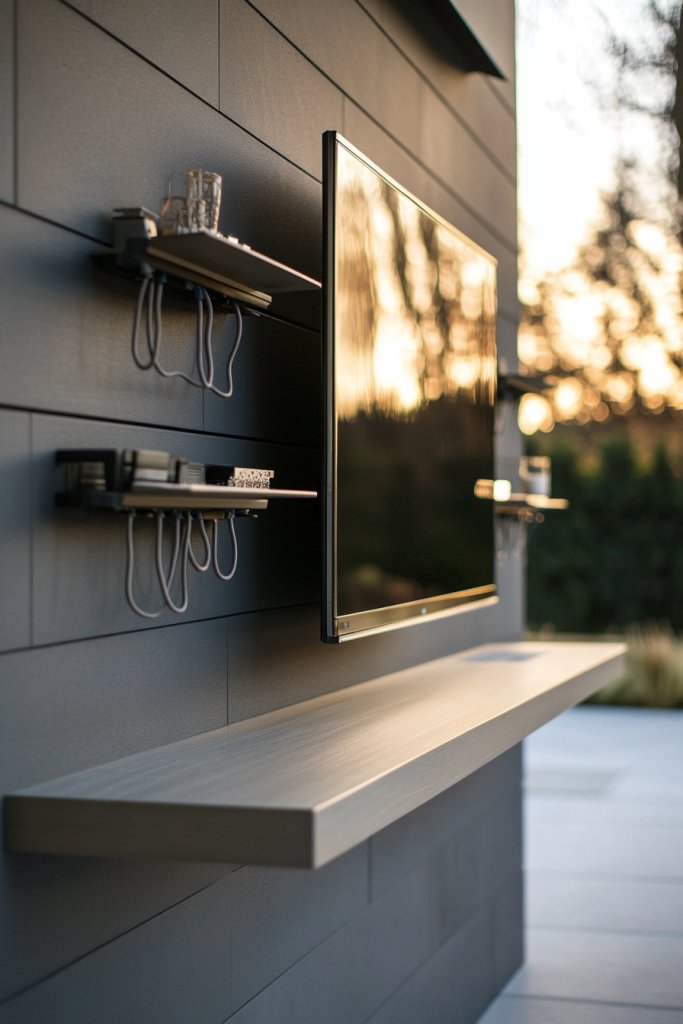
Tired of cluttered setups and tangled wires ruining your outdoor vibe? A floating shelf mount for your TV, combined with decorative cables, offers a sleek, modern solution. It keeps your tech organized while adding a minimalist aesthetic to your outdoor space. Plus, it’s an easy DIY project that upgrades your entertainment area instantly.
Picture a sturdy, weatherproof floating shelf made from treated wood or composite material, mounted directly to your wall or fence. The TV sits securely on the shelf, with cables neatly running down inside decorative conduit or cable sleeves. Elegant, braided or fabric-wrapped cables add a touch of style, hiding unsightly wires. The clean lines and hidden wiring create a seamless, contemporary look that invites relaxed lounging.
Choose from different shelf styles—slim, wide, or multi-tiered—to suit your space. Color-match the shelf and conduit with your outdoor decor for a cohesive look. Incorporate LED accent lighting beneath the shelf or along the cables for a subtle glow. For a more rustic or eclectic vibe, opt for reclaimed wood and colorful fabric-wrapped cords. This setup adapts easily to small patios, porches, or large backyard walls.
Mount the shelf using weather-resistant brackets and anchors suited for your wall material. Run the cables through decorative conduits or sleeves, securing them with zip ties or clips. Use cable management clips to keep everything tidy and out of sight. Attach your TV securely to the shelf with a compatible bracket, ensuring the weight is evenly distributed. Conceal power cords and auxiliary cables inside the conduit for a polished appearance. Test stability and cable routing before finalizing.
Personalize by painting or staining the shelf to match your outdoor furniture. Add decorative elements like woven baskets or small planters on the shelf for extra flair. Swap out cables for different colors or textures to match seasonal themes. Installing a weatherproof power strip or surge protector can extend your setup’s lifespan and functionality.
This floating shelf approach proves that you can enjoy a clutter-free, stylish outdoor entertainment zone without complex wiring. It’s a smart choice for DIYers who want a clean look with minimal effort. Imagine relaxing on your patio, watching your favorite show, with everything perfectly organized and out of sight—an outdoor upgrade worth bragging about.
7. DIY Canvas Cover for Weather Protection
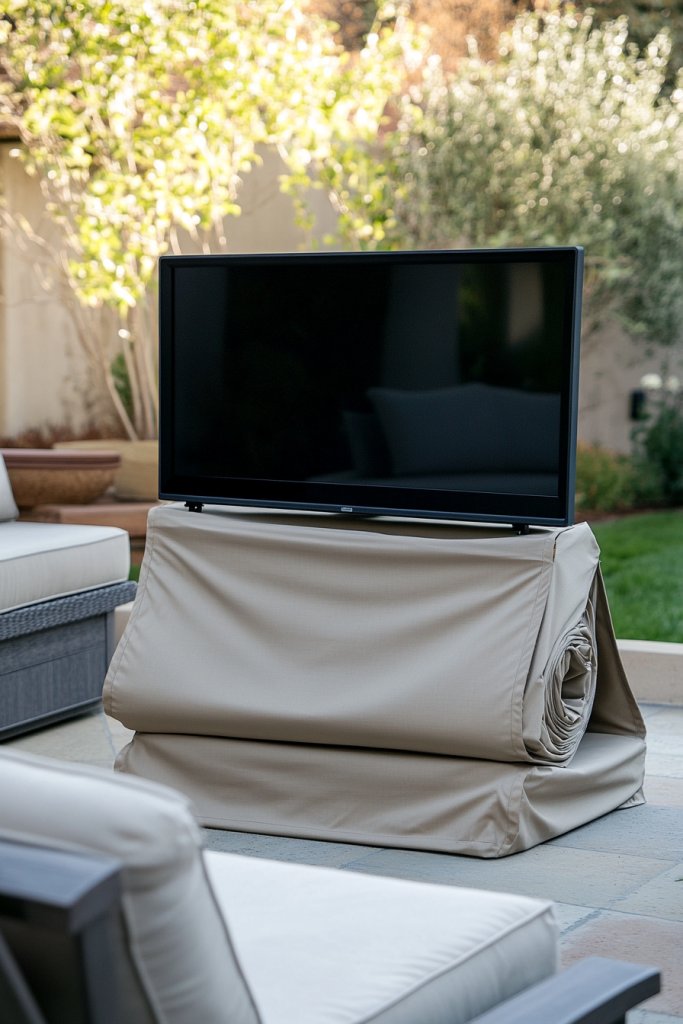
Ever been caught off guard by a sudden rain or harsh sun while binge-watching outdoors? A DIY canvas cover offers a simple, effective way to protect your outdoor TV from weather damage. It’s a practical project that keeps your tech safe and your viewing experience uninterrupted. Plus, it’s an affordable way to extend the life of your equipment.
Imagine a rugged, waterproof canvas draped over your TV, secured with straps or elastic edges. The cover is large enough to shield the entire screen and some surrounding equipment, with adjustable ties or snaps for easy removal. When not in use, it folds neatly into a storage bag or hangs on a hook nearby. During storms or intense sunlight, it provides a barrier that keeps your outdoor setup looking fresh and functional.
Choose canvas fabrics in colors that blend seamlessly with your outdoor decor or stand out as a statement piece. For seasonal variations, opt for lighter, breathable fabrics or insulated options for colder months. Add reflective strips or waterproof zippers for extra durability. You can also personalize your cover with stenciled patterns or outdoor logos for a custom touch. It adapts well to various outdoor furniture styles and can be used for other electronics too.
Measure your TV and surrounding area carefully to cut the canvas to size with some extra allowance. Sew or attach waterproof tape along the edges for reinforcement. Use grommets or hooks to secure the cover to existing fixtures or poles. Attach adjustable straps or bungee cords to keep it tight and prevent flapping in the wind. Store the cover in a dry place when not in use, and clean it regularly to maintain waterproofing. Test the fit in different weather conditions to ensure full coverage.
Decorate the cover with reflective piping, patches, or outdoor decals for a personalized look. Incorporate handles or loops for easy removal. Consider adding a small vent or mesh panel to prevent condensation buildup inside. Pair the cover with a matching outdoor storage box or cabinet for a cohesive aesthetic. This simple upgrade boosts your outdoor experience and protects your investment.
A DIY canvas cover is a game-changing accessory that combines practicality with customization. It’s a straightforward project perfect for beginners and offers peace of mind during unpredictable weather. Now, you can relax knowing your outdoor TV is shielded from rain, sun, and dust—making outdoor entertainment more reliable and enjoyable.
8. Hanging Wooden Frame with Rope Support
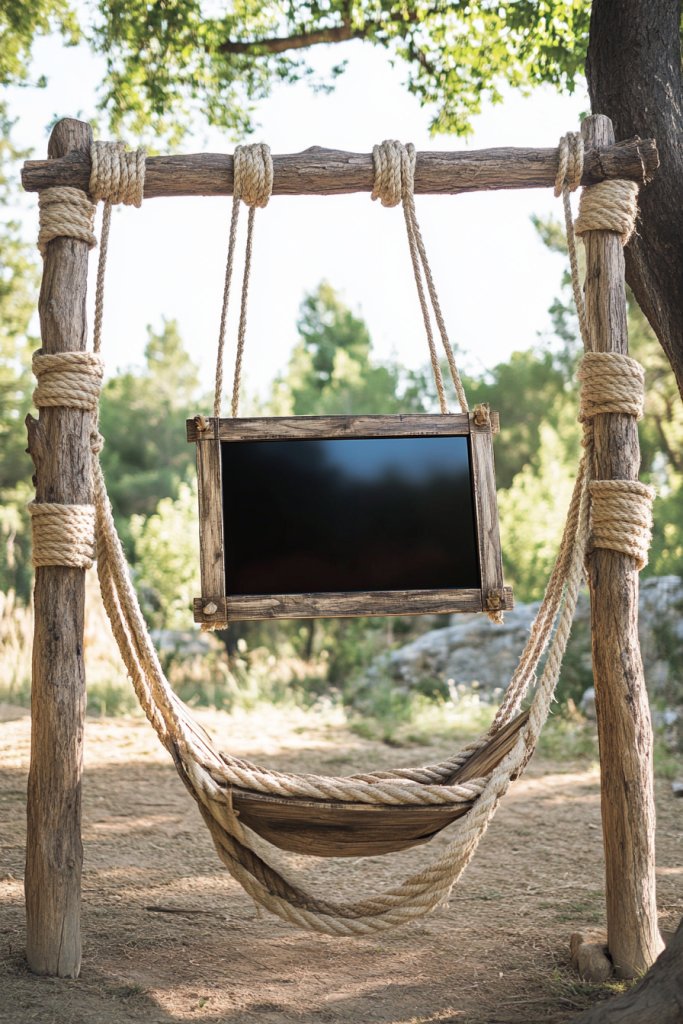
Looking for a boho-chic, suspended outdoor TV setup that’s both stylish and functional? A hanging wooden frame supported by thick ropes might be just what you need. It creates a relaxed, hammock-like vibe while securely holding your TV in place. Plus, it’s a fun DIY project that adds a touch of rustic elegance.
Visualize a sturdy wooden frame, crafted from weatherproofed timber, hanging from sturdy posts or beams. Thick, decorative ropes run from the top corners of the frame to overhead anchors, creating a gentle sway. The TV is mounted within the frame, surrounded by natural wood textures and draped fabrics or lights. This setup looks like a floating art piece, blending outdoor comfort with artistic flair, perfect for casual movie nights.
You can paint or stain the wood to match your outdoor decor or leave it natural for a raw look. Add woven or fabric curtains that can be drawn for privacy or shade. Incorporate string lights or lanterns along the ropes for ambiance. Adjust the length of the ropes for different heights, or add decorative knots for a personalized touch. It works well in large yards, patios, or even garden nooks.
Start by building or sourcing a weatherproof wooden frame with secure mounting points. Attach heavy-duty eye bolts or D-rings at each corner. Tie thick, weather-resistant ropes through the support points and anchor them overhead using hooks or beams. Make sure the ropes are tight and balanced to prevent sway or tilting. Mount your outdoor TV inside the frame with a secure bracket, and run cables through protective conduits. Test the setup for stability and adjust as needed.
Decorate the wooden frame with carvings, paint, or decals for a personalized look. Wrap the ropes with colorful or textured cords for visual interest. Add small planters or decorative elements on the frame’s edges for a lush feel. Consider installing a weatherproof cushion or seat beneath for lounging. The key is combining rustic charm with your personal style for a unique outdoor entertainment corner.
This hanging wooden frame with rope support turns your outdoor TV into a feature that’s both functional and artistic. It’s an achievable project that adds a laid-back, boho vibe to any yard. Once finished, you’ll enjoy watching movies or sports in a space that feels both inviting and stylish—proof that DIY can create truly stunning results.
9. Brick-Patterned Wall Panel for a Classic Look
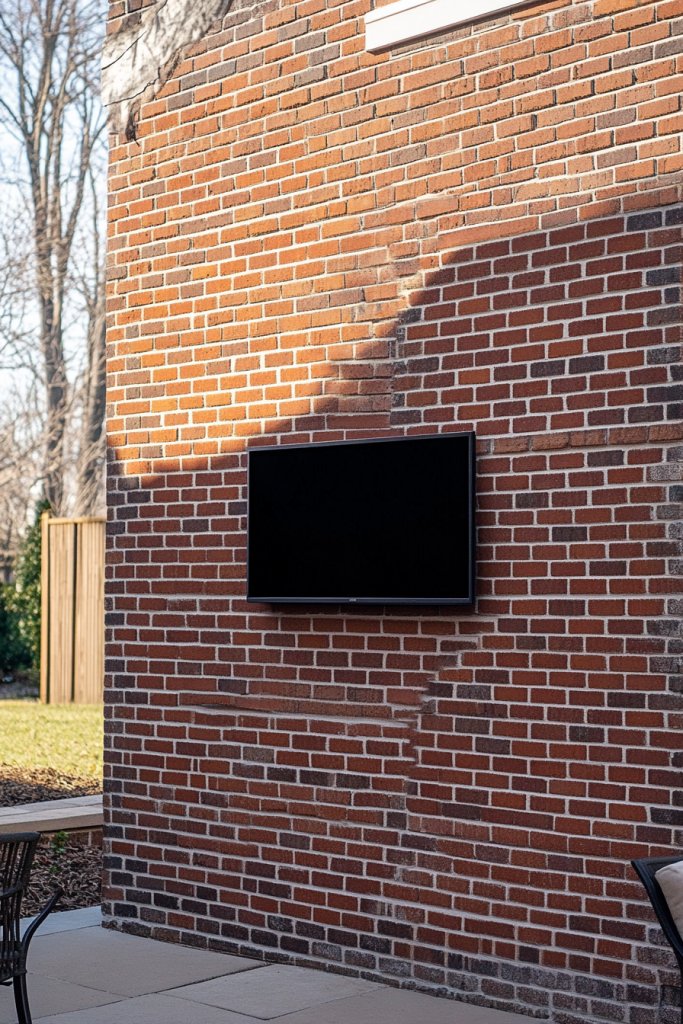
Ever want to add a timeless, classic touch to your outdoor entertainment area? A brick-patterned wall panel can do just that, offering a durable yet stylish backdrop for your outdoor TV. It’s a simple way to elevate your space without the weight and expense of real bricks. Plus, it’s a DIY project that can be customized to suit your aesthetic.
Imagine a wall covered with peel-and-stick brick panels or painted concrete that mimics the look of real bricks. The pattern adds texture and depth, creating a sense of permanence and craftsmanship. The surface is slightly rough to the touch, with a natural variation in color that mimics aged brickwork. Your TV sits proudly against this backdrop, instantly transforming your outdoor space into a charming, classic scene. Soft lighting from sconces or string lights enhances the brick’s rustic appeal.
Choose between traditional red bricks, whitewashed, or even modern gray tones to match your decor. You can install the panels as a full wall or as a feature behind your TV. For a more eclectic look, combine brick panels with wood or metal accents. Seasonal tweaks like adding faux vines or greenery can soften the look without overshadowing the classic brick style. It’s adaptable for small niches or entire backyard walls.
Clean and prepare the wall surface thoroughly. Peel-and-stick panels are easiest—simply align and press into place, ensuring no air bubbles. For painted concrete, use weatherproof paint and stencil the brick pattern carefully. Seal all seams with weatherproof caulk or grout for longevity. Mount the TV using a heavy-duty bracket, making sure it’s centered and level. Conceal cables behind the panels or run them through protected conduits for a clean finish. Regular maintenance involves cleaning the surface and inspecting for any peeling or damage.
Add decorative elements like vintage lanterns, wrought iron fixtures, or signage to complement the brick backdrop. Incorporate built-in shelves or niches within the brick wall for speakers or outdoor décor. Change lighting accents seasonally to match holidays or moods. Personal touches like painted murals or stenciled patterns can make your brick wall more unique. It’s a versatile, long-lasting feature that combines style with function.
A brick-patterned wall panel combines timeless beauty with DIY practicality, elevating your outdoor entertainment area instantly. It’s a project suitable for beginners with patience and attention to detail. Once complete, it creates a cozy, inviting atmosphere that feels curated and intentional. Now, you’re ready to host outdoor movie nights in style—proof that classic design can be DIY done.
10. Vinyl Clad Outdoor Cabinet for Concealed Storage
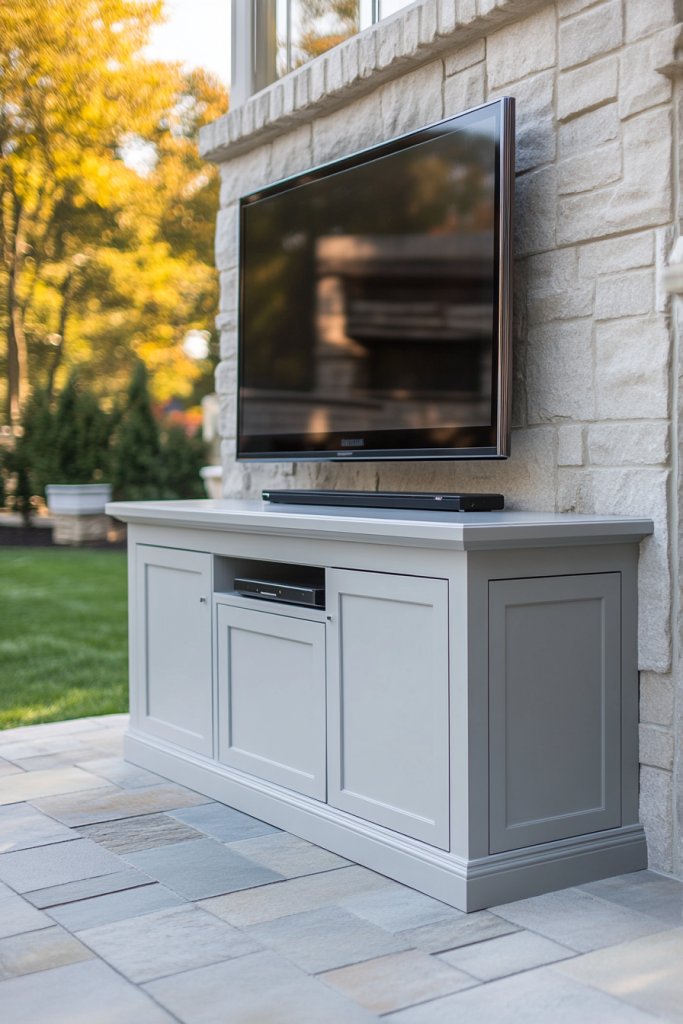
Tired of clutter around your outdoor TV setup? A vinyl clad outdoor cabinet offers a sleek, hidden storage solution that keeps your accessories organized and out of sight. It’s a practical yet stylish way to protect your gear from weather and dirt. Plus, building it yourself means customization and savings.
Visualize a sturdy cabinet with weatherproof vinyl siding, seamlessly blending with your patio decor. The cabinet doors hide compartments for remote controls, cables, or even small speakers. The surface looks smooth and uniform, with clean lines and minimal hardware. The cabinet sits flush against the wall or fence, maintaining a tidy, modern appearance. Its door handles are sleek and weather-resistant, adding to the streamlined look.
Customize the cabinet with different vinyl colors, textures, or patterns to match your outdoor theme. Add open shelves or hooks outside for quick-access items like grilling tools or outdoor movies. The size can be scaled up or down depending on your storage needs. Incorporate a built-in work surface or countertop for convenience. It’s adaptable to various yard sizes and can double as a small bar or prep station.
Construct the cabinet frame from weatherproof wood or metal, then attach vinyl siding using outdoor adhesive or fasteners. Seal all edges and seams with weatherproof caulk to prevent water infiltration. Install shelves or compartments inside, reinforced for weight. Mount your TV on a sturdy, waterproof bracket inside or on the front panel. Ensure proper ventilation and easy access for maintenance. Finalize by adding weather-resistant handles and locks for security.
Decorate the exterior with custom decals, stencils, or painted accents. Incorporate lighting inside or outside the cabinet for night visibility. Add magnetic strips or hooks on the outside for tools or accessories. Personalize with your favorite colors or themes to match your outdoor decor. It’s a functional piece that can be designed to reflect your style and needs.
A vinyl clad outdoor cabinet protects your investment while maintaining a clean, modern look. It’s a straightforward project that provides long-term benefits and peace of mind. Once finished, your outdoor entertainment area becomes more organized and stylish—proof that DIY solutions can be both practical and attractive.
11. Corrugated Metal Wall for a Contemporary Vibe
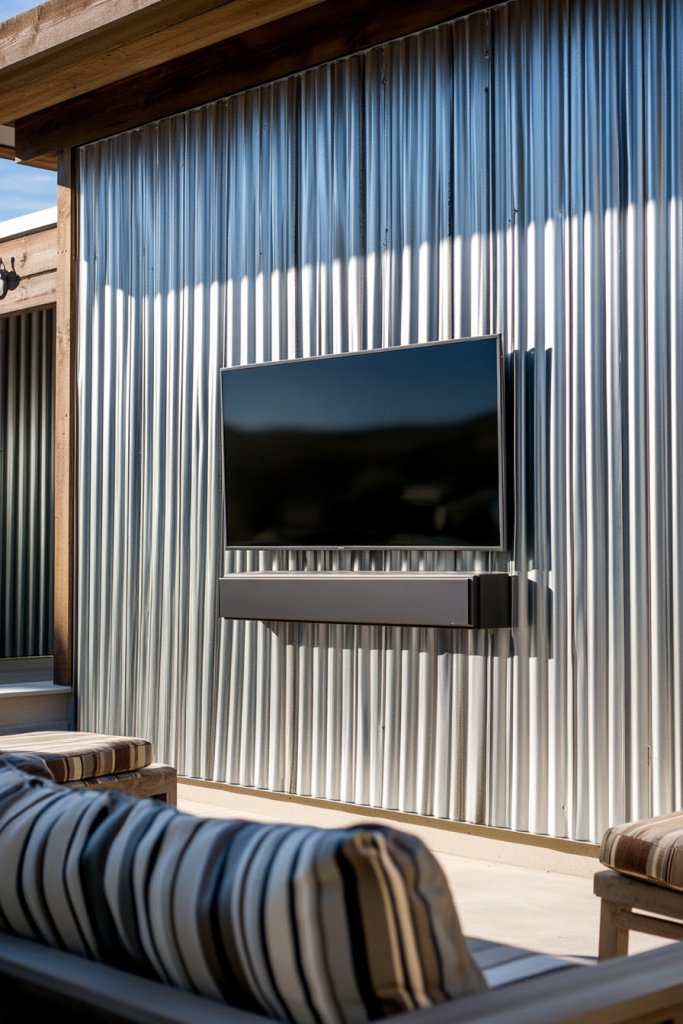
Craving an edgy, industrial look for your outdoor TV setup? A corrugated metal wall provides a bold backdrop that’s both durable and stylish. It’s perfect for modern patios or urban gardens seeking a sleek, minimal aesthetic. Plus, installing it yourself is a rewarding challenge for DIY enthusiasts.
Picture a wall covered in galvanized or painted corrugated metal sheets, arranged in vertical or horizontal patterns. The textured surface adds depth and character, reflecting light in interesting ways. Your TV is mounted in the center, with cables hidden behind the metal panels. The overall effect is a chic, industrial vibe that complements concrete, brick, or wood accents, creating a striking focal point.
Choose from different finishes—rusted, painted, or galvanized—to match your aesthetic. Combine with reclaimed wood or stone elements for contrast. You can install the sheets as a feature behind the TV or as part of a larger wall design. Add outdoor lighting or sconces to enhance the metallic sheen and ambiance. The setup works well in small niches or as a large statement wall.
Start by measuring your space and selecting weatherproof corrugated metal sheets. Attach the panels to a sturdy frame or directly to a wall with outdoor-rated fasteners. Ensure proper alignment and secure attachment to prevent warping or detachment. Conceal wiring by running cables behind the panels through drilled holes or conduits. Mount the TV securely with a heavy-duty bracket, ensuring cables are hidden or routed neatly. Finish with protective coatings if desired.
Decorate with outdoor-rated decals, stencils, or painted patterns for added personality. Install exterior lighting fixtures to highlight the metal texture at night. Pair with industrial-style furniture or accessories to complete the look. Personal touches like vintage signs or custom logos can make your metallic accent stand out. It’s a bold, low-maintenance feature that elevates your outdoor space.
A corrugated metal wall delivers a modern, edgy vibe that’s easy to maintain and highly durable. It’s a project suited for confident DIYers ready to tackle metalwork. The result is a stunning, contemporary backdrop that impresses guests and enhances your outdoor entertainment area. It’s proof that bold design and DIY craftsmanship go hand in hand.
12. DIY Faux Fireplace with Built-in TV Niche
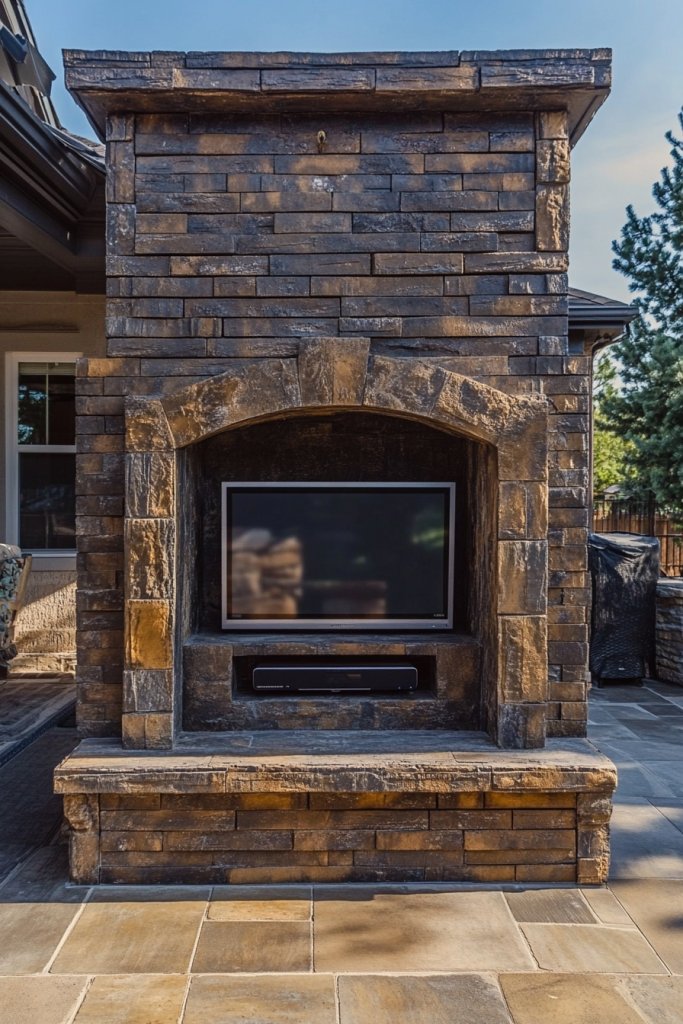
Ever wish your outdoor space felt more like a cozy retreat? A faux fireplace with a built-in TV niche can turn that dream into reality. It adds warmth, ambiance, and a focal point for gatherings. Plus, it’s a DIY project that combines craftsmanship with outdoor comfort.
Imagine a sturdy structure made from wood or concrete, finished with faux stone or brick veneer. The fireplace features a recessed niche designed specifically for your outdoor TV, with a mantel for decorative accessories. The surface is textured and weatherproofed, creating a warm glow when lit by string lights or lanterns. It’s a charming centerpiece that invites relaxation and entertainment.
Decorate the faux fireplace with seasonal accents, like garlands, lanterns, or outdoor art. Use different finishes—painted, stained, or textured—to match your style. The built-in niche can include shelves or compartments for firewood, speakers, or decor. It adapts to various sizes, from small patio corners to large backyard focal points. You can also incorporate a built-in seating area or benches nearby.
Construct the base from weatherproof wood, brick, or concrete blocks. Finish with veneer or stucco for a realistic look. Build the niche with sturdy framing, reinforced for safety and stability. Mount your TV securely inside the niche with a weatherproof bracket, ensuring cables are concealed. Decorate the exterior with faux stone or brick veneer, sealing all seams against moisture. Add lighting and accessories to enhance the ambiance.
Accent your faux fireplace with decorative tiles, outdoor art, or personalized plaques. Incorporate LED lighting or flickering faux flames for added warmth. Use weatherproof cushions or outdoor seating nearby for comfort. Personal touches like family photos or custom signs make the space uniquely yours. It’s more than a TV setup; it’s an outdoor living feature.
A faux fireplace with built-in TV is a statement piece that combines style, warmth, and function. It’s achievable with basic DIY skills and materials. Once complete, it transforms your yard into a cozy, inviting space perfect for gatherings. This project proves that DIY can create luxurious, outdoor retreats with a bit of creativity.
13. Vertical Garden Frame with Integrated TV Mount
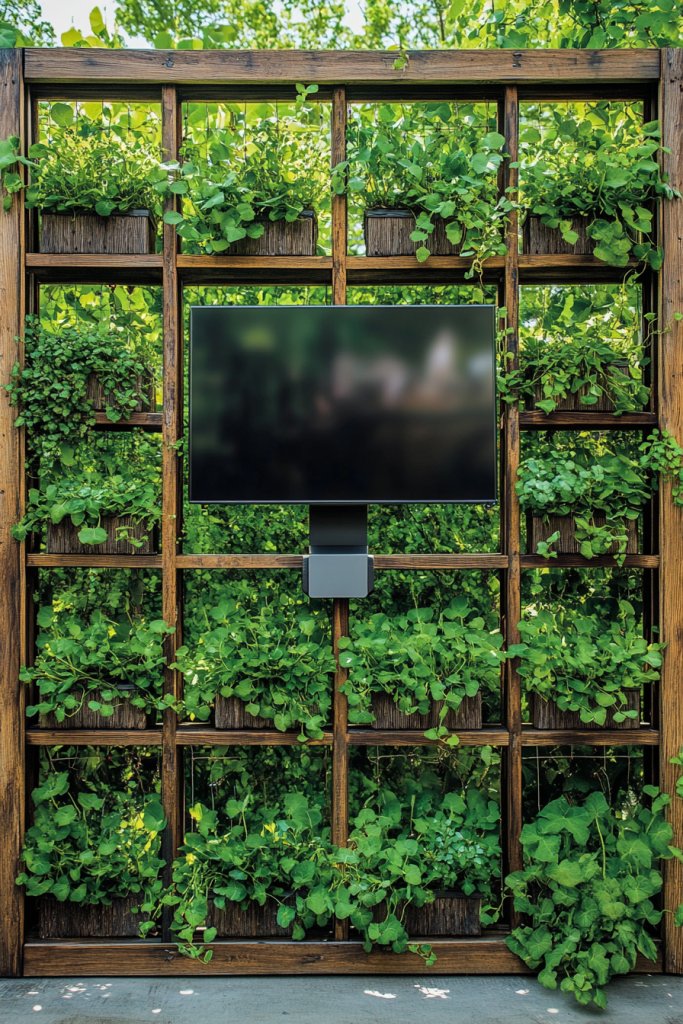
Want to bring a lush, green vibe to your outdoor entertainment area while keeping your tech safe? A vertical garden frame with an integrated TV mount offers a harmonious blend of nature and modern design. It’s a smart way to maximize space and create a stunning backdrop. Plus, it’s a DIY project that’s surprisingly doable.
Visualize a sturdy metal or wooden frame filled with weatherproof planters, arranged vertically against a wall or fence. The plants add a burst of greenery and life, while the integrated mount holds your outdoor TV securely. The combination of vibrant foliage and sleek tech creates an inviting, natural ambiance. The space feels alive and dynamic, perfect for relaxing evenings or lively gatherings.
Select plants suited for outdoor conditions—succulents, herbs, or flowering plants—to suit your climate and aesthetic. Mix and match planter sizes for visual interest. Use decorative screens or trellises to add texture behind the garden frame. The setup can be scaled for small balconies or large backyard walls, with options for removable or modular planters. Seasonal plant swaps keep the look fresh.
Build or repurpose a weatherproof frame, attaching planters that can be easily removed or rearranged. Mount the TV on a sturdy, weatherproof bracket within the frame, ensuring cables are concealed. Arrange the plants in the planters, securing them with soil and irrigation systems if needed. Use weather-resistant materials and seal all joints to prevent water damage. Regular maintenance involves trimming plants and checking cable connections.
Decorate the frame with decorative stones, outdoor art, or personalized plant labels. Incorporate fairy lights or solar-powered LEDs for night-time ambiance. Use decorative mulch or stones around the planters for a finished look. Add small outdoor accessories like sculptures or lanterns to complement the lush greenery. It’s a living, breathing feature that combines nature with outdoor tech.
A vertical garden frame with integrated TV mount turns your outdoor space into a vibrant, inviting retreat. It’s a DIY project that’s as rewarding as it is beautiful. The combination of greenery and technology creates a fresh, modern vibe that elevates your entertainment experience. It’s proof that nature and innovation can coexist beautifully outdoors.
14. Upcycled Crate Wall for a Cozy, Vintage Feel
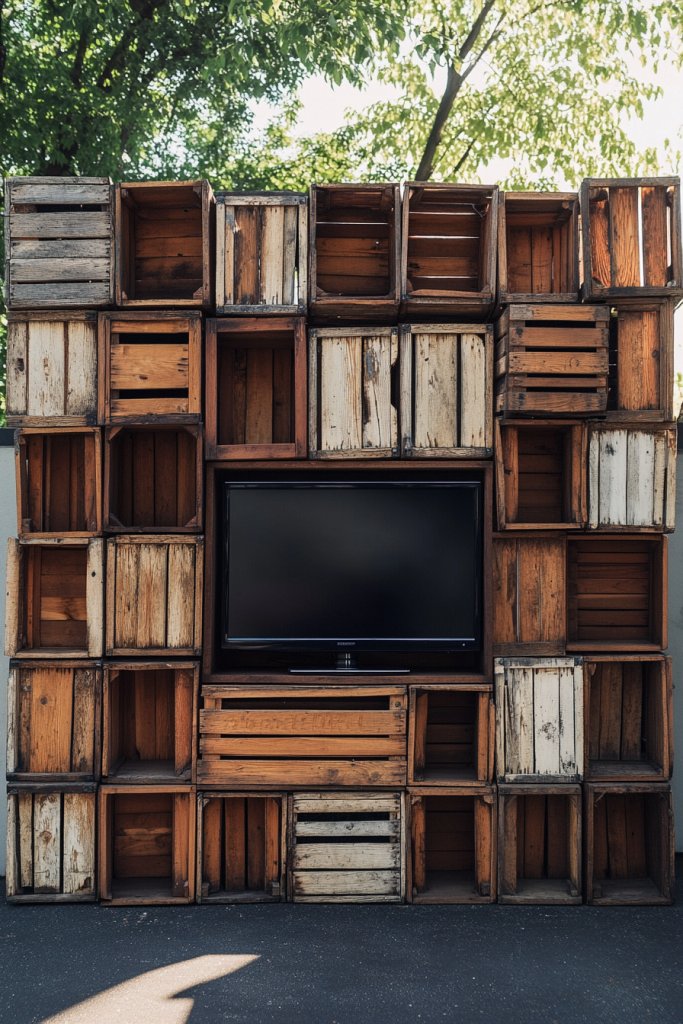
Looking to add a rustic, vintage charm to your outdoor space without breaking the bank? An upcycled crate wall offers a creative, eco-friendly way to do just that. It creates a cozy backdrop for your outdoor TV and storage while showcasing your DIY skills. Plus, it’s a fun project that recycles old wood into something stylish.
Imagine weatherproofed wooden crates arranged in a grid or random pattern, mounted on a wall or fence. The crates vary in size and finish, adding visual interest and texture. Inside or on top of the crates, you can place decorative items or outdoor essentials. The overall look is charmingly eclectic, with a vintage vibe that invites relaxed gatherings and movie nights. Soft lighting or string lights enhance the cozy atmosphere.
Paint or stain the crates in neutral or bold colors to match your decor. Layer the crates for added depth, or leave some open for easy access. Use them to hold outdoor accessories, or install small shelves inside for additional storage. The arrangement can be customized for small patios or large yards, and you can add decorative elements like fabric liners or vintage hardware. It’s adaptable and endlessly customizable.
Select weatherproofed crates or treat wood with outdoor sealant. Attach the crates to your wall using heavy-duty brackets and screws, ensuring they’re level and secure. Mount your outdoor TV on a central crate or on a dedicated wall mount nearby, hiding cables behind the crates or running them inside. Fill the crates with outdoor-friendly decor or storage baskets. Seal all joints and test stability before hosting your outdoor movie night.
Personalize with stenciled patterns, vintage labels, or personalized signs. Add fairy lights or lanterns for mood lighting. Incorporate outdoor cushions or pillows on top of the crates for seating. Use decorative hardware or metal accents to enhance the vintage feel. The crates become a functional, charming feature that reflects your personality.
An upcycled crate wall combines sustainability with style, transforming your yard into a cozy retreat. It’s a project that’s accessible for DIYers of all skill levels and offers a unique, handcrafted look. Once finished, it creates an inviting space perfect for outdoor movie nights or casual hangouts. Your creative reuse pays off with a distinctive, personal touch.
15. Concrete Block Wall with Hidden Wiring
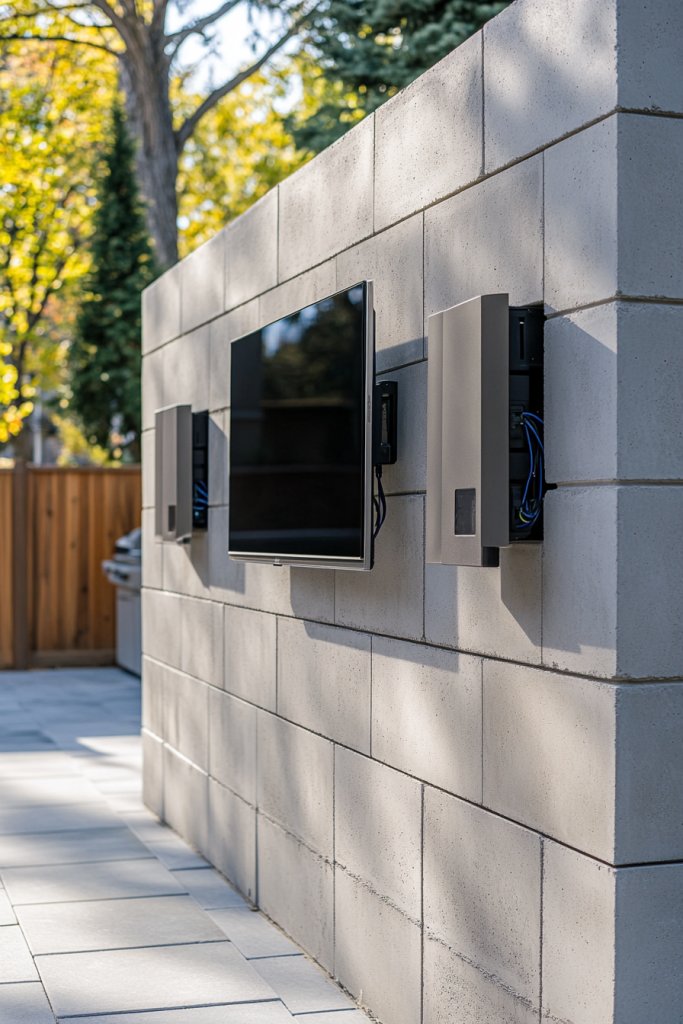
Ever wish your outdoor TV setup looked sleek and minimalist without exposed wires cluttering the view? A concrete block wall with hidden wiring can do just that. It’s a durable, modern solution that conceals cables and creates a clean backdrop. Plus, it’s a satisfying DIY project that adds a professional touch to your outdoor space.
Picture a sturdy wall built from uniform concrete blocks, neatly stacked and sealed for weather resistance. The wall’s surface is smooth, with no visible cables or hardware. Your TV is mounted flush against the blocks, with all wiring concealed behind the wall via drilled channels or conduits. The result is a sleek, minimalist look that emphasizes the screen and keeps clutter out of sight. Ambient lighting or wall sconces highlight the clean lines at night.
Use different colors or finishes—painted, stained, or textured—to match your outdoor decor. Incorporate built-in shelves or niches within the wall for speakers or decor items. The wall can be extended or segmented into sections for larger yards. For a more industrial look, leave the concrete exposed, or add decorative metal accents. It’s adaptable to various sizes and styles, maintaining a sleek profile.
Lay a solid foundation and build the wall from weatherproof concrete blocks, ensuring proper leveling. Drill channels or install conduit sections during assembly to run cables internally. Mount your TV using a heavy-duty, weatherproof bracket, anchoring it securely into the wall. Conceal all wiring by running it through the channels or behind the blocks, sealing with weatherproof caulk. Finish with protective coatings or paint for added durability. Regular inspection ensures longevity.
Add decorative elements like outdoor artwork, custom paint designs, or textured finishes. Install LED strip lighting along the top or within niches for nighttime ambiance. Incorporate weatherproof speakers or audio systems discreetly within the wall. Personalize with signage or thematic accents that suit your outdoor style. It’s a functional, sleek feature that elevates your entertainment area.
A concrete block wall with hidden wiring offers a clean, professional appearance that’s surprisingly easy to DIY with patience. It’s the perfect backdrop for a modern, minimalist outdoor setup. Once finished, your space will look polished, organized, and ready for movie nights or sports events—proof that simple materials can create stunning results.
16. Pergola with Built-in Speakers and TV Niche
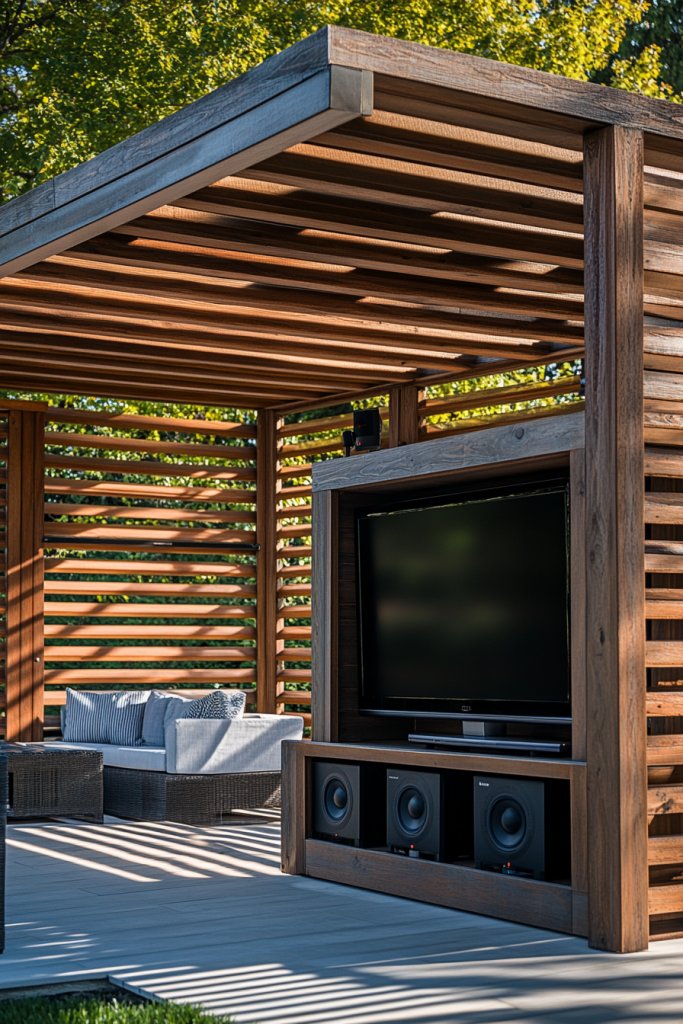
Dreaming of a stylish outdoor space where you can watch movies or listen to music in comfort? A pergola with built-in speakers and a dedicated TV niche offers just that. It’s a perfect blend of shade, sound, and visual entertainment, elevating your backyard into an outdoor lounge. Plus, it’s a DIY project that’s impressive and fun.
Imagine a sturdy wooden or metal pergola with a slatted roof that filters sunlight. Inside, a niche in one of the supporting posts or beams securely houses your outdoor TV, protected from weather. Built-in speakers are integrated into the structure, with sleek wiring concealed inside the beams. String lights or pendant fixtures hang from the rafters, completing a cozy, inviting atmosphere ideal for movie nights or outdoor concerts.
Adjust the size and height of the pergola to fit your yard or deck. Use weatherproof materials and finishes to match your decor—stained wood, painted metal, or composite. Incorporate retractable shades or curtains for added privacy or sun control. The integrated speakers can be high-end or budget-friendly, depending on your needs. It’s a flexible design that adapts to both small and large outdoor spaces.
Frame the pergola using weatherproofed beams, anchored securely into the ground or existing structure. Build or purchase a weatherproof TV niche with sturdy mounting brackets inside the support post. Run audio and cable wiring through conduit channels within the beams, concealing wires from view. Mount the speakers securely within the structure, ensuring optimal sound dispersion. Attach lighting fixtures, and test all electronics before final assembly. Seal all joints and test stability under wind or weather stress.
Personalize with decorative elements like custom signage, outdoor art, or themed accessories. Add cushions, outdoor rugs, or side tables for comfort. Use weatherproof fabric or roller shades to control sunlight. Integrate a small outdoor bar or prep area nearby for convenience. Creative lighting and sound setups can turn your pergola into a true outdoor entertainment hub.
A pergola with built-in speakers and TV niche creates a luxurious, functional outdoor living space. It’s a project that’s accessible for DIYers with basic carpentry and electrical skills. Once complete, it offers a perfect setting for gatherings and movie nights, making your yard the ultimate outdoor lounge. It’s proof that a DIY pergola can combine style, comfort, and entertainment seamlessly.
17. Tension Wire Frame for a Minimalist Look
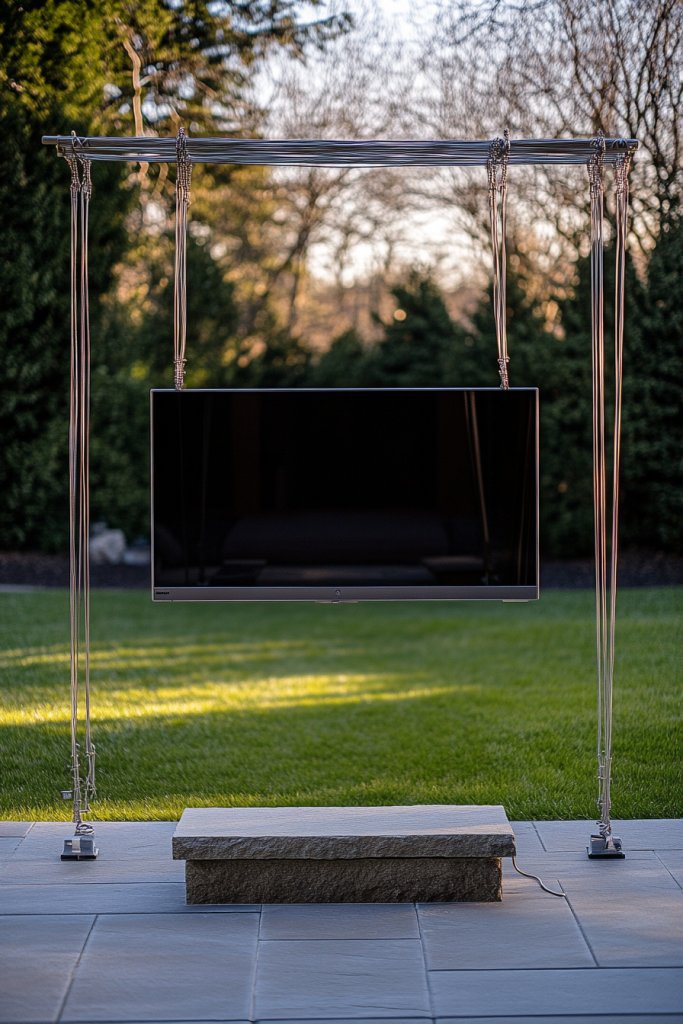
Craving a sleek, minimalist outdoor TV setup that feels almost invisible? A tension wire frame can hold your TV securely without bulky supports. It’s a modern, unobtrusive solution that emphasizes clean lines and open space. Perfect for small yards or contemporary patios, this DIY project makes a bold statement.
Imagine a frame made from stainless steel or weatherproof cable, stretched taut between sturdy anchor points. The cables support a slim, lightweight mount for your TV, which appears to hover in mid-air. The minimal hardware is almost invisible, drawing all attention to the screen itself. The open design creates a sense of spaciousness and modern elegance, especially when paired with neutral tones and simple furniture.
Adjust the tension and placement of the wires to suit your space and aesthetic. Use black or metallic cables to blend with your outdoor decor, or opt for colored coatings for a pop of contrast. Incorporate lighting along the wires for a dramatic effect at night. This setup works well with small, flat-screen TVs or even outdoor projectors for a cinematic feel. It’s adaptable for balconies, small patios, or large yards.
Install anchor points on sturdy walls, posts, or beams using weatherproof hardware. Run cables between the anchors, ensuring they are taut and level. Attach a weatherproof mount or bracket to hold your TV, then secure it to the tension wires with appropriate fittings. Conceal all cables within protective conduits or paint them to match the surroundings. Regularly check tension and stability, especially after storms or high winds.
Decorate with subtle lighting or color-coordinated cables to match your decor. Add small clips or hooks on the wires for accessories like outdoor speakers or small decorative elements. For seasonal flair, swap out lighting colors or add fabric wraps. Keep the look sleek and simple, letting the tension wire frame highlight your outdoor TV as a piece of modern art.
A tension wire frame exemplifies minimalist design that’s both functional and stylish. It’s a project that demands precise measurement and attention to detail but delivers a stunning, contemporary result. Once installed, you’ll enjoy a virtually invisible setup that elevates your outdoor entertainment. It’s proof that less truly can be more in outdoor design.
18. DIY Outdoor TV Cabinet with Storage Bench
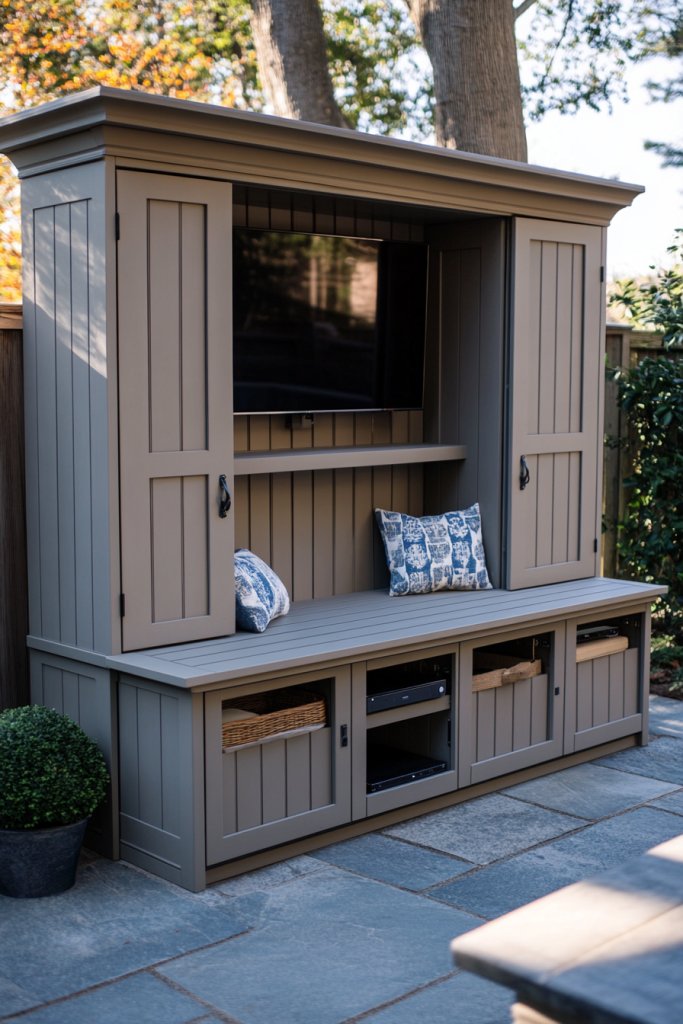
Want a versatile outdoor furniture piece that combines storage, seating, and TV protection? A DIY outdoor TV cabinet with an integrated storage bench is just what you need. It keeps your gear organized, protected from weather, and adds a cozy, functional element to your yard. Plus, it’s a manageable project for DIY enthusiasts.
Picture a sturdy, weatherproof cabinet made from treated wood or composite, with a cushioned bench on top. The cabinet doors hide compartments for electronics, remotes, or outdoor accessories, while the bench invites you to sit back and relax. The surface is finished with weather-resistant paint or stain, creating a seamless look with your outdoor decor. It’s a stylish, practical centerpiece that invites gatherings and movie nights.
Customize the cabinet with decorative hardware, painted patterns, or personalized labels. Use cushions or outdoor pillows on the bench for extra comfort. Incorporate open shelves or hooks inside for additional storage. The size and design can be scaled to fit small balconies or large patios, with options for adding side tables or extra seating. It’s a flexible, functional design that adapts to your outdoor space.
Build or repurpose a weatherproof cabinet frame, attaching weather-resistant doors and hardware. Mount your outdoor TV inside using a secure, waterproof bracket, running cables through concealed conduits. Add cushions or weatherproof upholstery to the bench for comfort. Install shelves or hooks for accessories, and seal all joints with outdoor-grade caulk. Test stability and weatherproofing before regular use, ensuring ease of access for maintenance.
Decorate with outdoor-themed hardware, stencils, or painted motifs. Add cushions or throws that match your style. Incorporate lighting inside the cabinet or underneath the bench for night-time ambiance. Personal touches like family names or custom artwork make the piece more inviting. It’s a DIY project that combines practicality with personal style.
A DIY outdoor TV cabinet with storage bench offers a functional, stylish upgrade to your yard that’s attainable with basic skills. It combines multiple uses into one piece, making your outdoor space more organized and inviting. Once finished, it transforms your yard into a comfortable outdoor living room—proof that DIY can be both simple and impressive.
19. Shutter-Style Screen for Privacy and Protection
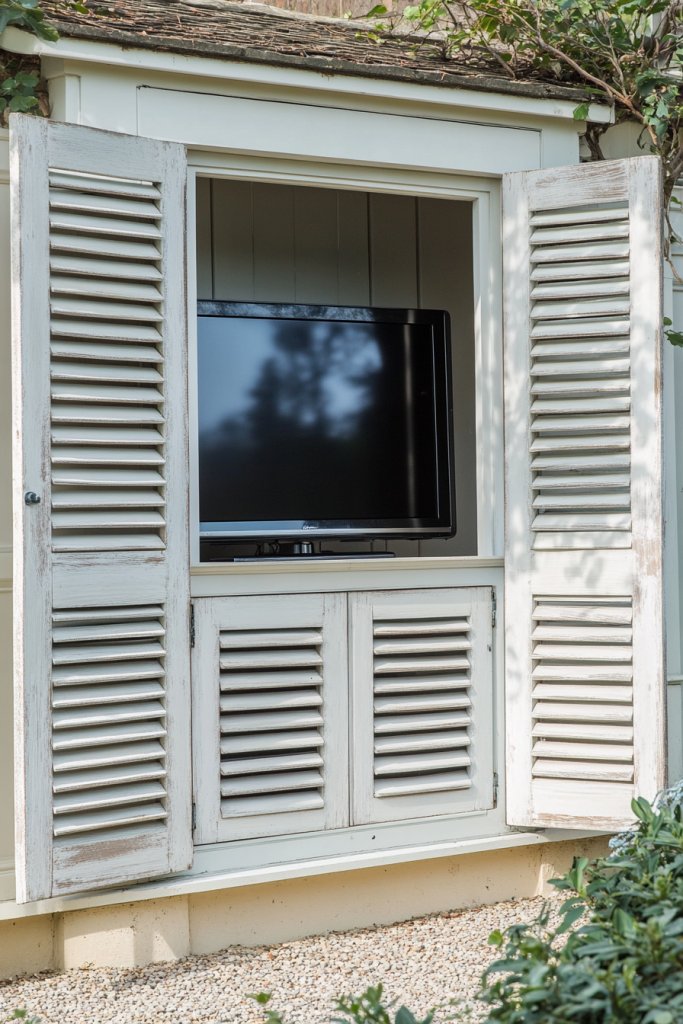
Want to protect your outdoor TV from wind, rain, and prying eyes while adding a charming, vintage touch? A shutter-style screen can do all that and more. It’s a versatile DIY project that combines privacy, weather protection, and timeless style in one package. Perfect for creating a cozy outdoor nook or entertainment zone.
Visualize a set of vintage or weatherproof shutters mounted on a sturdy frame or wall. They can be painted in bright colors or weathered to a rustic finish, depending on your style. When opened, they reveal your outdoor TV, which is mounted behind or inside the shutter frame. When closed, they block wind, rain, and nosy neighbors, creating a private retreat. The shutters add character and a nostalgic vibe to your outdoor space.
Choose shutters made from wood, vinyl, or composite, with options for louvered or paneled designs. Customize with paint, stencils, or distressing techniques for a personalized look. You can install shutters as a standalone feature or as part of a larger privacy screen. Add decorative hardware or hinges for extra flair. It’s adaptable for small patios or large backyard walls.
Mount the shutters securely using weatherproof hinges or brackets, ensuring they can open and close smoothly. Attach the entire shutter assembly to a sturdy frame or wall, reinforcing for wind resistance. Mount your outdoor TV behind or within the shutter frame, hiding cables behind the panels. Seal all joints and hardware to prevent moisture ingress. Test the shutters’ operation and stability before regular use.
Decorate shutters with decorative hardware, floral motifs, or outdoor art for added charm. Install weatherproof handles or latches to facilitate opening and closing. Add outdoor lighting or lanterns to highlight the shutters at night. Use contrasting colors or patterns to match your decor theme. It’s a charming, functional feature that combines vintage style with outdoor privacy.
A shutter-style screen offers an attractive, practical way to protect your outdoor TV while adding character. It’s a straightforward project that can be tailored to fit your space and style. Once installed, it creates a cozy, private outdoor space perfect for movies or relaxing evenings. DIY craftsmanship turns an ordinary yard into a nostalgic retreat.
20. Reclaimed Door Panel as a Unique TV Backdrop
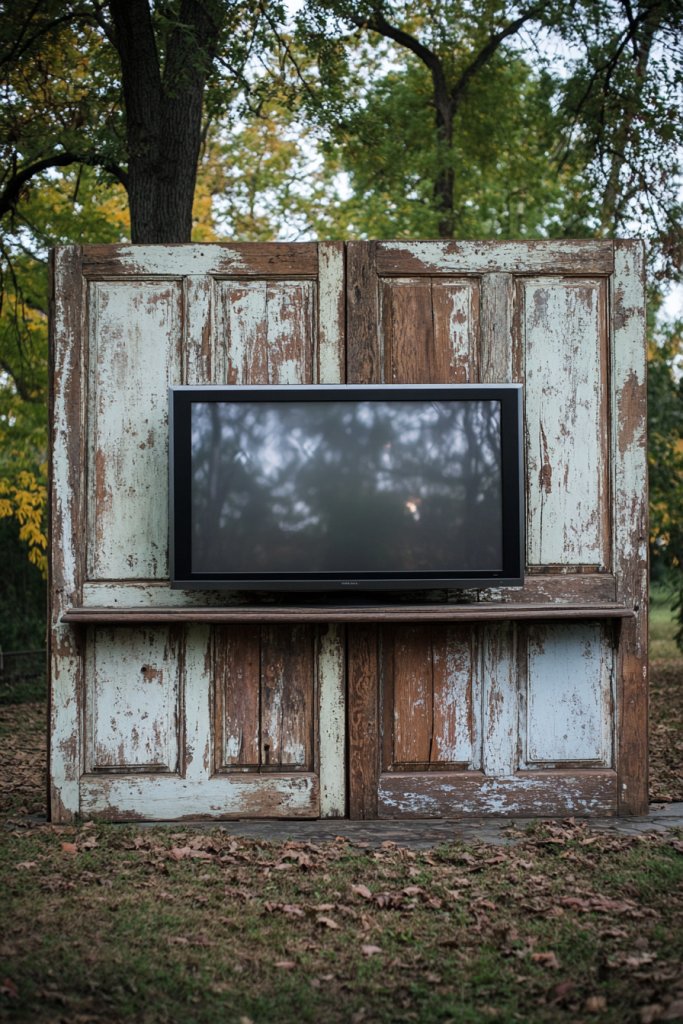
Looking for a statement piece that’s both eco-friendly and full of character? A reclaimed door panel as a TV backdrop combines vintage charm with sustainability. It’s a DIY project that transforms a weathered door into a focal point, giving your outdoor space a unique, personalized vibe. Plus, it’s a conversation starter.
Imagine a weathered, painted or stained door panel mounted on a wall or fence, serving as a dramatic backdrop for your outdoor TV. The door’s distressed texture and faded colors add a sense of history and character. Your TV is mounted in the center or slightly above the panel, with cables concealed behind or through the door. The overall effect is rustic, charming, and instantly eye-catching, perfect for a vintage or eclectic style.
Choose doors with decorative panels, windows, or hardware for added visual interest. Paint or treat the door with weatherproof sealant, maintaining its aged look or updating it with fresh paint. Incorporate decorative hardware, knobs, or hooks for extra functionality. The panel can be part of a larger feature wall or a standalone statement piece, fitting various yard sizes and themes.
Mount the reclaimed door securely on the wall or a sturdy frame, ensuring it’s level and stable. Create a recessed or surface-mounted niche for your outdoor TV, framing it for a seamless look. Conceal cables by running them behind the panel or through drilled holes, sealing all entry points. Add weatherproof finishes or sealants to protect from the elements. Mount your TV with a weatherproof bracket, making sure cables are hidden for a clean appearance.
Decorate the door with stenciled patterns, outdoor art, or hardware to match your style. Add outdoor lighting or lanterns around the panel for ambiance. Incorporate small shelves or hooks on the door for outdoor essentials or decor. Personal touches like family initials or vintage signage make it uniquely yours. It’s a blend of function, style, and eco-consciousness.
Using a reclaimed door panel as a TV backdrop adds a distinctive, vintage character to your outdoor space. It’s a DIY project that’s accessible and environmentally friendly. Once installed, it creates a cozy, nostalgic atmosphere perfect for movie nights or relaxing weekends. It’s proof that sustainability and creativity go hand in hand in outdoor design.
21. Floating Brick-Look Shelves for Decorative Support
Want to combine functional storage with stylish decor in your outdoor entertainment area? Floating brick-look shelves provide a sleek, modern way to display accessories, speakers, or outdoor decor while supporting your TV. They offer a clean, minimalist aesthetic that’s easy to DIY. Plus, they make your outdoor space look more curated and intentional.
Imagine a set of sturdy, weatherproof shelves designed to resemble brickwork—either through textured veneer, wallpaper, or painted finishes. The shelves appear to float on the wall, with concealed supports creating a seamless look. You can place small decorative items, outdoor speakers, or even plants on the shelves, creating a layered, textured backdrop for your TV. The combination of brick pattern and sleek shelves adds depth and contemporary style to your yard.
Choose different finishes—real brick veneer, faux brick wallpaper, or painted patterns—to match your design theme. Vary the shelf sizes and depths for visual interest. Incorporate integrated lighting or hidden compartments for cables and accessories. This setup can be scaled to fit small patios or large garden walls, providing both support and decor. It’s highly adaptable and customizable.
Attach concealed brackets or supports to your wall or fence, ensuring they can bear the weight of the shelves. Install the shelves securely, leveling as you go. Apply brick pattern wallpaper or textured veneer to the support areas for a realistic brick appearance. Mount your TV on a sturdy bracket near or on the shelves, concealing cables within the supports or along the wall. Seal all joints and support points to withstand outdoor conditions. Regular maintenance involves cleaning and checking support stability.
Decorate the shelves with personalized accents, outdoor art, or seasonal decor. Use LED strip lighting underneath or along the edges for nighttime effect. Incorporate small outdoor planters or decorative boxes to add utility and style. Change the color or pattern of the brick look seasonally or for different occasions. It’s a versatile feature that enhances both function and aesthetic.
Floating brick-look shelves combine modern style with practical support, elevating your outdoor entertainment setup. They’re achievable with basic DIY skills and materials, resulting in a polished, professional appearance. Once installed, your yard will look intentionally designed and inviting—proof that creative, budget-friendly solutions can make a big impact outdoors.
Conclusion
With a diverse array of DIY outdoor TV ideas, you can create an entertainment space that reflects your style and enhances your outdoor living experience. Whether you opt for sleek mounting solutions or elaborate custom setups, these ideas are designed to inspire and empower you. Don’t wait—start transforming your backyard today and enjoy countless memorable moments under the open sky!
Leave a Reply