Imagine turning your craft space into a haven of creativity and organization—sounds amazing, right? Cricut workspace ideas are incredibly popular because they help crafters maximize efficiency while keeping their tools and materials beautifully organized. A well-designed workspace not only boosts productivity but also makes the crafting process more enjoyable and inspiring.
In this article, you’ll discover a wide variety of creative workspace ideas to transform your crafting area. From sleek storage solutions to personalized stations, these ideas cater to different styles and space sizes, ensuring you’ll find the perfect setup to spark your imagination and keep your Cricut tools ready for your next project.
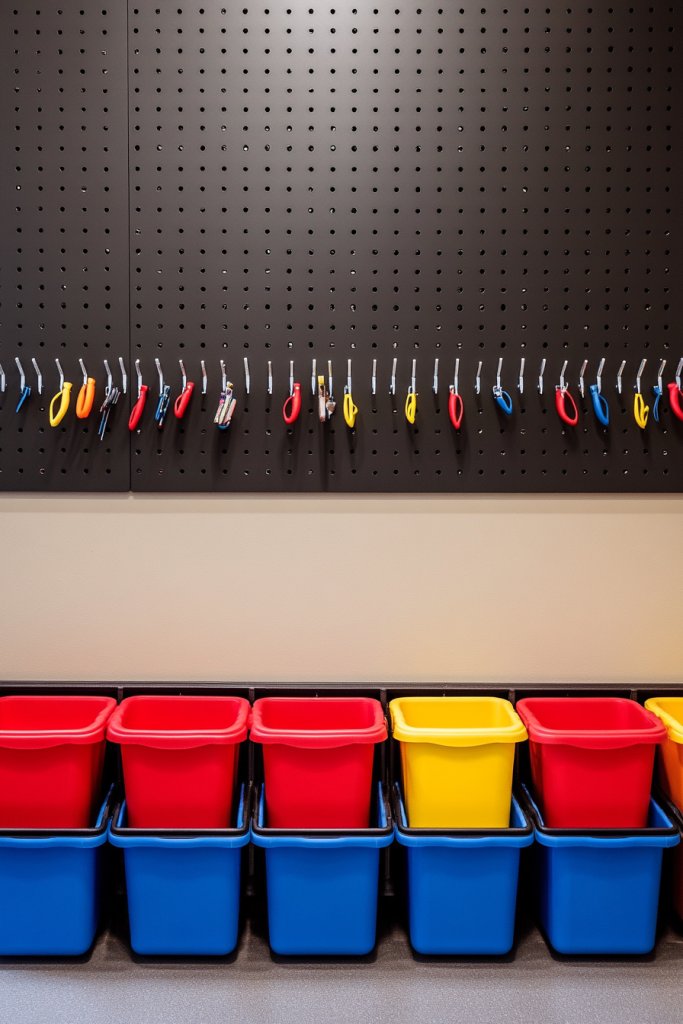
1. Wall-Mounted Craft Supply Pegboard with Color-Coded Storage Bins
Ever felt overwhelmed by a jumble of tools and supplies cluttering your crafting space? Keeping everything within arm’s reach without turning your workspace into a chaos zone is a real challenge. A cluttered desk not only wastes time but also kills your creative vibe. You want a solution that’s both functional and visually appealing, making crafting more fun and less frustrating.
Imagine a vibrant wall adorned with a neat grid of pegboard panels. Bright color-coded bins hang perfectly aligned, each labeled for easy identification. Scissors, spatulas, and vinyl rolls are stored in designated spots, creating a colorful mosaic of organization. The textured surface of the pegboard contrasts with the smooth, shiny bins, giving your space a lively yet orderly feel. It’s like having a craft store wall right in your own home.
Choose a neutral pegboard for a minimalist look or paint it a bold hue to match your decor. You can add decorative hooks or metallic accents for a modern touch. Seasonal changes are simple—swap out bin colors or labels to reflect holidays or themes. For smaller spaces, target only a section of the wall; in larger areas, extend the setup for maximum impact. Personalize the bins with fun stickers or handwritten labels to match your style.
Start by selecting a sturdy pegboard size that fits your wall and meets your storage needs. Mount it securely using appropriate hardware, ensuring it can handle the weight of your supplies. Organize tools into different bins based on frequency of use or type, then attach them onto the pegboard with hooks or brackets. Label each container clearly for quick access. Incorporate a small shelf or a few clip hooks for frequently used items like scissors or pens. Regularly review and update your setup to keep it fresh and functional.
Add decorative touches like patterned washi tape around the edges or custom painted sections for a unique look. Use themed bins—think pastel for spring or metallic for a glam vibe—to reflect your personality. Incorporate small baskets or containers inside bins for tiny items like needles or clips. Consider installing a small LED strip for subtle lighting that highlights your organized display. Personal touches make this pegboard not just practical but also a stylish focal point.
Transforming your workspace into a vibrant, organized hub boosts your confidence and sparks creativity. Seeing everything in its place makes setup and cleanup quicker, giving you more time to craft. Plus, a neat space feels inspiring—like walking into your favorite craft store every day. Ready to turn that cluttered wall into an artful display of order and style?
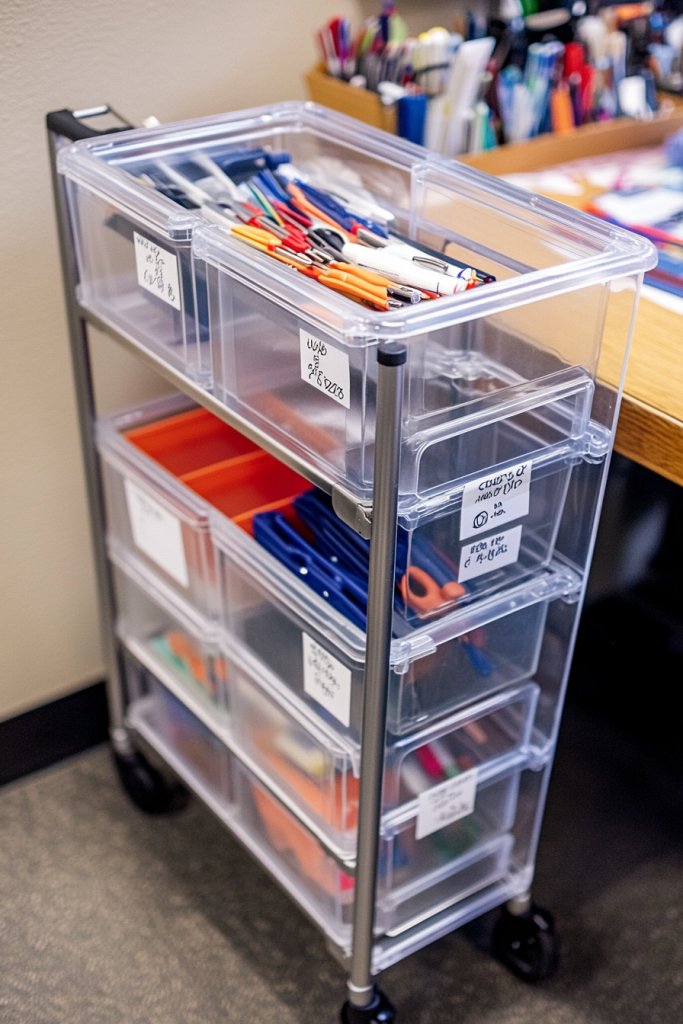
2. Multi-Tier Rolling Cart with Labelled Compartments
Ever wish all your Cricut supplies could magically stay in one organized place and move with you? Juggling multiple small containers on a cluttered table is a recipe for frustration. You need a mobile solution that consolidates everything while giving you easy access. Let’s face it—stationary setups are so last century.
Picture a sleek rolling cart with three or four tiers, each filled with neatly labeled compartments. Brightly colored drawers or bins hold different tools, vinyl sheets, and accessories, all within arm’s reach. The cart’s smooth wheels glide effortlessly, allowing you to wheel it closer or tuck it away. The labels are clear and bold, making tidying up a breeze. It’s like a mini craft station on wheels—compact, efficient, and stylish.
Opt for a metallic finish for a modern industrial look or pastel shades for a softer, craft-room vibe. Use transparent drawers for a quick view of contents, or chalkboard labels for easy updates. If space is tight, choose a narrower cart; if you have a dedicated craft corner, go for a larger, multi-tier version. You can also add small hooks on the sides for hanging scissors or spatulas, maximizing every inch. Personalize with decorative stickers or custom labels to match your craft aesthetic.
Select a sturdy, lightweight cart with multiple tiers. Label each compartment clearly—think big, bold, and legible. Fill the bottom tiers with bulkier items like cutting mats or extra vinyl rolls, while the top holds frequently used tools. Use small containers inside compartments for tiny bits like needles or pins. Roll it to your workspace whenever needed, then tuck it away to save space. Regularly check and reorganize to keep everything current and accessible. Consider adding non-slip pads or bumpers to prevent sliding during use.
Decorate the cart with themed stickers or custom paint for a personalized touch. Use color-coded labels to categorize supplies by project or material type. Add a small magnetic strip on the side for holding metal tools. Attach a foam pad on the top surface for quick blade or pen changes. For extra flair, hang a mini chalkboard or a small whiteboard for notes or reminders. These small personalizations make your cart uniquely yours.
A mobile cart streamlines your workflow and keeps things visually organized, which boosts your confidence in tackling projects. Being able to wheel your supplies over without digging through drawers makes a huge difference. Plus, it’s a fun way to add a pop of color and personality to your space. Ready to roll your way to a more efficient craft station?
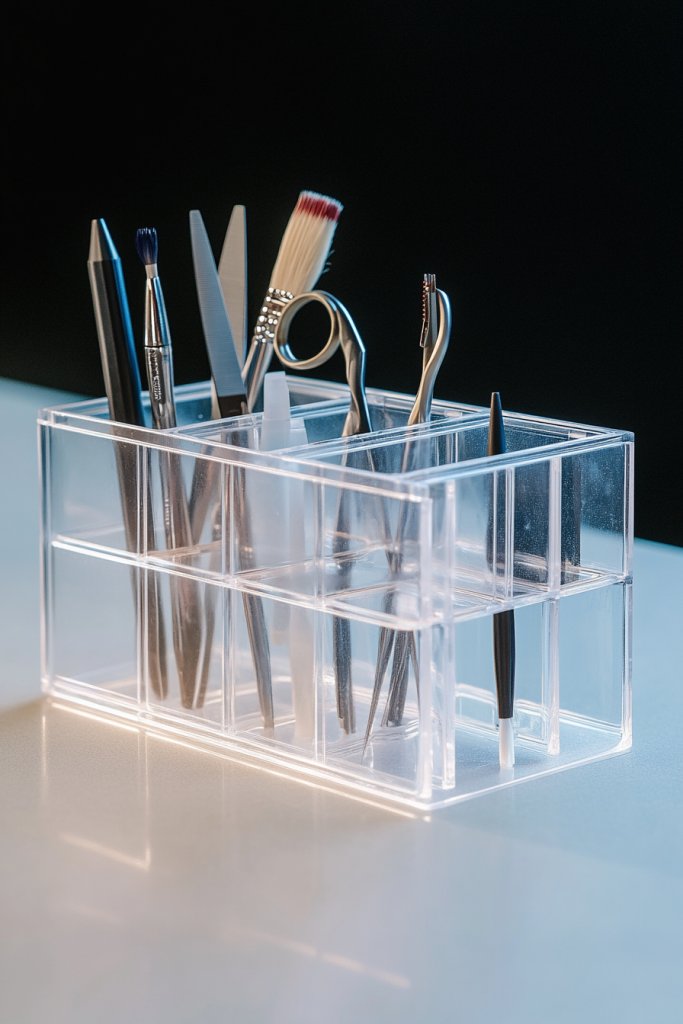
3. Customized Acrylic Tool Holders with Clear Sections
Ever get annoyed hunting for scissors or pens amidst a jumble of supplies? Cluttered surfaces waste your precious crafting time and kill the creative buzz. You need a sleek, organized solution that keeps your favorite tools front and center. Custom acrylic holders are the perfect way to combine style with function.
Visualize a set of transparent acrylic trays and slots, each tailored to hold specific tools. Scissors sit in a dedicated angled compartment, while pens and spatulas rest in sleek, labeled sections. The clear material showcases your tools, making it easy to find what you need at a glance. The minimalist design complements any craft space, adding a touch of modern sophistication. It’s like having a jewelry box but for your crafting essentials.
Choose acrylic in different thicknesses or add colored accents for a playful twist. Customize slots based on your tool sizes—larger for scissors, smaller for pens, and so on. For seasonal flair, swap out acrylic pieces with themed designs or textured surfaces. You can also mount these holders on a wall or place them on your work table. Personal touches like engraved labels or decorative edges elevate the look further.
Start by measuring your tools to create or purchase acrylic holders with appropriately sized compartments. Use a good quality acrylic cutter or order pre-cut pieces from a craft supplier. Label each section with engraved or adhesive labels for quick identification. Position the holders close to your workspace for easy reach. Consider stacking or arranging different sizes for a layered, organized effect. Clean regularly to maintain clarity and shine.
Add a splash of color by choosing tinted acrylic or applying decorative tape to the edges. Use personalized engraved labels to add a professional touch. Incorporate small silicone inserts or foam padding inside compartments for extra grip and protection. Arrange the holders in a pattern or shape that suits your workspace—symmetrical or asymmetrical, your call. These custom pieces can evolve as your collection of tools grows.
Having your tools stored in a beautiful, organized manner boosts your confidence and efficiency. Seeing all your essentials at a glance reduces stress and inspires more creative ideas. Plus, the sleek look elevates your entire workspace, making every project feel special. Ready to upgrade your tool storage to a new level?
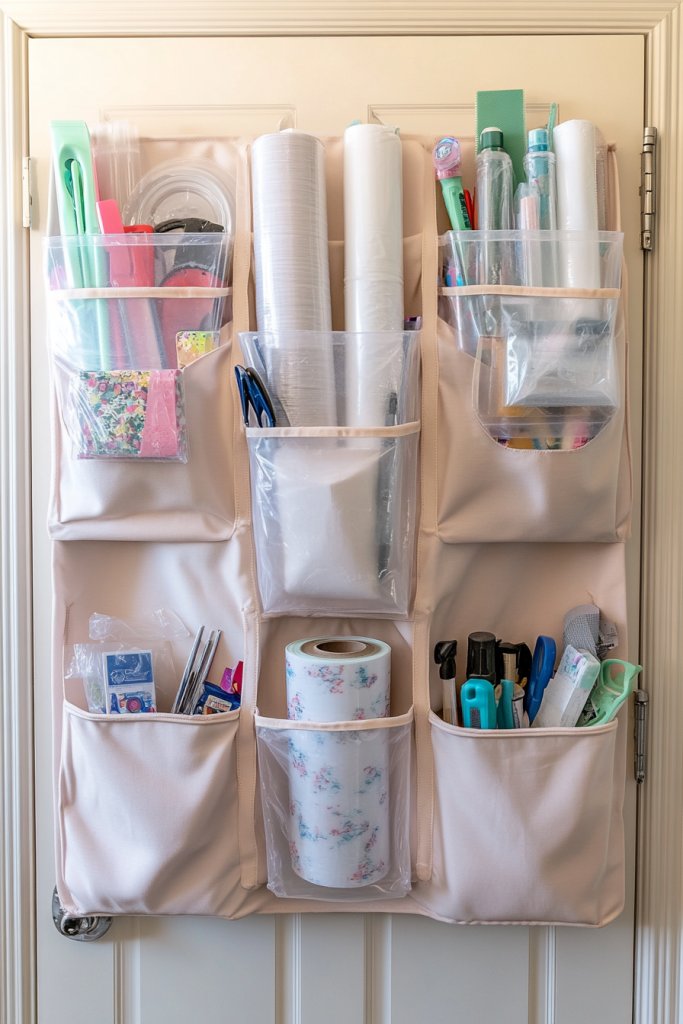
4. Over-the-Door Organizer with Vinyl and Accessory Pockets
Does your craft table constantly feel cluttered with rolls of vinyl, transfer tape, and tiny tools? Desk space is precious, and finding storage solutions that don’t take up valuable surface area can be tricky. You want a smart way to keep everything accessible yet out of the way. Over-the-door organizers might just be your new best friend.
Picture a hanging organizer with clear, multi-sized pockets draping over your door. Rolls of vinyl sit snugly in larger pockets, while smaller pouches hold transfer tapes, spatulas, and extra blades. The transparent pockets let you see everything instantly, so you’re never rummaging. The door becomes a functional storage zone, freeing up your work surface and keeping supplies within easy reach. It’s a simple, effective upgrade for any craft room.
Opt for fabric or clear plastic pockets depending on your aesthetic. Use color-coded pouches for different materials—think rainbow vinyl rolls or themed accessories. For a minimalist look, choose sleek, neutral tones; for a fun vibe, go bold with patterns and bright colors. Hang it on the back of a door, cabinet, or wall if you prefer not to use the door itself. Adjust pocket sizes based on your specific supplies for maximum versatility.
Choose an organizer with sturdy hooks and a variety of pocket sizes. Install it over your door, ensuring it’s secure and taut. Fill the larger pockets with vinyl rolls, and organize smaller items like spatulas and pens in the pouches. Use labels or color tags to keep everything sorted. Regularly review and reorganize as your collection grows or changes. Keep the organizer clean and check for wear or tears periodically.
Decorate the organizer with fabric covers or add decorative trims for a personalized touch. Use color-coded labels or stickers to quickly identify contents. Attach small clips or hooks for hanging tools or keychains. You can also add a small chalkboard label area for notes or reminders. These tweaks make your storage both practical and uniquely styled to your taste.
Maximizing vertical space helps keep your creative flow uninterrupted. When everything is organized and visible, you’re more likely to stay inspired and productive. This simple change can make your entire craft environment feel more professional and inviting. Ready to hang your way to a clutter-free workspace?
5. Floating Shelves with Decorative Bins for Finished Projects
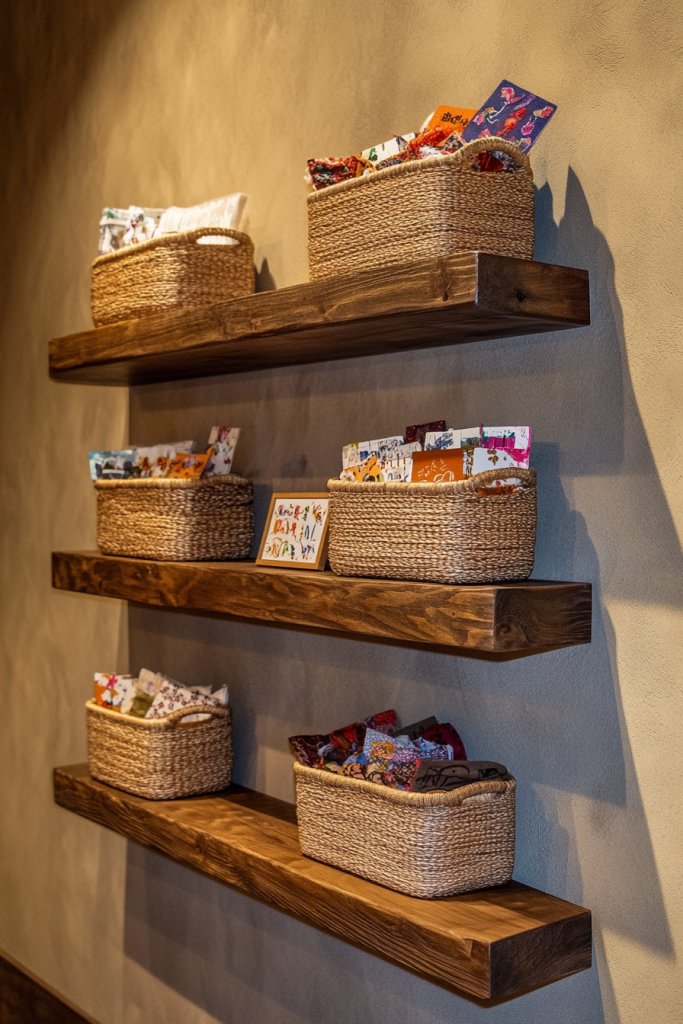
Tired of stacking finished projects in a messy pile or hiding them away? Displaying completed crafts beautifully adds personality to your space and motivates you to start new projects. Finding a stylish yet practical way to showcase your work can be a game-changer. Floating shelves paired with decorative bins make this possible.
Visualize sleek, wall-mounted floating shelves stretching across a blank wall. Sturdy baskets or decorative bins sit neatly on each shelf, holding finished projects, fabric scraps, or ongoing ideas. The open design lets your creativity shine through while keeping clutter off your work table. The combination of minimalist shelves and textured baskets creates an inviting gallery feel, turning your workspace into a mini art gallery.
Choose shelves in materials like wood, metal, or glass to match your decor. Mix and match bin styles—woven baskets for rustic charm or sleek acrylic containers for modern flair. Adjust shelf heights to accommodate different-sized projects or collections. For seasonal updates, swap out bins or add decorative accents like faux greenery or fairy lights. Personalize with labels or monograms for a custom touch.
Install floating shelves at a comfortable height, ensuring they are securely anchored into studs or wall anchors. Select decorative bins that complement your aesthetic and are sturdy enough to hold your projects. Arrange your finished works on the shelves, grouping similar items together. Use labels or tags for easy identification of projects or materials. Regularly tidy and rotate displayed items to keep the display fresh and inspiring.
Add decorative touches with themed bins—think vintage, boho, or minimalist styles. Incorporate labels in handwritten calligraphy or modern fonts for a polished look. Use textured baskets like woven rattan or fabric-lined containers to add depth. Consider adding small LED lights underneath shelves for ambient illumination. These elements turn your display into a personalized gallery of your creative journey.
Displaying your finished projects boosts your confidence and reminds you of your progress. It creates an inspiring environment that encourages you to craft more often. Seeing your work in a curated, stylish way can motivate fresh ideas and ongoing creativity. Ready to turn blank walls into your personal craft showcase?
6. Magnetic Tool Strip Mounted Above Work Surface
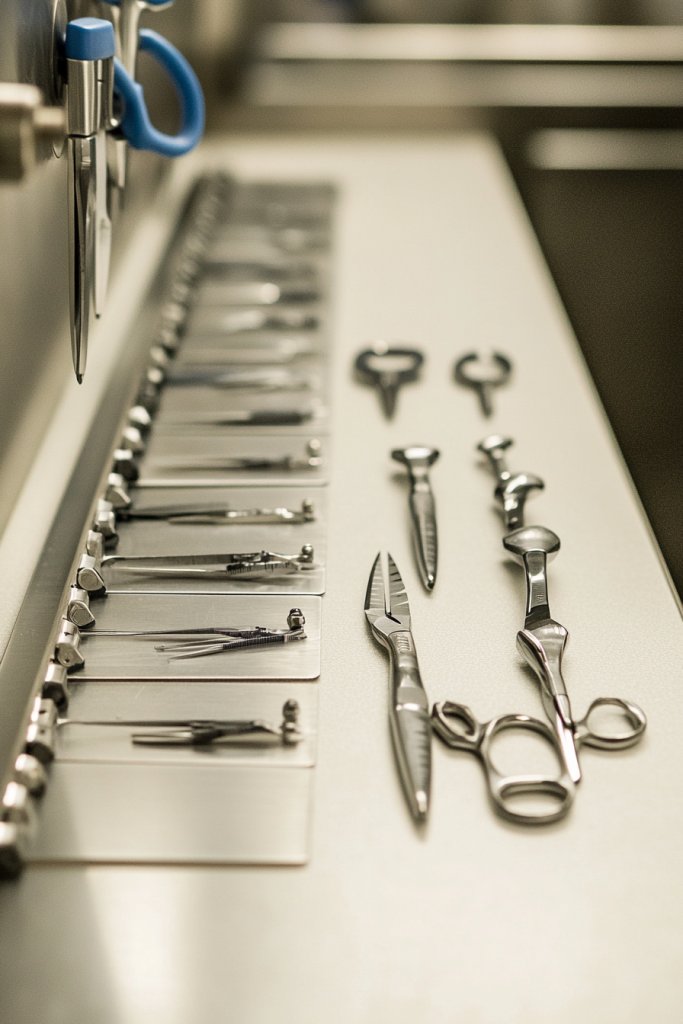
Ever find yourself digging through drawers just to find a pair of scissors or a blade? Cluttered tools scattered across the table slow down your workflow and kill your vibe. You need a simple, accessible solution that keeps your essential tools always within arm’s reach. Enter the magnetic tool strip—your new best friend for a tidy workspace.
Picture a sleek metal strip mounted directly above your crafting surface. Metal scissors, rulers, and blades cling effortlessly to the strip, organized and ready to use. The magnetic surface keeps everything visible and accessible, cutting down search time. The strip’s slim profile won’t take up much space, yet it transforms your work area into an efficient command center. It’s like a magnet for productivity.
Choose a strip in stainless steel, painted metal, or even a decorative finish to suit your style. Install several strips if you have many tools or different types—vertical or horizontal layouts work well. For a playful touch, add small magnetic clips or hooks for additional accessories. Mount it closer to your main workspace or near your cutting station for maximum efficiency. Personalize with labels or paint accents for extra flair.
Securely attach the magnetic strip to a wall or a sturdy backsplash above your work surface using screws or strong adhesive. Arrange your tools on the strip, grouping similar items together—scissors, rulers, spatulas, etc. Supplement with small magnetic containers for tiny metal pieces like needles or clips. Regularly wipe the strip to maintain its magnetism and cleanliness. Be mindful of the weight limit to avoid accidents or dropping tools.
Decorate the strip with colorful or patterned paint to match your craft room theme. Use small labels or tags to identify tool types, making it even easier to locate items. Attach decorative magnets or charms for a personal touch. Combine with a pegboard or shelf system for a layered, organized look. These small details turn a simple strip into a stylish, functional feature.
Having a dedicated space for your tools boosts efficiency and minimizes clutter. It feels great to see everything neatly displayed, which sparks inspiration and a sense of control. When your workspace is organized, creativity flows more freely, and you’ll tackle projects with renewed confidence. Ready to magnetize your workspace?
7. DIY Drawer Dividers for Precise Organization of Small Items
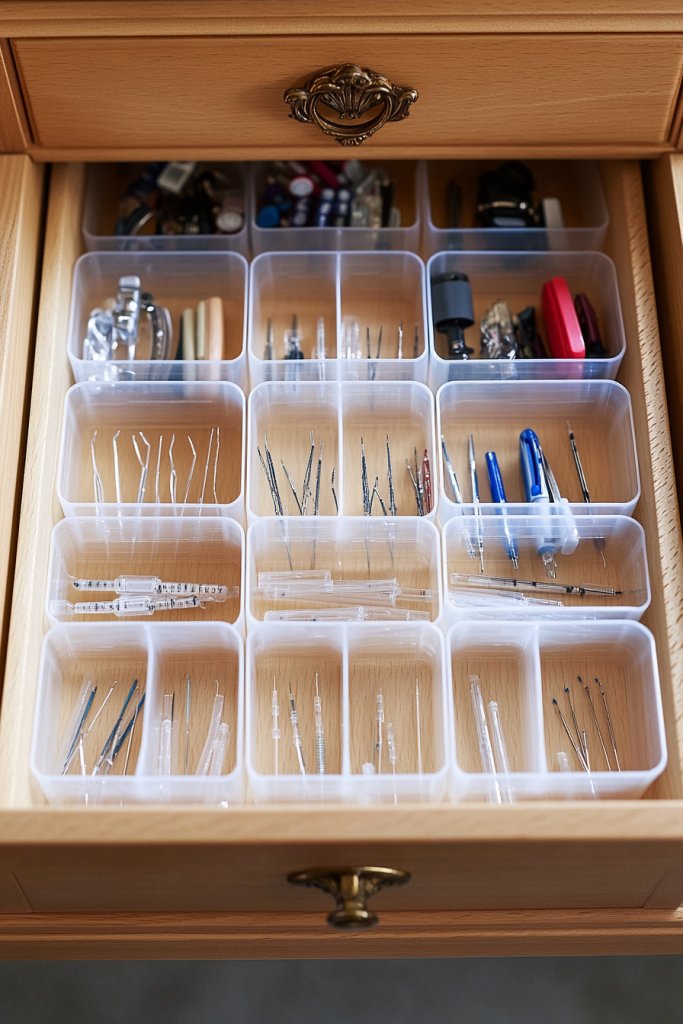
Small craft supplies like needles, pens, and tiny tools often end up in a tangled mess, wasting your precious time digging for what you need. You crave a way to keep all those little bits neatly separated and easy to find. DIY drawer dividers are the perfect hack for achieving that perfect level of organization.
Imagine customizing simple wooden or plastic dividers fitted snugly inside a drawer. Each section holds specific items—separate compartments for pens, spatulas, needles, or tapes. The dividers create a tidy grid, transforming chaos into order. The clear labels or color-coded sections make it obvious where everything belongs. It’s like turning a cluttered drawer into a boutique display.
Use adjustable or modular dividers for flexibility, so your organization can evolve with your supplies. Paint or decorate the dividers to match your room’s style—think pastel hues or bold patterns. For a more eco-friendly approach, repurpose cardboard or repainted foam boards cut into custom sizes. You can also stack multiple layers of dividers for vertical storage in deeper drawers. Personalize with labels or small tags for quick identification.
Measure your drawers carefully before building or buying dividers. Use wood, acrylic, or sturdy cardboard, cutting them to fit snugly. Secure the dividers with double-sided tape, adhesive strips, or small screws if needed. Arrange your small items into the compartments, grouping similar tools together. Regularly review and adjust the dividers to accommodate new supplies or changing needs. Keep them clean and dust-free for longevity.
Add decorative touches with paint, washi tape, or stickers to make the dividers more appealing. Use labels on each section—handwritten or printed—to streamline your workflow. Incorporate small containers or trays within the dividers for extra tiny items. Consider color-coding sections to match your project themes or material types. These small upgrades make organization effortless and stylish.
Well-organized small item storage saves time and reduces frustration, giving you more confidence to dive into projects. Seeing your supplies neatly sorted can motivate you to keep crafting and experimenting. A tidy drawer also makes your workspace look professional and inviting. Ready to DIY your way to a clutter-free craft space?
8. Compact Fold-Out Craft Table with Built-in Storage Compartments

Limited space often forces crafters to compromise between workspace size and storage. You want a surface big enough to handle your projects but also compact enough to fit in tight spots. A fold-out craft table with built-in storage is the perfect solution, giving you flexibility without sacrificing organization.
Envision a sleek foldable table that folds out from a wall or corner, revealing hidden compartments underneath. When folded, it’s a slim profile that tucks away easily, but when extended, provides a sturdy work surface. Storage drawers or compartments are built into the table’s frame, neatly holding tools, papers, or vinyl rolls. The surface itself can be a smooth, durable material—think laminate or wood—ready for your creative mess.
Choose a finish that complements your decor—modern white, rustic wood, or vibrant colors. Incorporate multiple fold-out sections or extendable leaves for larger projects. The built-in storage can be customized with drawers, shelves, or even small pegboards for tools. For seasonal flexibility, easily fold the table away when not in use, freeing up space for other activities. Personalize with decorative handles or edge accents.
Select a sturdy, foldable table designed for easy setup and takedown. Install it in a corner or against a wall using secure brackets or hinges. Fill built-in compartments with your most-used supplies—pens, blades, or small tools. When set up, ensure the table is level and stable, especially if you’ll be cutting or gluing. Consider adding non-slip pads to prevent movement. Regularly clean and reorganize to keep it functional and appealing.
Decorate the table surface with themed decals, paint, or contact paper for a personal touch. Add labels or small containers inside storage compartments for quick access. Use colorful knobs or handles to add flair. Incorporate a foldable light or a small portable lamp for better visibility. These details make your fold-out station uniquely yours and more inspiring.
A versatile fold-out table maximizes your space while offering a dedicated crafting zone. It encourages you to work on projects more often because setup is simple and quick. Plus, it keeps your space tidy and organized, creating a professional-looking workspace. Ready to fold, extend, and craft with confidence?
9. Labelled Clear Storage Jars for Glitter, Foam Sheets, and Vinyl
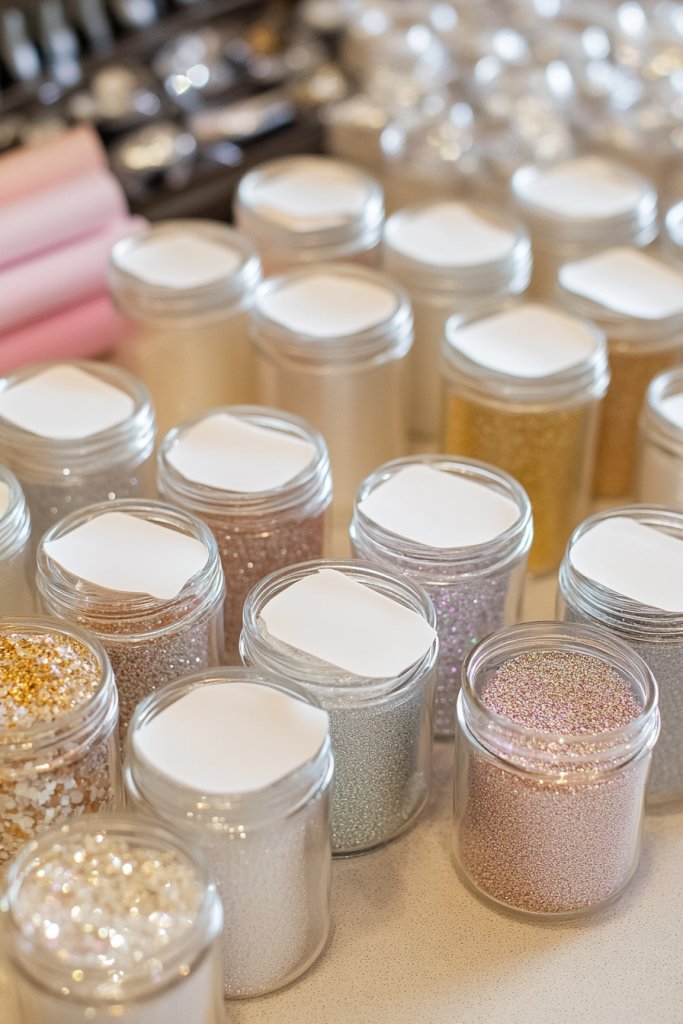
Tired of digging through messy piles of glitter or rummaging for that perfect foam sheet? Small craft supplies often become a black hole of chaos, wasting your time and testing your patience. You need a straightforward way to see and access your supplies instantly. Clear storage jars with labels are the solution that transforms clutter into clarity.
Imagine small, uniform glass or plastic jars lined up on a shelf or inside a cabinet. Each jar is filled with a different color glitter, foam sheet, or vinyl roll, and neatly labeled with clear, bold tags. The transparency of the jars allows you to see the contents at a glance, making it easy to pick the right color or material. The labels add a professional touch, elevating your storage game from chaos to chic.
Choose jars in different sizes depending on the volume of your supplies—small for tiny items like glitter and larger for bulkier foam sheets. Use colorful or monogrammed labels to add personality. Store jars in a tiered rack, inside a drawer, or on open shelves for easy access. For seasonal or themed projects, swap out labels or contents for a fresh look. Incorporate decorative touches like washi tape or stickers for extra flair.
Purchase clear jars with airtight lids to keep supplies fresh and dust-free. Fill each jar with your favorite glitter, foam, or vinyl, then attach or write a label directly on the jar or on a sticker. Organize the jars on a shelf or inside a dedicated storage box. Regularly review contents, discarding old or dried-out supplies. Keep a small scoop or brush nearby for easy, mess-free application. Periodically clean jars for maintenance.
Decorate jar labels with handwritten fonts, printed designs, or stickers matching your craft theme. Use color-coded labels for quick identification—pastel for spring, metallic for holiday projects. Add a small decorative tag to each jar for a boutique feel. Incorporate a mini chart or key nearby to track supplies or reordering needs. These small details turn simple jars into a delightful part of your craft decor.
Seeing your supplies organized and clearly labeled makes crafting more efficient and less stressful. It invites you to experiment with new colors and materials because everything is accessible and attractive. This setup helps maintain a calm, inspiring environment that fuels your creative spirit. Ready to elevate your storage with stylish, labeled jars?
10. Hanging Clipboards and Inspiration Boards for Project Planning
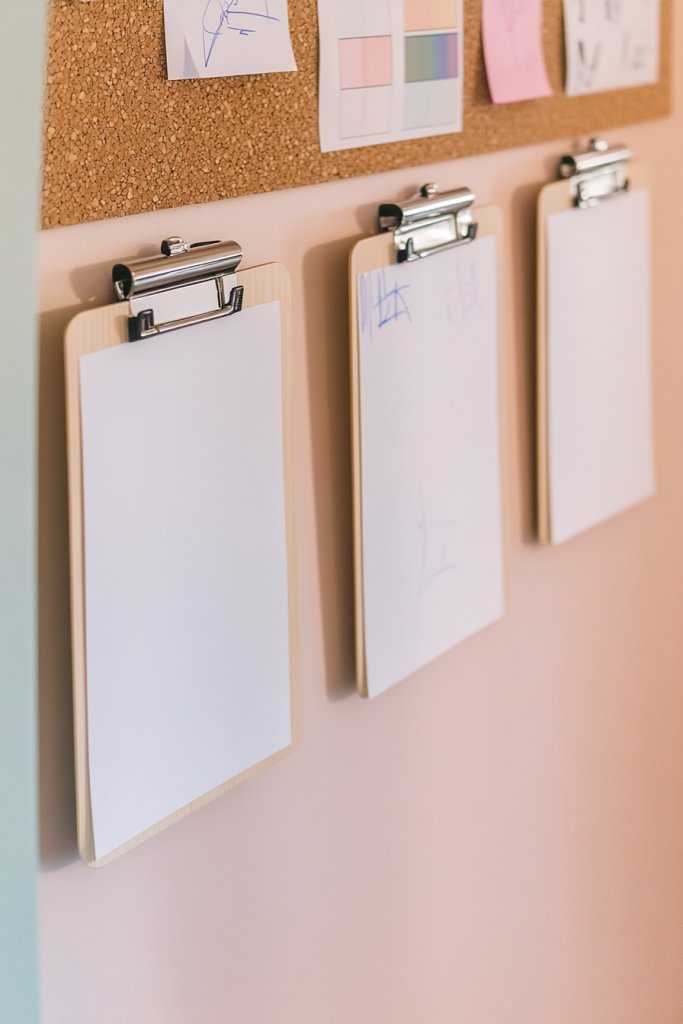
Ever start a project only to forget a crucial detail or color palette? Keeping inspiration and planning tools visible and accessible makes a huge difference. You want a way to organize ideas, sketches, and notes without cluttering your workspace. Hanging clipboards and inspiration boards are the perfect way to keep your creative flow smooth and visible.
Imagine a wall with several clipboards hanging in a neat row, each holding project sketches, color swatches, or notes. Nearby, a corkboard or magnetic board displays pinned inspiration photos, fabric samples, or current project ideas. Everything is within eye level, making it easy to reference and update. The mix of textures and organizational tools creates a dynamic, inspiring workspace that sparks ideas and keeps you on track.
Use painted or decorative clipboards for a personalized touch—think bold colors or patterns. Incorporate themed pins or magnets to organize different project categories. Swap out inspiration images seasonally, or add a whiteboard section for jotting quick notes. For small spaces, group several clipboards or boards on a single wall or door. Personalize further with custom labels or doodles on the boards.
Hang clipboards at a comfortable eye level with sturdy hooks or brackets. Use decorative or functional pins to attach sketches, notes, or fabric swatches. Arrange a cork or magnetic board nearby for additional inspiration and project planning. Regularly update the content, removing finished ideas and adding new inspiration. Incorporate a pen or marker holder on or near the clipboards for quick note-taking. Keep the area tidy and inspiring.
Decorate clipboards with washi tape, painted designs, or stickers for a fun look. Use color-coded pins or clips to categorize projects or themes. Add a small shelf or container for pens, markers, or sticky notes. Consider creating a dedicated “idea wall” with a mix of pinned images, sketches, and notes. These small customizations make your planning area both practical and inspiring.
Having a visual project plan keeps you motivated and organized. It makes the creative process less stressful and more enjoyable. When everything is displayed and easy to update, ideas flow more freely. Ready to pin your way to a more productive crafting environment?
11. Under-Desk Storage Solutions for Bulk Materials
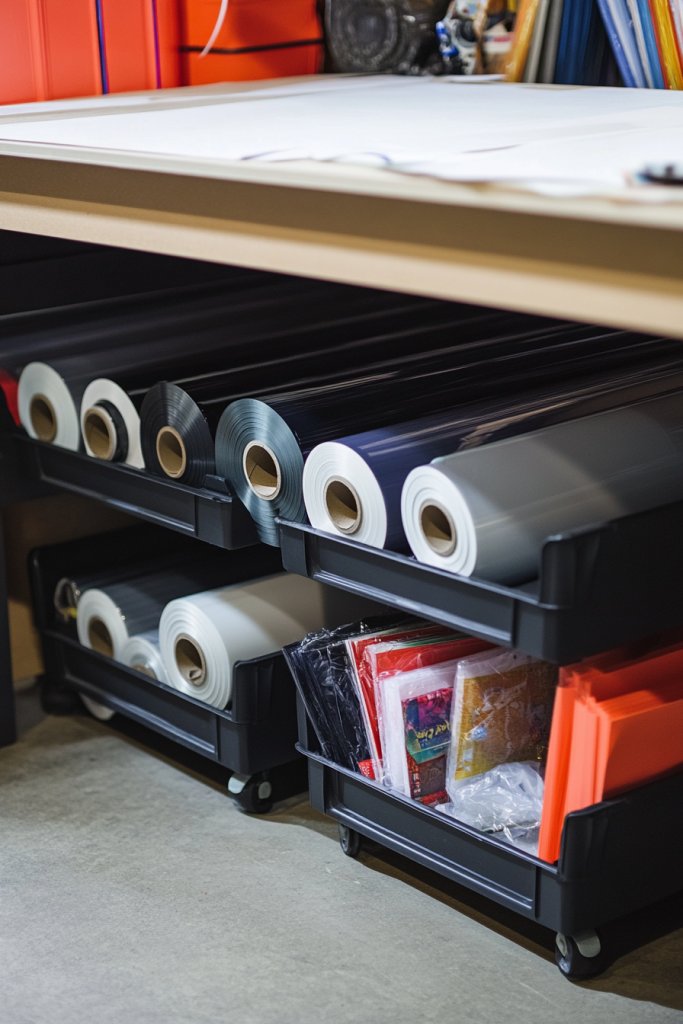
Do you struggle with clutter underneath your crafting table where bulk supplies hide away? Storing large rolls of vinyl or backing materials out of sight can make your workspace feel cramped and chaotic. You need a smart, accessible solution that clears space without sacrificing storage capacity. Under-desk storage solutions are your new best friend.
Imagine a shallow set of drawers or a rolling cart tucked neatly underneath your table. It holds extra vinyl rolls, large sheets of foam, or backing materials, all organized and easy to access. Clear bins or labeled compartments keep everything visible at a glance. The setup transforms a cluttered under-table mess into a sleek storage area, making your workspace feel more open and organized.
Choose stackable plastic drawers, shallow rolling carts, or sliding bins based on your space. Use labels or color-coding to categorize materials—think one color for vinyl, another for foam. For a more integrated look, build custom shallow shelves or cubbies into the underside of your desk. You can also add a fabric curtain or decorative panel to hide the storage area when not in use. Adapt the setup to fit your space and material needs.
Measure the available space beneath your desk before selecting storage units. Use stackable drawers or shallow carts that slide easily in and out. Label each bin or drawer clearly for quick identification. Store bulk items like vinyl rolls horizontally to save space and prevent unwinding. Secure rolling carts with brakes to keep them stable. Regularly review and reorganize to optimize space and accessibility.
Decorate labels with fun fonts or icons for quick recognition. Use patterned or colored storage containers to match your room decor. Add small handles or wheels for easy mobility. Incorporate a small clipboard or checklist on the side to track inventory. These touches make your storage both functional and stylish.
Organized bulk storage keeps your workspace tidy and efficient, encouraging more frequent crafting. When you can find everything easily, your confidence and productivity soar. Plus, a clutter-free environment feels more inviting and professional. Ready to tidy up your under-desk chaos?
12. Customizable Modular Storage Cubes for Flexibility
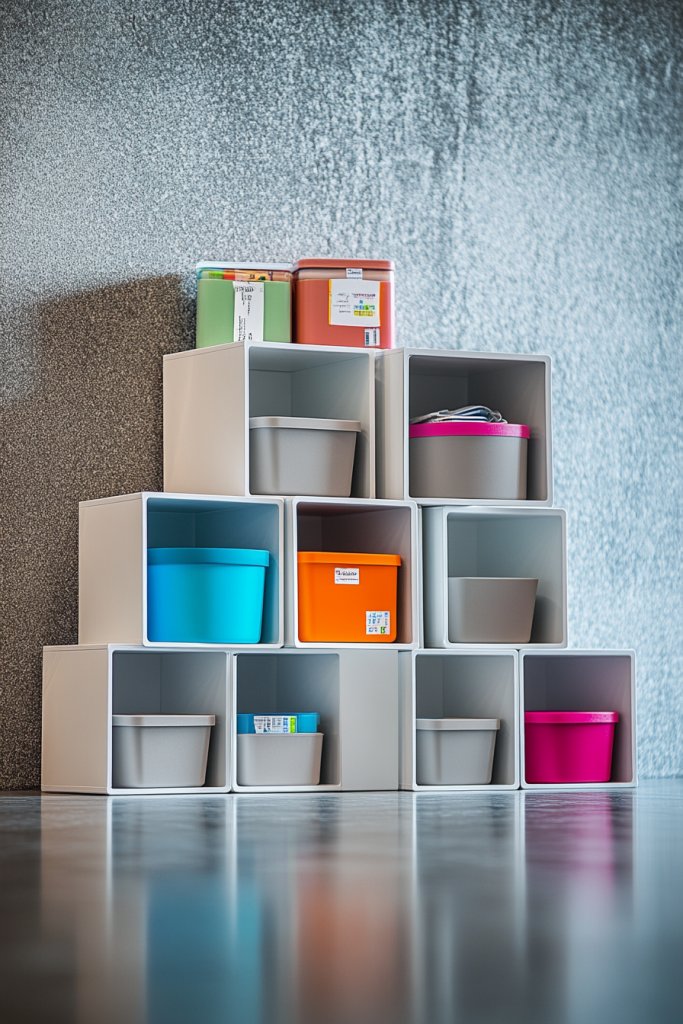
Ever wish your craft storage could grow and change with your needs? Fixed shelves and static units often limit your creativity and adaptability. Modular storage cubes give you the freedom to customize your organization system, making it as flexible as your imagination.
Visualize a series of cube units stacked or arranged in different configurations, forming a customized storage wall. Each cube can hold specific supplies—small bins for tools, larger sections for papers, or drawers for embellishments. The modular design allows you to reconfigure the setup easily when your storage needs shift. The clean, geometric look adds a modern touch to any craft space.
Choose cubes in neutral tones for a minimalist look or vibrant colors for a playful vibe. Opt for open cubes for quick access or include drawers and doors for concealed storage. Arrange the cubes in patterns—vertical, horizontal, or even staggered—to suit your space. Use labels or decals to identify contents. This system can grow alongside your collection of supplies and projects.
Select modular cube units that fit your space and storage needs. Securely assemble or stack the cubes, ensuring stability. Assign each cube a purpose—tools, papers, embellishments—and organize accordingly. Use baskets or small containers inside cubes to divide items further. Reconfigure as needed, adding or removing units to keep up with your craft evolution. Anchor larger setups to the wall for extra safety.
Decorate cubes with paint, contact paper, or decals to match your style. Incorporate labels or icons to identify each section. Add small hooks or pegboards inside cubes for hanging tools. Use color-coded bins or liners for quick sorting. These personal touches make your modular system both functional and inspiring.
Flexibility in storage means you’re more likely to keep your space organized long-term. It encourages experimenting with new supplies and projects because your storage adapts to your evolving needs. A well-organized, customizable setup boosts your confidence and creative flow. Ready to build your perfect craft cube system?
13. Slip-On Vinyl Roll Dispenser Stand for Easy Access
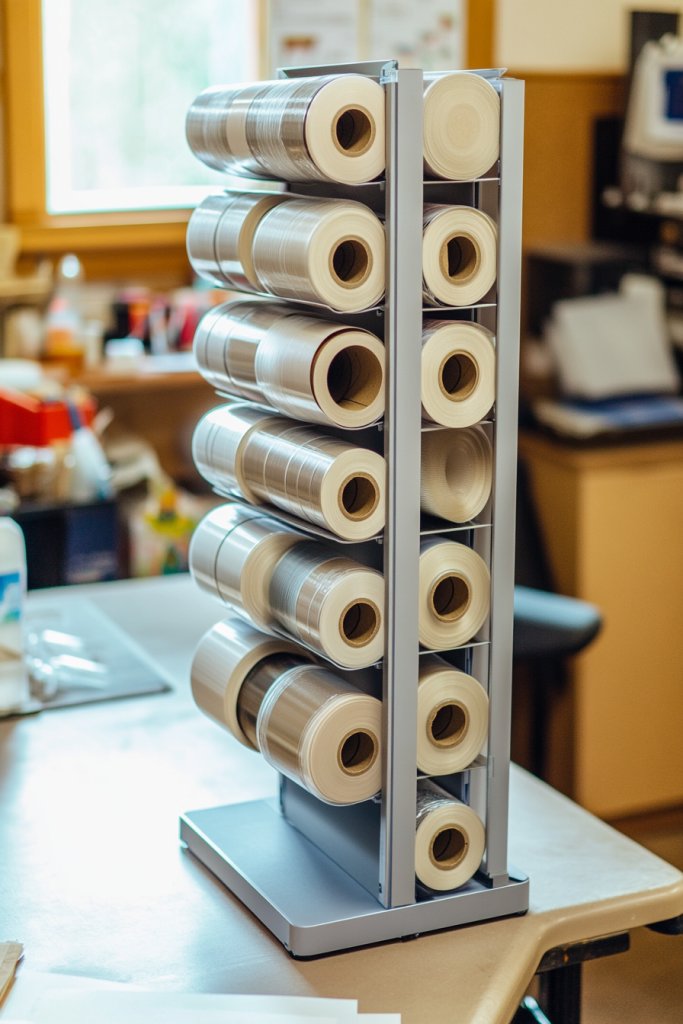
Getting frustrated with vinyl rolls unwinding or constantly fighting to pull out just the right length? Vinyl rolls can be a pain when they slip or roll away, wasting your time and causing messes. You need a simple, functional dispenser that keeps everything neat and ready to go. Slip-on vinyl roll dispensers are the answer.
Imagine a sturdy stand or holder where vinyl rolls slide on and off smoothly. The dispenser keeps rolls upright and organized, preventing unwinding or tangling. When you need a new piece, just slide the roll onto the stand or off it—no fuss, no mess. The sleek design fits seamlessly into your workspace, making your materials easily accessible while keeping your area tidy. It’s like a valet for your vinyl.
Choose a dispenser in metal, wood, or plastic depending on your decor style. Customize the size to accommodate different roll diameters or widths. For a creative touch, paint or decorate the stand to match your craft room theme. Use multiple stands for different colors or finishes, or combine with storage bins for complementary organization. Adjust height and spacing for maximum convenience.
Select a durable stand that supports the weight of your rolls and fits your space. Slide your vinyl rolls onto the dispenser, ensuring they rotate freely. Place the stand near your cutting station to streamline your workflow. Use labels or color-coding to organize by color or material. Regularly check for wear, and clean the stand to prevent dust or residue build-up. Refill as needed, and keep your workspace efficient.
Decorate the stand with paint, decals, or washi tape for a custom look. Add labels or tags to identify different vinyl types or colors. Incorporate small hooks or clips for tools or squeegees. Pair the dispenser with a small container for scraps or excess vinyl pieces. These small details keep your station both functional and stylish.
A dedicated vinyl dispenser keeps your materials organized and accessible, which boosts your confidence during projects. It reduces clutter and frustration, allowing you to focus on creating. When your workspace flows smoothly, inspiration comes naturally. Ready to slide your way to a more organized craft station?
14. Repurposed Vintage Suitcases or Crates as Chic Storage Units
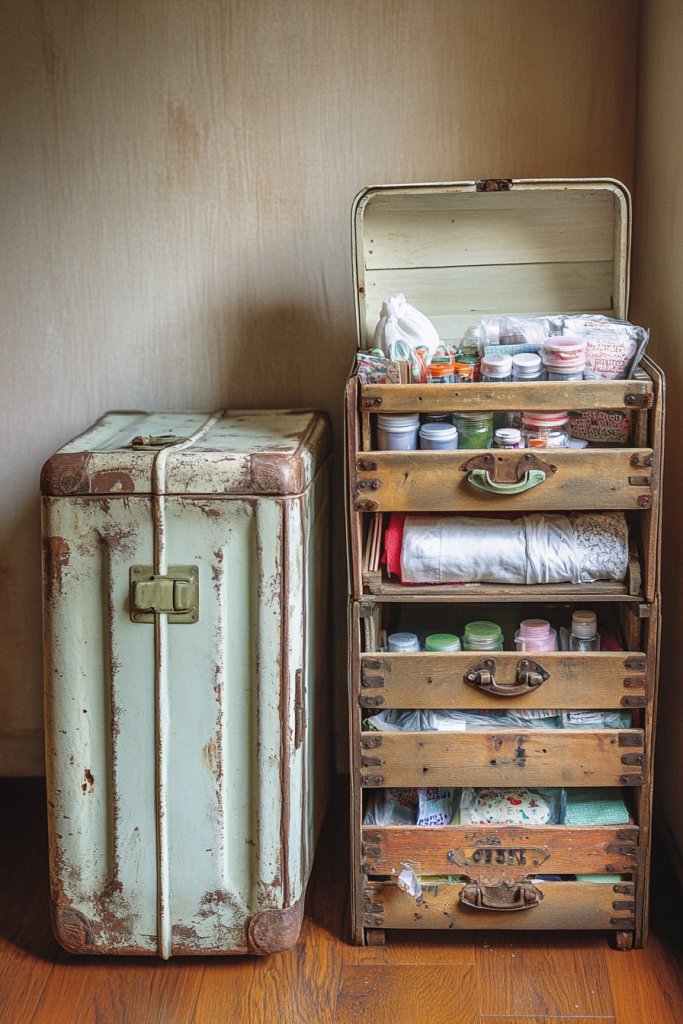
Looking for storage that’s functional but also adds character to your craft space? Boring plastic bins and plain shelves can dull your creative vibe. Vintage suitcases and crates offer a charming alternative that combines storage with style. Plus, they’re a fun way to recycle and add a nostalgic touch.
Picture a stack of vintage suitcases in different sizes, lined up on a shelf or used as a side table. Open one to reveal organized compartments for tools, embellishments, or papers. The distressed leather, faded fabric, or rustic wood brings a cozy, eclectic feel to your workspace. Small vintage crates can serve as drawers or display stands, filled with supplies or finished projects. The mix of textures and history creates a warm, inviting atmosphere.
Choose suitcases in neutral tones for a rustic look or painted in bold colors for a modern twist. Stack them for vertical storage or place them side by side for a layered display. Use vintage crates as open storage or as decorative containers on shelves. Incorporate labels or tags to keep items organized inside or outside the suitcases. Mix and match styles for a personalized, curated look.
Securely stack or arrange suitcases on a sturdy surface or shelf. Use small containers inside for tiny supplies or add dividers for better organization. When using crates, line them with fabric or paper for a polished look. Store frequently used tools in open suitcases or crates for quick access. Periodically clean and inspect for wear or damage, replacing or repairing as needed. Combine with modern storage pieces for a balanced aesthetic.
Decorate suitcases with stencils, stickers, or fabric for a unique look. Add decorative hardware or vintage tags for extra flair. Use labels on the outside or inside to identify contents. Incorporate small fairy lights or fabric accents to enhance visual appeal. These touches turn functional storage into a statement piece in your craft room.
Using vintage pieces adds character and warmth to your workspace, inspiring a cozy, creative environment. Recycling old suitcases and crates makes your space feel personal and eco-friendly. It encourages you to craft more often in a space that feels inviting and styled with personality. Ready to vintage-up your storage?
15. Overhead Hanging Storage for Frequently Used Tools
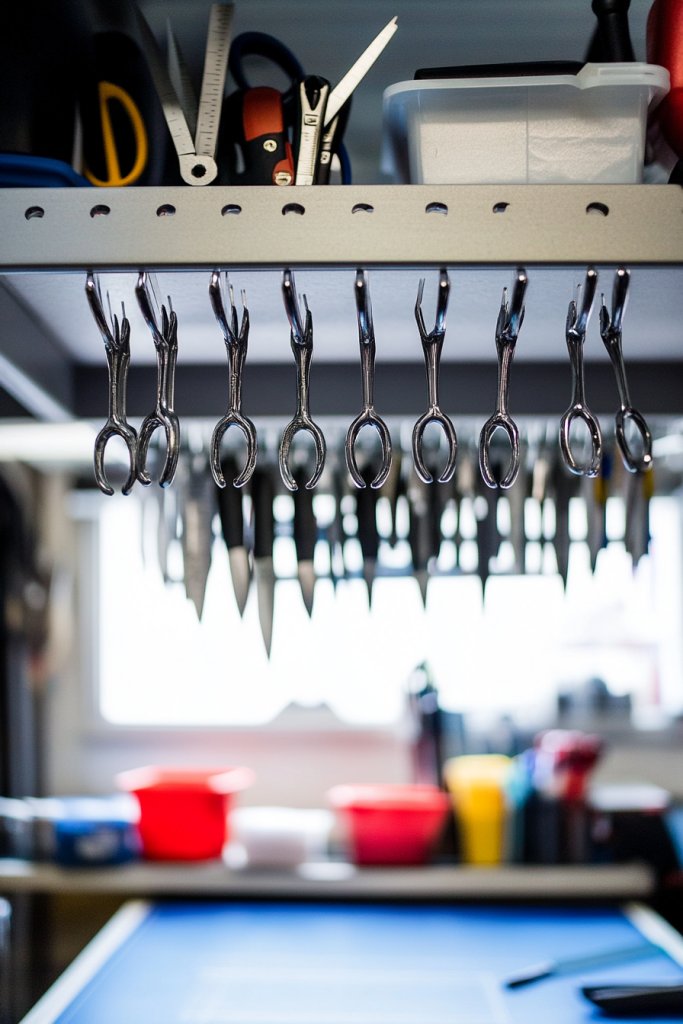
Constantly reaching for scissors, rulers, or craft knives can interrupt your flow and create clutter. Keeping essential tools within easy reach while freeing up your workspace is key. Overhead hanging storage takes advantage of unused ceiling or wall space, making your tools accessible and your surface clear. Sounds like a win-win, right?
Envision ceiling-mounted hooks or racks holding a variety of frequently used tools. Rulers hang neatly from clips, scissors are secured with magnetic strips or hooks, and craft knives rest in dedicated holders. The setup keeps your tools visible and accessible without cluttering your desk. When you need a tool, you simply reach up—no digging, no fuss. The suspended tools add a functional, industrial aesthetic to your craft room.
Use metal or wooden hooks depending on your decor style. Arrange tools in order of frequency or size for maximum convenience. For a decorative touch, add colorful or patterned ribbons or tapes to the hooks. Install ceiling-mounted racks or wall-mounted arms that extend over your workspace for easier access. For small spaces, opt for compact, wall-mounted versions that don’t hang too low.
Securely attach hooks or racks to the ceiling joists or wall studs using appropriate hardware. Arrange your tools on the rack, grouping similar items—scissors, rulers, spatulas—by type or height. Use magnetic strips for metal tools, or hang small baskets for miscellaneous items. Make sure everything is within reach but not obstructing your workspace. Regularly check the mounting for stability and safety.
Decorate hooks with colorful ribbons or paint for a personalized look. Add small labels or tags to identify tool categories. Incorporate decorative elements like fabric covers or painted accents around the mounting points. Use a combination of hooks and shelves to maximize vertical storage. These details make your overhead storage both functional and stylish.
Having your tools organized overhead saves space and keeps your workspace sleek. With everything in sight, you’ll spend less time searching and more time creating. It’s a simple upgrade that boosts efficiency and confidence. Ready to hang your tools like a pro?
16. Color-Coordinated Storage System for Inspiring Creativity
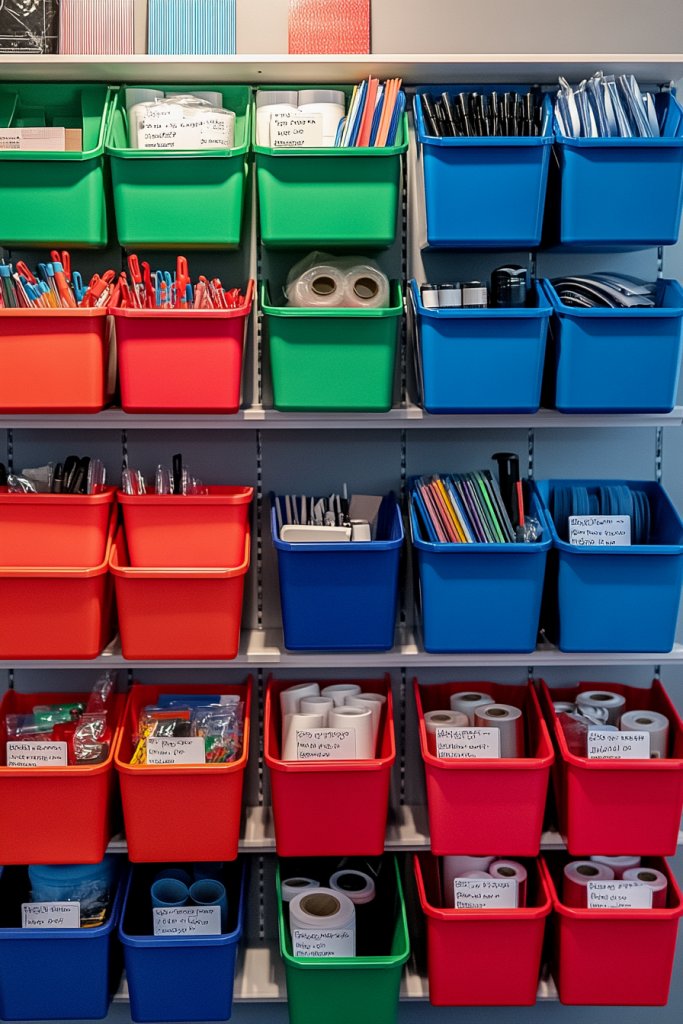
Do you find yourself overwhelmed by a rainbow of supplies scattered all over? Lack of organization not only wastes time but also stifles your creative flow. A color-coordinated storage system helps you stay inspired and makes selecting materials almost fun. It’s a simple trick that transforms chaos into a vibrant, motivating environment.
Picture clear containers, bins, or drawers arranged by color or material. Reds and pinks in one section, blues and greens in another—everything is ordered visually. When you need a specific color or type, you see exactly where it is instantly. The uniformity of the system creates a tidy, energetic workspace that sparks creativity. It’s like your supplies are part of a colorful symphony ready for your next masterpiece.
Use matching containers or bins in different shades to create a gradient or rainbow effect. Incorporate labels with color-coded tags for quick identification. Adapt the system seasonally or by project—switch out colors or reorganize for new themes. For small spaces, stack similar colors in vertical towers; for larger areas, create dedicated sections or wall-mounted organizers. Personalize with decorative labels or painted accents for extra flair.
Sort your supplies by color or material, then assign each group a dedicated container. Use clear, stackable bins, drawers, or baskets for maximum visibility. Label each container with a matching color tag or printed label. Arrange the containers on shelves, inside drawers, or on carts for easy access. Regularly update and reorganize to keep the system fresh and inspiring. Maintain consistency for best results.
Decorate labels with colorful markers or stickers matching each color group. Incorporate themed stickers or icons for additional fun. Use ribbons or washi tape to add decorative borders to containers. Set up a color palette chart nearby as a visual reminder or mood board. These small details turn your storage into an inspiring, personalized workspace.
A color-coordinated system keeps your workspace lively and organized, encouraging experimentation. When everything is visually appealing, you’re more motivated to start new projects. The organized chaos of color ignites your creativity and boosts confidence. Ready to organize your supplies by hue?
17. Personalized Nameplate and Decorative Labels for a Cohesive Look
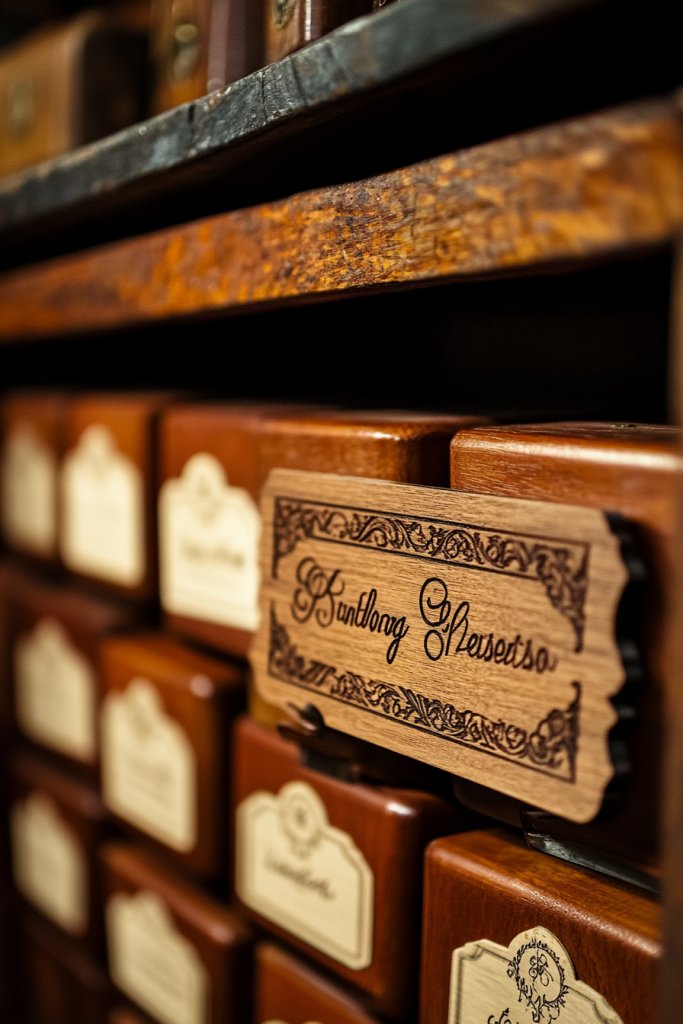
Do you want your craft space to feel truly yours and more inviting? Generic storage labels and plain nameplates don’t quite cut it when it comes to creating a cohesive, inspiring environment. Personalized nameplates and decorative labels add that special touch, making your workspace unique and motivating.
Picture custom-made nameplates on drawers and bins, crafted from wood, acrylic, or cork, with your name or fun titles like ‘Vinyl Vault’ or ‘Tool Tackle Box.’ Decorative labels feature hand-drawn doodles, stylish fonts, or themed graphics that match your aesthetic. These labels are clear, attractive, and easy to read, tying your entire space together visually. They turn functional storage into art, making your room feel curated and personal.
Use a variety of materials—wood, metal, chalkboard, or printable adhesive paper—to create labels that match your decor style. Hand-lettered or printed labels add a personal touch, while decorative corner accents or icons elevate their look. Experiment with calligraphy, doodles, or themed designs for holidays or seasons. You can also create custom name plaques for your craft station or storage units.
Design your labels using graphic software or hand-draw them for a personal touch. Print or cut stickers and adhere them to your storage units. For larger plaques, use a wood or acrylic base, then paint or etch your titles. Attach the labels with a strong adhesive or mounting hardware. Ensure the labels are weatherproof or wipeable for durability. Regularly update or replace labels as your storage evolves.
Add embellishments like washi tape borders, decorative corners, or small charms. Use color themes or fonts that match your overall decor. Incorporate icons or images that reflect the contents—scissors, vinyl rolls, or pens. Create a cohesive look by using similar styles and materials across all labels. These personalized touches turn your craft space into a reflection of your personality.
A well-labeled, personalized workspace not only looks professional but also boosts your confidence. It encourages you to keep everything organized and inspires pride in your craft environment. When you love your space, you’re more motivated to create and share your projects. Ready to add your personal touch?
Conclusion
With a diverse array of Cricut workspace ideas, there’s no limit to how you can improve your crafting environment. Whether you prefer minimalist setups or colorful, personalized stations, these ideas will help you create an inspiring and efficient space. Don’t hesitate to try out different configurations—your perfect crafting sanctuary is just an idea away. Get ready to craft with joy and confidence!
Leave a Reply